fbpx

Blog

The Five Best Appliances for Your Newly Renovated Kitchen

The Five Best Appliances for Your Newly Renovated Kitchen

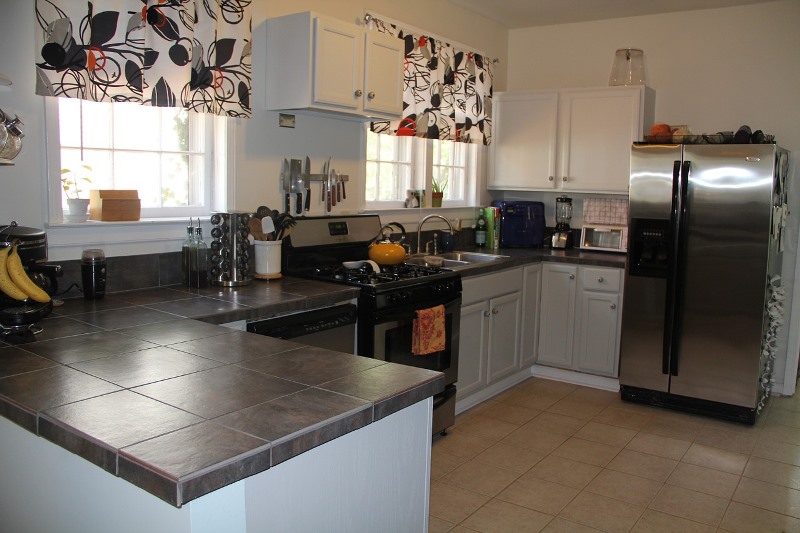
For many people, the kitchen is right at the heart of the home. It’s where we not only cook, but often where we share meals together around the table, where we bake sweet treats with the children and where we relax with a cup of coffee after a hard day at work.

It’s no surprise that renovating the kitchen can add value to your home and also add value to your daily lives, as one of your most used rooms is now even better.

What could improve it even more than your renovation? How about some new appliances? These five appliances will look great and they are also practical, so you don’t even need to feel guilty about splurging on them!

1. Steamer

A steamer is a fast and efficient way to cook vegetables, most starches, chicken and fish. Not only does the food taste fantastic when it has been steamed, but it also withholds so many more nutrients than food boiled or roasted does.

It’s so convenient to be able to add your protein, starch and sides to the same cooking appliance and it will save you on the dreaded washing up because you won’t have a lot of pans to wash.

2. Coffee Machine

A coffee machine is a great way to enjoy your favourite barista style coffee at home. The smell of freshly brewing coffee will make your kitchen seem even more homely and comforting, and you will save a lot of money by not having to visit your favourite coffee shop for good coffee. It’s so convenient to just be able to go to the kitchen and pour yourself a cup.

You can choose to grind your own beans for a really authentic experience, or for a simpler way, choose a pod style coffee maker.

3. A George Foreman Grill

A George Foreman Grill is another really quick and convenient way to cook food, especially meat. It gives your meat that lovely smoky, almost barbecued taste.

It also works to draw the fat out of your meat and make it more friendly on your health and waistline. Rather than the fat running out and then being reabsorbed into the meat, with a George Foreman Grill, the fat runs away and is collected in a tray for disposal.

4. A Nutribullet Juicer

A Nutribullet juicer is an essential for any health conscious family. The perfect way to make delicious, nutritious juice, the Nutribullet can break down even the toughest of fruits and vegetables to make you a great tasting and healthy juice.

This is a particularly good appliance for anyone with children who don’t want to eat their five a day – most children will drink the juice because of its sweet taste and appealing colour.

And let’s be honest – it looks pretty snazzy on your counter top too!

5. Electric Spiralizer

No modern kitchen is complete without a spiralizer. A spiralizer is used to cut vegetables into pasta like ribbons that can then be used to replace spaghetti or tagliatelli pasta in your favourite Bolognese and carbonara dishes.

The perfect solution to making a family favourite quicker and healthier. As one of the most recent trends in healthy eating, many modern recipes call for spiralized vegetables so don’t worry that you won’t know what to do with it!

That’s it – our top five recommendations for five appliances that every family needs to have in their newly renovated kitchen. All of the appliances we’ve chosen will save you time. Some will also save you money and effort too. And they will even help to ensure that you and your family are eating and drinking more healthily too!


4 Simple Ways Homeowners Can Increase Their Home’s Value

4 Simple Ways Homeowners Can Increase Their Home's Value

Homes tend to appreciate over time, as long as you take care of them and keep them in good shape. However, there are some things you can do to your home that can increase their value, and you don’t necessarily have to spend a ton of money on them. Here are four simple ways homeowners can increase their home’s value.

Do a Kitchen or Bath Update

Kitchens and bathrooms are two of the most-used rooms in a house, and they also are the rooms that buyers focus on the most. That’s why it’s important to make periodic improvements to these rooms. You don’t have to break the bank and spend thousands and thousands of dollars. In fact, minor remodels are the ones that tend to add the most value. Some simple things you can do include replacing appliances, replacing a vanity, switching out water and light fixtures and updating your tile and counter tops.

Concentrate on the Exterior

Most people focus on making interior improvements when remodeling their home, but you can actually get the most bang for your buck focusing on the outside. Many of the improvements that have the most return on investment are exterior ones. These include replacing your entry door or garage door, adding or repairing a deck, and sprucing up your landscaping. All of these improvements will be investments that pay back more than they cost to complete, when done correctly.

Structural Improvements

Doing things to the bones of your house aren’t cheap but they are necessary. Take your roof, for example. People do not want to buy a roof that leaks or has broken shingles. Some companies, such as Select Exteriors, know that if this is the case with your roof, you might consider investing to improve it. The same goes for your home’s foundation. Structural improvements can be expensive, but not doing them when necessary can greatly reduce the value of your home.

Make Energy Improvements

Many of today’s home buyers want an energy-efficient home, so you can boost your home’s value by making some simple energy changes. This can include installing a programmable thermostat and changing to compact fluorescent lights. If you want to make a bigger investment, replacing windows or installing solar panels can be good choices.

Making these and other improvements to your home can greatly increase your home’s value. Some improvements require a big investment, but others do not. Either way, you are likely to recoup most of what you spend on these improvements.

Moisture Mishaps: 5 Ways to Prevent Wood Rot in Your Home

Moisture Mishaps: 5 Ways to Prevent Wood Rot in Your Home

Excess moisture in your home may be more of a threat than you realize. It soaks easily into wood, and can be the start of wood rot. Wood rot in your home’s frame can lead to structural weakness and eventual collapse. Moist, rotten wood can also draw termites or form a breeding ground for mold and fungus, which pose health hazards. But wood can last a lifetime if it’s kept dry. Here are some ways to prevent wood rot on your next repair or project.

1. Apply Primer

It’s always a good idea to protect exterior-facing wood against moisture by adding primer. Use oil-based primers made for exterior surfaces, as they tend to penetrate better and last much longer than water or even latex primers. Be sure to paint both sides and edges, including the ends. If you’re trying to cover up existing water damage, apply a couple of coats of alkyd primer instead.

2. Gutter Maintenance

For critical points like eaves and gutter installation, use two coats of primer. Gutters can trap water as debris builds up and pose a greater risk; if the wood that supports them rots away, gutters can pull loose, and you’ll end paying for new gutters on top of replacing the wood. Make sure to keep them clear of things like leaves. Some gutters have guards on them that let water filter through to be redirected while keeping other debris separate and easier to remove.

3. Angled Surfaces

Whether you’re building or repairing eaves, roofing, hand rails, decks, or any external structure, try to slope them slightly away from the central structure so that they tend to shed water. Water can be easily trapped and pooled or redirected by flat surfaces, raised edges, crannies, or rotting leaves. Be sure you consider how to best avoid this.

4. Use Plugs

Every screw or nail you use could be allowing moisture into the interior wood, no matter how tight it seems to be. Whenever you’re doing exterior work, try to use nails or screws with galvanized or stainless seals that form a water-tight seal around the head. Alternatively, you could slightly countersink them and fill the hole with all-weather caulk, sealants, or wood glue before painting or covering. Caulk should also be used on any cracks and holes that have developed around doors, windows, vents, and so forth to avoid seepage of water.

5. Rot-Resistant Woods

Some natural woods are actually very good at shedding water and resisting rot. These include woods like cedar, cypress, and teak that have their own natural oils. However, they can be needlessly expensive for ordinary repairs or interior framework. Generally, you’re safe using cheaper modern alternatives like chemical or pressure-treated wood.

When it comes to preventing rot and water damage, taking the easiest or cheapest way out will likely lead to expensive repairs later. Use these tips and you’ll have rot-resistant wood and sturdy construction for many years to come. Wood rot can cause terrible structural damage later on, so it’s always better to prevent it as much as possible.

Decorate Your Home with Double Glazed Sliding Doors

Sliding doors is a concept that was popular since the time when it was introduced in to the market. If the sliding doors are glazed over a single side, then they cannot perform all the necessities that are required for a better insulated home. Using double glazed sliding doors is the solution and is also the option which offers you more than just good insulation. When you have a single glazed door newly installed, and you are skeptical about changing the whole thing again, then you must note the fact that a double-glazed sliding door can be easily upgraded from a single glazed sliding door. Now you can install some large sliding doors between your drawing rooms and the attached garden area. It will improve the overall decoration of your house, and you can also open this door for parties in your garden area.

sliding doors

Advantages of a Double-Glazed Sliding Door

If you are considering changing your doors to double glazed sliding doors but you are not sure about the other benefits of it, then here are the benefits and advantages of a double-glazed sliding door:

  • Improved Insulation– the biggest and the most prominent advantage of double glazed sliding doors is its ability to increase the insulation of the room. Most of the doors that are single glazed allow the outside air to pass in and out of the room making it difficult for your HVAC systems to run efficiently, i.e. during winter days the warm air inside the room goes outside and the cold air comes in and vice versa for summers. When you are using a double-glazed sliding door, then it effectively controls the insulation of the room and does not allow the passing of air in and out of the house. This makes it easier for the HVAC systems to function efficiently.
  • Helps in Saving Energy – if you have an air passage through your doors then even the best HVAC can fail to perform efficiently. But when you are using double glazed sliding doors then the air passage is controlled and helps in the better functioning of your HVAC systems. This in turn will run less and save energy.
  • Noise Proof– if your house is beside a busy road or your house is beside a noisy neighbour, a double-glazed sliding door can keep you away from such noisy disturbances. If you wish to have a calm and quiet environment inside your house, then you can install these sliding doors in your house.
  • They Can be Easily Recycled– one of the best things about these doors is the fact that they can be very easily recycled. Therefore, whether you plan for a remodel or any other thing that requires the removal of the doors, you can easily do it. Each of its part is recyclable and hence you can be sure of using something that will not harm the future generations.

Double-Glazed Sliding Doors

Why Would You Choose Double-Glazed Sliding Doors?

When you renovate your house, you can install some double-glazed sliding doors in your house because these doors can reduce the noise pollution and save your electric consumption bill, protect your home from dust particles, and these doors can also prevent UV rays during the daytime. These doors can also block the sun’s heat and prevent any damage to your furniture. Apart from that, these doors come with a double locking system that will secure your home and these sliding doors can provide you the utmost privacy level.

Hiring A Window & Door Contractor

There are plenty of repairs and upgrades around the home that you can do yourself with a little practice and the right tools. Installing new windows or doors, however, is something that’s outside most do-it-yourselfers’ comfort zones. Hiring a professional contractor to handle the installation of new windows and doors in your home is essential for ensuring that the job is done properly, and your new windows and doors will fit well enough to prevent drafts and last for a long time. However, hiring the right contractor for the job can be a job in and of itself. Homeowners need to be aware of the signs that the contractors they have chosen are the right ones for their project.

Repairing or replacing doors and windows can be expensive, but not as expensive as it can be to live with the consequences of substandard work from an unqualified contractor. Improperly installed windows and doors can hurt your home’s energy efficiency, lead to costly repairs, and negatively impact the look and resale value of your home. Choosing the right contractor is more than a matter of choosing the lowest bid. Homeowners should consider numerous factors before making the decision to hire a contractor. If you’re considering hiring a professional contractor to install or repair windows or doors in your home, consult the following checklist to make sure you choose wisely and do your due diligence before and after the project. Doing so can ensure that your new windows and doors will last as long as you want them to and that your contractor won’t take advantage of you.

Checklist For Hiring A Window & Door Contractor created by Midwest Window & Door

Water Worries: How to Quickly Fix Leaky Pipes in Your Bathroom or Kitchen

Water Worries: How to Quickly Fix Leaky Pipes in Your Bathroom or Kitchen

If you notice that a faucet is leaking in the kitchen or bathroom, it is imperative that you take care of it as soon as possible. If allowed to linger, it could cause water damage throughout the house in addition to the water making that annoying sound as it falls from the pipe to the floor. What can you do to fix this issues in an affordable and timely manner?

Tighten Them First

It is possible that your pipes just need to be tightened with a wrench. In a matter of seconds, you could have the issue resolved permanently with the tools that you have in your home. If you aren’t sure how to tighten a pipe, you can watch a tutorial or have a friend or family member help you. Remember, you want to go to the right to tighten and to the left to loosen a pipe or any other object.

The Pipe May Need To Be Replaced

There may be a crack or fracture in the pipe that may be allowing water to leak out of it. Some companies, such as Clearwater Plumbing, realize that if that is the case, you need to replace the section where the leak is. Even if the problem is a minor one at the moment, it is important that you take care of it before winter as the cold temperatures could cause small cracks to become complete breaks in the pipe.

You May Be Able to Tape the Leak

The use of sealing tape may help stop a leak for a few hours or days. Ideally, you will then call a plumber to take care of the issue as the tape is no substitute for repairing or replacing a leaking pipe.

Check the Temperature in the Room

In some cases, your pipes may not be leaking at all. They could just be collecting condensation because the room is too hot or humid. To fix the issue, you may just need to find ways to improve air circulation as that will help to get rid of excess moisture in an easy and efficient way.

If the pipes in your bathroom or kitchen are leaking, there is probably a simple fix to resolve the issue. However, don’t hesitate to call a plumber if you aren’t sure what the problem is or if you have tried other remedies that haven’t worked. Regardless of how minor the problem may appear, it could lead to major issues in the future if not addressed quickly.

Plumbing Blunders: What to Do When Your Home Has a Water Leak

Plumbing Blunders What to Do When Your Home Has a Water Leak

Almost every person has dealt with a water leak in their home at some point. A high number of homes and apartments that have suffered from water damage in the past are mostly due to leakage in their plumbing systems. Whenever you discover that you have a water leak at home, you must call a plumber. However, there are a number of things that you can do before the plumbers arrive to prevent any further damage. Here are some important tips on what to do when your home has a water leak.

Shutting Off the Water

As a homeowner it might be best to call a professional such as those from The Clean Plumbers to help with your water pipes. Immediately you discover that a water leak at home, you must act quickly. You should shut off the water going into the appliance or room where you have detected the leak. If there are any electrical appliances connected near the water leak, switch them off and unplug them immediately. You may consider shutting off your circuit breaker depending on the magnitude of the water leak. If the water leak does not subside, you should turn off your chief water valve located in the garage, yard or basement.

Eliminating Water Pressure in Your Pipes

In order to reduce the amount of water leaking in your home, turn on both the hot and cold levers of the lowest spout inside your home either on the first floor or basement. The same should be done on the faucets found in the uppermost floor. This allows air to enter into the pipes and allows them to drain their water via the lever (mostly yellow in color) opened on the house-side water meter. The water will drip for about 10-15 minutes and then slow down if it was leaking from your finished ceiling. If the dripping persists, shut off the water meter using the street-side lever.

Wrapping the Leaking Pipe

As the water pressure in the pipes will have been eliminated, you can use a tape product to wrap around the leaking pipe to act as a temporary fix as you wait for professional services. If the tape is wrapped correctly, it can stop the leakage for a while before the plumbing repairs are done. A rag can be used to wrap the pipes to stop water from being sprayed all over and instead direct it to a bucket or drain.

No homeowner wishes to contend with a water leak in their home. However, in the event that it happens, all the above steps will be useful in controlling a water leak before professional plumbers arrive. They are preventive measures against water damage in your home.


A Fixer Upper: 5 Tips for Your First Home Renovation

A Fixer Upper, 5 Tips for Your First Home Renovation

You just bought your first home, and it needs a little work. One thing you should accept from the get-go is that it is going to take some time to complete this project. This does not mean it is impossible to speed up the process, and the following five tips will help you do just that.

Get Permits
One of the most important things to do is to apply for the right permits. You can hire a contractor to help you or go to the county or city office to see what permits you need.

Major Issues
You have deal with the issues that make it hard for you to live in the home. Check if your electrical system needs to be taken care of or check if the plumbing needs to be dealt with. It might even be a good idea to live in your home for a month to see what is absolutely necessary before making cosmetic upgrades.

Damage Repairs
Any damage the house has sustained should be dealt with. This could be flood damage or fire damage, both of which threaten the stability of your home. It would be wise to talk to a professional restoration service such as NiteOwl Restoration, or someone similar that you trust and recognize in your area, because these issues usually cannot be fixed without expert help.

DIY Work
Fixer uppers are bound to have major issues, but they may also be riddled with small ones, which means you can do some things before you start on major issues. Dealing with smaller problems on your own like painting or sprucing up the curb should speed up the process a bit.

Write a List
It might seem silly, but this is also a good time to write up a list of issues you want addressed. Cross out the issues you can deal with on your own, and leave the rest. Be honest with yourself regarding the things you can live with like the tile in your kitchen should you notice it gives your home a vintage touch. Prioritize this list, and tackle each issue slowly because doing too much at once puts you at risk of not finishing anything if money gets tight for some reason.

These are just some tips that could help renovate a fixer upper a little quicker. This does not mean you should expect perfection, but it should move things along smoothly.

How to Update Antique Furniture Pieces & Preserve Their Rustic Flair

How to Update Antique Furniture Pieces and Preserve Their Rustic Flair

If you own a piece of rustic antique furniture, you might be faced with a dilemma as it ages. The piece will likely need repair as it gets older, but you may be hesitant to perform needed repairs for fear of ruining its authentic charm. Luckily, there are several ways you can make small repairs without making a piece look too modern. Here are four easy ways to update antique furniture without ruining its rustic charm.

Refinish the Piece

As a piece of furniture is used decade after decade, it will often become dirty and faded. If you want to restore it to some of its former glory, you can refinish it by sanding it down slightly and using a stain to match its original color. Be sure, however, to select the stain you’re going to use on it in advance so that you can compare it to the piece’s original coloration. Generally, with older furniture, you’ll be looking for a darker-colored stain.

Polish Hardware

If your piece of antique furniture is a desk or a cabinet with door and drawers, it will have handle hardware on it. Generally, this hardware will be made out of brass or some other shiny metal. If you want to make the piece of furniture look a little better, you can simply polish this hardware using a light metal polish. Doing so will remove any fading that has occurred over the years and make your furniture’s hardware stand out again.

Add Period-Authentic Nails for Support

Some pieces of furniture will begin to fall apart over time. If this is the problem you’re having, don’t give up hope just yet. You can get period-authentic nails, such as those from The Rustic Express that will lend structural support to your piece without looking out of place. Be sure to match the nails you use to the ones that were used to put the piece of furniture together originally.

Replace Rotten Wood

Once in a while, you may run across a piece of rustic furniture that has been left in poor conditions, such as in a barn, for far too many years. If a piece of wood is rotten, you may be able to replace it. Be aware, however, that you’ll need to find a proper cut of aged wood that matches your furniture. Look through salvage websites, as these will often have older pieces of reclaimed wood that you can use to repair your piece of antique furniture. Whatever you do, don’t use a piece of modern wood, as it will stick out like a sore thumb on an older piece.

Upgrading older furniture is an art, but if you’re patient and willing to put in a little work, you can do it. Make sure you are paying close attention to detail and matching up anything new you do to the original look and feel of your antique furniture piece.

Problems Caused To Homeowners By Storm Water Drain

Your backyard is flooded and the reason for this is that the stormwater drain is blocked and not letting the water through.
Storm Water Drain

How messy does that sound? Especially, when it’s the rainy season and the stormwater drain is still blocked, you can imagine the situation you will be in. So, before the monsoons come by, and the nightmare comes true, it’s time to take action and get the drains fixed. You can try fixing it DIY style. However, if all self-methods fail then, you must call in the help of a professional plumber to help you get things done smoothly and fast.

Here, are some tips for you to try to unblock your stormwater drain. Try them and get rid of the hassle as soon as you can.

Tips to unblock the stormwater drain

Storm Water-Drain

  • Storm water drains are pipes that connect pipes from the roof to sumps in the garden, which then discharge water into the water table or curb in the street. They most commonly block due to tree roots, dirt, and silt lying in the pipes. It’s pretty hard to clear the pipes by your own. So, there is a need to call in a professional to do the work.
  • Get a full inspection of the stormwater drain to understand the real cause of the blockage. The gravity of the blockage will determine the repair it requires. Stormwater drains usually, block due to fallen leaves, debris, or grime build-up or because of a collapsed pipe. If the stormwater pipe is cracked, you can restructure it by application of plaster.
  • When you call in the plumbers, ensure that you instruct them to bring along a high water pressure drainage machine, as they are the best drain cleaners and absolutely perfect for this kind of situation. High water pressure drainage machines utilize high-pressure water to remove any dirt, leaves, and silt caused in the storm water pipes. Any other conventional methods aren’t as suitable.
  • You can also use hand rods to remove any obstacle that is causing the stormwater drain from being blocked. Hand rods can help to drive any dirt particles hooked to the lining of the pipe. A high-stress water jitter is especially used for pressurized cleaning of any debris that would not budge otherwise.
  • Another way to clean the pipe is by using the electric auger, which chews through any kind of dirt present inside a pipe blocking its way. The strong blades of the electric auger propel into the blocked pipe taking away any obstruction present.
  • Get your stormwater drain regularly check and maintain it. A little precaution does not hurt anyone. Keeping a regular eye out for problems can keep you worry-free of the problems coming to you unannounced. Keep in touch with your local plumber and call in every six months to check the functions of your drain. A little bit of cleaning and repairing every now and then will save you a lot of money in the long run.

Conclusion

Clear any type of blockage in your stormwater pipe at the earliest possible way to prevent damage to your property. Unlike clearing a block in your regular drain, unblocking stormwater pipes is not easy. You must understand this gravity of the situation before you move forward to make any effort to clear the block yourself. Your drain cleaners are not going to work here and you will need proper tools and some amount of technical know-how for clearing the block or blocks in the stormwater pipes. If you are unsure, please call a plumber and save yourself from further damages.


Copyright © 2024 | Bruzzese Home Improvements | All Right Reserved | Web Design & Development by QualityMust