fbpx ...

Blog

The Home: How to Protect your Biggest Investment of your Lifetime

The Home How to Protect your Biggest Investment of your Lifetime

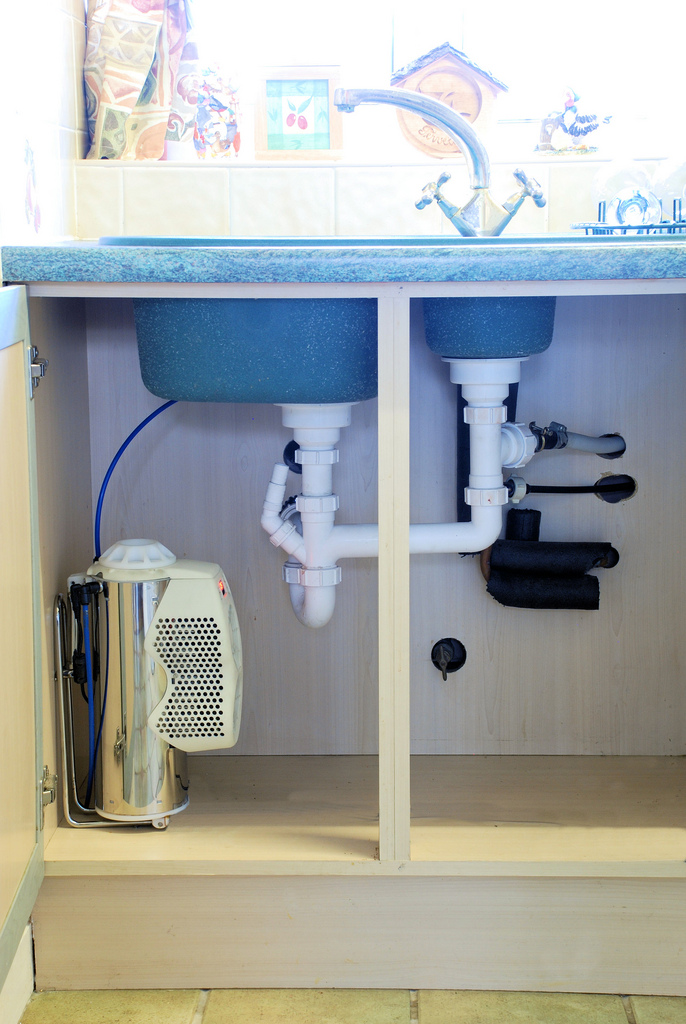
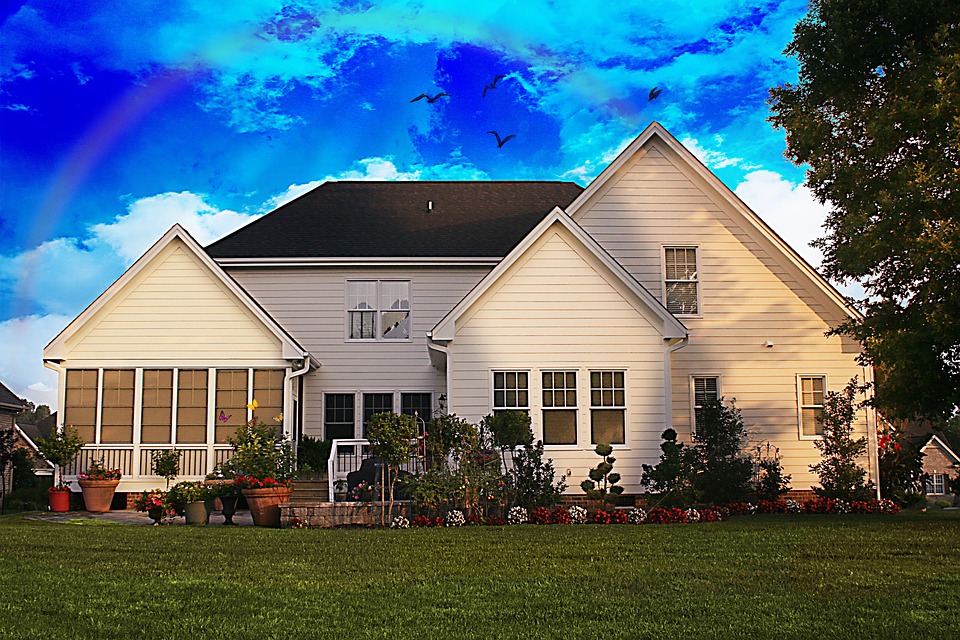
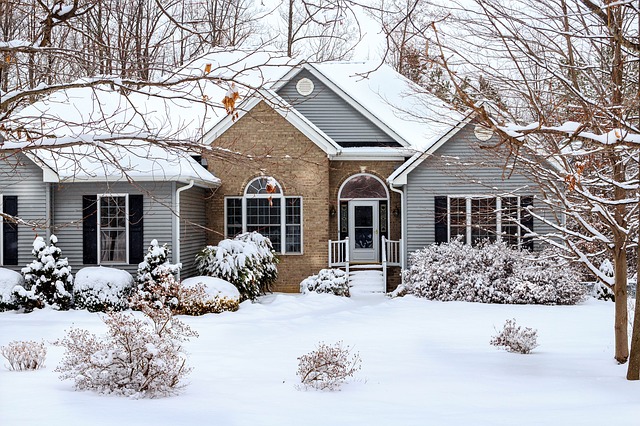
Your house is valuable to you, both in terms of the finances and your emotional connection to it. For that reason, you should do everything you can to protect your home. There are several steps you can take that will reduce or eliminate the impact of disasters like storms and fires, and these also tend to reduce the cost of home insurance at the same time. So while it may take some time, the improvements will pay for themselves eventually based on the insurance savings. In this article, we will talk about a few of the most popular ways to protect your investment.

Impact-Resistant Roof
If you live in an area that experiences strong storm activity, then you should consider an impact-resistant roof. These roofs are especially hardened to resist the impact of flying objects that have been tossed up in the air by powerful winds. This is a major threat from hurricanes and big storms- the winds can pick up miscellaneous debris and hurl them with extreme force. If you do not have an impact-resistant roof, you risk having holes punched in the roof material or getting shingles torn off. There are also roofs that are especially resistant to fire.

Shatterproof Windows
Just as roofs are vulnerable to flying objects, windows can also be broken if storm-tossed debris flies into them. This is dangerous, because glass shards will get everywhere. Windows are also expensive to replace. If you purchase and install shatterproof or impact-resistant windows, however, then the chances of your window breaking when something slams into it are much smaller. Every state has a department of insurance that regulates these modifications. If you check with them first, you can get a set from a company like Lifetime Exteriors that conforms with their requirements so that you get a discount on your home insurance premium each month.

There are a few other examples of home modifications that protect your investment in the long run, but they all have the same general idea: prevent the most common forms of damage from affecting your home to the greatest extent possible. It does cost money to make these changes, but you can recoup some of the cost by calling up your insurance carrier and asking for discounts. They might want to verify the installation, but the savings can be quite significant when you add them up over time.


A Clean-Up Checklist: What to do after Renovation?

cleaning after the renovation

Whether you are doing some major renovation work in your home like tearing down a wall or something simple like upgrading your light fixtures, you are likely to make a mess that involves some plaster, paint and plenty of dust. We give you a checklist for cleaning after renovation so you can minimize the amount of time you have to spend in a messy home.

1.  Clean the walls first

The walls will have gathered up a lot of dust, and even though they will look the least dirty, you should start with the walls. The best way to do it is to dampen a towel with water and wrap it around a broom, securing it with wire or tape. Wipe the walls down, including the corners. If you have wallpaper covered walls, you can vacuum them with the brush attachment. You can even dry dust them, just like you would if your walls are newly painted.

2.  Clean the ceiling and light fixtures

We want the dust from the top layers of the room to fall down before we get to cleaning the floor, so the next step is cleaning the ceiling. You can apply the same technique as for the walls. However, you should be careful with ceiling fans and light fixtures. Make sure the lights are off, use a ladder or a chair and clean all the light fixtures carefully with a duster and a cloth.

3.  Clean the floor

If there is considerable mess on the floor, start with the broom to remove big pieces of plaster for example. You want to avoid using your steam vacuum cleaner for these as it might get damaged. You can use the vacuum cleaner after the broom, and finish the cleaning with a mop. Make sure you follow this order: broom – vacuum cleaner – mop.

Vacuum cleaner

4.  Clean other big surfaces

There will be a lot of dust on tops of cupboards, shelves, window ledges, doors and so on. You want to clean all of these with a duster and a wet cloth. While you are already at it, you might add wood polish to freshen them up.

5.  Clean other furniture

If you had a big renovation project, we hope you had all your furniture out of the way, or at least put away in one pile and covered with plastic or blankets. Either way, you will want to use the upholstery attachment to vacuum your upholstered furniture and accessories. Then wipe or wash all ornaments, decorations and smaller pieces.

6.  Repeat the floor cleaning

As experts at Sutherland Shire cleaning services say, you will be surprised at how much dust settles down in just a few days after renovation, so you are well advised to repeat the vacuuming and mopping of the floors at least one more time.

7.  Check the air filters

The air filters can spread more dust into your rooms if they are not clean, so you should check and replace them if needed.

It might take a few days up to a week for your home to be fresh and clean again, but keep checking back and cleaning top-down.


5 Warm, Cozy Home Tips for Those Cold Winter Months

winter

Whether you bundle up with a ton of blankets, or find yourself craving a hot drink, winter seems to make you cold no matter how high you set the thermostat. Now that winter is in full swing, you may be wondering how to keep your home cozy when it is so chilly outside. There are several ways to keep your home well insulated and trap the heat inside; you just need to learn a few tricks.

Invest in a Draft Stopper
Many homes seem to have a slight draft underneath the front or back door so investing in a draft stopper to seal the space between the door and the floor will help keep the cold air outside and the warm air inside. If you are unable to purchase one, it is easy to make your own by lining the area with an old towel or rug.

Caulk Windows
Applying caulk to the inside of your windows is an inexpensive and easy way to help keep the cold air out. Many people live in older homes that may not have well-insulated windows so applying caulk to the lining is a great alternative to investing a lot of money in new windows. Just go to your local home improvement store to find some and get tips on how to apply it.

Close your Curtains
Closing your curtains once it gets dark will insulate your house from any drafts that may still be coming through the cold glass of your windows. However, during the day when the sun is shining, leave the curtains open to allow sunlight to shine in and naturally warm the room.

Close off Unused Rooms
If you live alone or have rooms you don’t use very often, keep those doors and vents closed to avoid heating rooms you won’t be using. This will allow the heat to travel to the rooms you and your family frequent, keeping you warmer and your costs down.

Invest in a Programmable Thermostat
Purchasing a programmable thermostat can do wonders for your heating bills during the cold winter months. Applying settings that will keep the heat lower during the day when the sun is shining, and at night when you are sleeping will save a lot of money, and keep the house on a stable heating cycle at all times. While investing in the thermostat, it is also a good idea to get your furnace checked out. HomeSmart from Xcel Energy recommends you change your filter at least annually and get your furnace serviced to stay safe all year long.

It doesn’t take much to make a world of difference in keeping your home warm and cozy this winter. By following a few helpful tips, you will find your home stays warmer and your bills get lower.

Choosing the Right Water Filter for Your Home

choosing the right water filter for your home

How can home water filtering technologies be of value to us today? Tap water has become contaminated with various chemical elements such as radon, arsenic, and nitrites. Organic elements such as Echerichia Coli bacteria has also become increasingly common. On the other hand, there is bottled water as an alternative which is advertised as “safe” and “natural”, but is less regulated than the tap water supply. By using home water filters, you can filter out and remove sediments and chemicals from tap water, and make it healthy to consume.

Initial Considerations

First, you need to think about your household and family needs. For tackling the pollutant problem the right way, you will have to determine all the types of chemicals your tap water is water filtercontaminated with. You should buy water filters that are certified by an official water testing agency, and pay attention to the list of contaminants that those filters remove. Weigh down how much effort and time you are ready to put into water filtering and how much water you spend on a daily basis.

Pitchers & Faucet Mounted Filters

Pitchers can remove disinfection products, mercury, chlorine, lead, and also improve the taste of water. There is a wide range of models available that come in various sizes and styles. They will require regular cartridge changes, depending on the filter model. In a recent chat with Sydney-based retailers of water filters, I learned that pitcher filters are convenient for one or two people, because frequent cartridge changes may turn the annual cost of a faucet-mounted filter.

Faucet-mounted filters are an ideal solution for filtering drinking and cooking water, because they are easy to install and relatively inexpensive. Like pitchers, they are equipped with carbonated filters that remove a wide variety of pollutants. They also require frequent filter changes, and may slow down the water flow.

Countertop & Under-Sink Filters

Countertop filters are situated on a counter and connected to the faucet with a line. Large amounts of water can be filtered with a countertop filter, without the need for making any choosing the right water filterplumbing notifications and frequent cartridge changes. They are usually more expensive than faucet-mounted filters and pitchers. However, fixed installation and plumbing modifications are required for under-sink filters. They do not require a lot of maintenance and do not cramp the counter area. Ideal for kitchen use, they include carbon and reverse osmosis, among other filtering technologies.

Water-purifying Technologies

The best water filtering technologies used today include: distillers, reverse osmosis, carbon filters and ultraviolet light. Distillers are the least effective and practical, generate excess heat and consume a lot of electricity. Reverse osmosis filters can remove many water impurities that cannot be removed by activated carbon (nitrates, fluoride, hexavalent chromium and arsenic). However, they waste a lot more water than they produce, thus they are advised for house application.

Carbon filters use activated carbon. They neutralize water contaminants by bonding them with activated carbon, and are best for removing chlorine byproducts, herbicides and pesticides, lead, MTBE (the gasoline additive), small number of pharmaceuticals and certain parasites. Ultraviolet light is used for killing microorganisms and bacteria, but cannot remove chemical contaminants, so it cannot be considered a filtering method. UV technology is most effective when used in conjunction with carbon filters.

Whole-House Filters

These filters are good for removing rust, sediments, and chlorine, but not for pollutants like metals, volatile organic compounds, and cysts. They require plumbing changes and have a long cartridge life.

Conclusion

The list of hazardous contaminants in our tap water is constantly growing and there is no water filter that can remove all contaminants. That is why it is important to determine those hazardous substances that prevail in your water, and choose your water filter unit accordingly.


Plumbing Blunders: What you Should Never do without the Help of a Professional

Plumbing Blunders What you Should Never do without the Help of a Professional

While there are plenty of projects that you can easily handle on your own, there are other jobs that should be left to the professionals. In addition to getting the work done more quickly, trained contractors can provide you with reliable finishes so that you won’t have to worry about leaks or other problems later. Here are four plumbing repairs that you really should turn over to an experienced team rather than trying to deal with them on your own.

Preserve Fixtures with Lower Pressure
As homes are built, the water department will bump up the pressure. This is bad news for your plumbing fixtures, but you can protect them by installing a pressure regulator. This handy appliance goes on the mail water line to control the incoming pressure, so it’s definitely a task you should leave to the professionals.

Moving the Lines
If a home improvement project requires replacing a supply line or faucet, then you may be able to handle that on your own. However, if you need to move lines in any direction, then it’s smart to have the professionals take care of it for you. As you add angles and pipe lengths, the risk of leaks increases, but you can rely on a trained plumber to get it done right the first time.

Sump Pumps
If you’ve had flooding in your area, then you appreciate the importance of avoiding damage with the addition of a sump pump. However, installing one is not as easy as it sounds. The area around the pump needs to be assessed and sloped for proper drainage, and the pipe coming out of the system must travel away from the house to an appropriate location. With a company like A P Plumbing on the job, you can be confident that water will be safely diverted from the home rather than reentering at another point.

The Hot Water Tank
Hot water tanks come with their own set of risks and challenges, so this is definitely a job for the professionals. In addition to getting the plumbing properly connected, you also need to deal with wiring for the pilot light. You’ll also have the address the tricky issue of disposing of the old tank. When you with a pro, however, you won’t have to worry about anything.

Before you decide to do a project yourself, take an honest look at the work involved and ask yourself if you truly have the right skills and tools. With any plumbing project, one of the big concerns is undetected leaks down the road, but you can rest easy when you trust the job to a professional.


Common Mistakes People Make When Buying Their First Home

family-home

A home is probably going to be the largest purchase most people will make in their lifetime. As such, there can be a lot of pressure to make the right decisions when obtaining a home. Unfortunately, sometimes people do make big mistakes. With that in mind, here are some of the most commonly made mistakes you should make sure to avoid when buying your first home.

Forgetting There Are More Expenses than Mortgage Payments

One mistake made by first time homebuyers occurs because they are unaware that owning a home requires far more expense than a monthly mortgage payment. Many people may decide to take on a mortgage when they finally have enough income to make the monthly payment. However, this ignores many of the other routine expenses that can be involved.

This includes things like property taxes, home insurance premiums, electricity bills, water bills and even dues paid to a homeowners’ association. Certainly make sure you know all the expense that will be required to own a specific home before you agree to buy.

Not Getting the Best Home Loan

Another common mistake occurs when new homeowners select the wrong mortgage. There are many home loans beyond the standard mortgage that are designed specifically for people who need financial help obtaining a home. You can find many of them on this website from a mortgage lender in Austin.

This includes options like loans from the Federal Housing Administration, the Veteran’s Administration and the US Department of Agriculture. Loans from these government agencies often come with great benefits for consumers like interest rates lower than regular mortgages. Make sure you qualify for such options before choosing a conventional mortgage.

Choosing a Home Before a Loan

The first step to buying a home should always be getting pre-approved for a mortgage. Part of the reason some people don’t is because they are nervous about the pre-approval process. They may assume that they’ll only be approved for a loan for a home much smaller than they actually want. They may also worry about being rejected outright. However, these fears are often misguided. Being pre-approved for a mortgage first will help you choose the right home from the beginning instead of having your hopes dashed later.

Overall, buying a home is a big deal. There is a lot of decision making required, and it will be a huge financial commitment. Make sure you are well informed on the whole process so you can put some your fears at rest.

Guest Post By:

Anita Ginsburg / Freelance Writer
anitaginsburg@gmail.com

Homeowners: Save on Your Heating & Cooling Bill

Understanding how an HVAC unit works and how to best maintain it can enable you to avoid common HVAC repair problems and save money on heating and cooling. As this resource from refrigerationschool.com explains, even though HVAC equipment is mechanically complex, it is not hard to find ways to lower your energy bill while keeping the home at a good temperature.

Understanding the Basics

The four main types of HVAC units are the air conditioner, heat pump, boiler and furnace. Hot or cold air is distributed via a forced air, radiant or gravity-based system. Research has shown that radiant heating and cooling systems are particularly energy efficient but the fact is that any type of system has both advantages and disadvantages.

Saving Money

HVAC units need to be maintained both by a homeowner and a professional. Homeowners should replace or clean filters at least once a month, as doing so can reduce energy consumption by up to 15%. Yearly DIY maintenance jobs include cleaning the coil fins, heat exchanger and evaporator coil. Drains should be cleaned as and when needed. A professional HVAC technician should be called in to tune up the HVAC unit twice a year to extend the unit’s lifespan.

Adjusting Settings

A thermostat controls a home’s HVAC system. The United States Department of Energy recommends that the thermostat temperature be set at 68F for the winter. This setting can be lowered when sleeping or out of the home. For summer, the temperature should be set at no lower than 78F. Raising the temperature by a single degree in the winter (or lowering it by a single degree in the summer) can increase your energy bill by up to 1%.

Why It’s Worth It

An average monthly electric bill ranges from $279 to $359 depending on your geographical location. Up to 48% of all energy consumed in the average home is used to heat or cool the home and a single Kilowatt of electricity costs an average of 12.12 cents. Thankfully, you do not have to spend large amounts of money every month to keep your home at a pleasant temperature. The tips outlined above and in the following infographic can help you save a significant amount of money while still keeping warm in the winter and cool in the summer.


understand-hvac-system-heating-cooling


Organized Repairs: 6 Things You Need to Know Before Starting a Project

home renovation

After listening to pleas for months, you’re finally going to make those changes to the house that your spouse wants. Before you dive into the project, however, make sure you are ready for the responsibility that comes along with it.

Children and Pets

Whether you’re a parent to humans or furry creatures, you want to ensure their safety during the project. You may need to bring them to a babysitter or pet sitter for the day or block off that part of the house during the renovations.

Overall Safety

Not only do you need to make sure your little ones are accounted for, but you also need to ensure that you know what you’re doing. Failure to follow proper safety protocols could lead to an injury or even death. If you have never tackled a project before, do some research on it. You may even want to enroll in a couple of classes to get a head start on this knowledge.

Time and Money

The goal here is probably for you to save some money by taking on the project yourself. Keep in mind, however, that you need to account for the supplies, and errors you make, in the costs. Set a reasonable time frame for yourself. If you start by thinking that a project will take only a few weeks and it ends up extending into several months of work, you may feel yourself growing frustrated.

Organization

No matter what project you are undertaking, you need to get organized. Purchasing small bins, like those available at Quantum Storage, can help keep your project more organized. Don’t just lump everything into one, however. Put things like paint brushes in their own container and other items like nails in another. Keeping your materials organized will allow you to work more efficiently.

Ask for Help

Undertaking a project all by yourself may seem overwhelming, and you don’t need to fear asking for help. Find out if a relative or friend could stop by one of the days that you’re planning to work just to give you a much needed boost.

Plan Breaks

While you probably want to get the work done as quickly as possible, you need to plan breaks for yourself to avoid overdoing it. This tip is a wise one for both your body and your mind, so schedule in some relaxation time before you even begin.

Keeping these tips in mind as you start a project will create a smoother overall vibe while you work.

Winterize Your Home Decor & Liven Up Chilly Days

living-room-fireplace

There is no better way to welcome the cold months ahead than to turn up the heating, curl up in a soft blanket by the fireplace and enjoy your favorite indoor leisure activities. Once you are done with seasonal decluttering, add a note of warmth and comfort to your living area with the help of a few snug accessories that combine aesthetics with functionality. Do not know where to start? Here are some convenient tips on how to revamp the decor with a few inexpensive modifications and turn your home into a lovely spot for relaxation and enjoyment in the face of the cold outside.

Off with the chilling view: Cover your windows

Most homes leak heat like sieves, windows being one of the main culprits for energy loss and sky-high electricity bills. To trap warmth indoors, use rich, heavy drapery and other window coverings: this simple trick will prove a rewarding investment in terms of lower energy waste, added privacy from gossip mongering neighbors and improved room look. If you are not a big fan of lavish drapery, you can install custom blinds and shades that will allow you to weatherproof your home, keep out nosy peepers and protect the rooms from intense sunlight come spring and summer.

Put your foot down and enjoy it: Add soft, colorful carpets dog-carpet

Another aspect of your home that may use a little tender, love and care, floors will both look and feel better if you shod them with soft carpeting this winter. Elegant, thick rugs in either monochromatic designs or bold color combinations will provide an extra layer of insulation and add visual interest to your living area decor. When choosing new carpeting, avoid brash tones, go for soft, full carpets and make sure you match the floor cover color scheme to the rest of the décor (single-tone rugs and carpets with tastefully contrasted colors will work well in most settings).

Colors of windy weather: Use warm tones for comfort

Warm colors such as red, brown and gold will help create a cozy atmosphere indoors so in case your home is lacking in visual warmth, you can add details in one (or more) of these tones to liven up the room feel. Warm-colored knit motifs such as cushion covers, blankets and sofa throws will prove both a functional and appealing addition to your living room. Or, you can use ornaments and functional accessories such as brown, yellow or orange scented candles, golden mirror frames, red or coffee-colored jewelry boxes and lacquered wicker baskets to achieve the inviting look.

Light that shines through cold nights: Use candles and dimmer switches

Winter nights filled with the sounds of raging blizzards and stormy winds outside can truly be daunting. Do away with the common cold and creepy monsters that lurk in the night with candlesthe help of a subtle flicker of tea candles and dimmer lights. While scented candles offer an inexpensive and efficient way to add a little warmth to your home, dimmer switches and dimmable bulbs provide an endlessly customizable source of light for rooms which require different lighting for special occasions or different times of day.

Is your home ready for yet another winter fairytale? Follow these simple tips and add a note of warmth to your living area without breaking the bank. Remember: a home that feels cozy is the one which blends function and visual interest. If your house is lacking in the latter of the two, now is the best time to do something about it, before snow and freezing temperatures come knocking on your door and lock you in until springtime.

This article was written by Zoe Clark. Zoe is an environmentalist, home decorator and DIY enthusiast. When not obsessing about designing perfect homes, she is spending time with her family.

How to Safely and Efficiently Shovel Snow

How to Safely and Efficiently Shovel Snow

While school kids are busy wishing for snow days, us adults are wondering if this will be the year we’ll successfully shovel snow without backache or injury.

Most adults assume they know how to shovel snow. We grab a shovel and boldly attack the snow in an attempt to flaunt our strength. The problem is most of us assume wrong.

Instead of a bullheaded mantra of “tough and fast,” try integrating these tips as part of your new mantra: “safe and smart.”

Shovel Smart, Shovel Safe

Most homeowners will do some shoveling, so it is important to familiarize yourself with proper technique. Bad shoveling habits can lead to back injuries, falls, heart attacks and other medical calamities. To avoid injury:

  • Make a plan so you don’t end up moving the same snow twice. You don’t want to accidentally block your door, the street, your car, etc.
  • Move in small sections instead of straining to reach it all from one spot.
  • Don’t wait for the last flake to fall. Shovel every few inches so the snow is not as heavy.
  • If you’re unable to shovel before the end of the storm, shovel in layers instead.
  • Whenever possible, push the snow instead of lifting it on the shovel.
  • If you have to lift snow, lift with your legs, not your back.
  • If possible, walk the snow to where you want it instead of throwing it.
  • Don’t turn at the waist. Try pivoting on one foot instead.
  • Spray your shovel with cooking spray so the snow slides off instead of building up and weighing you down.

Take Time to Prepare

Just as important as your technique while shoveling is your preparation for the task. Make sure you:

  • Wear thick shoes with a good tread and ankle support.
  • Dress in layers so you can easily remove them as you work up a sweat.
  • Treat it like a workout: Stretch and warm up before heading out.
  • Take frequent breaks to warm up, stretch and hydrate. This is especially important for anyone with pre-existing health concerns.

Pick the Right Equipment

The right tools — whether that’s a shovel, a snow blower or heavy machinery — make all the difference.snow-blower

When it comes to shovels, it’s not one-size-fits-all. Find a shovel that is the right length and weight for you. Be wary of shovels with ergonomic handles. They may make scooping and throwing snow more difficult.

Snow blowers are fantastic tools, but they must be chosen and handled with care. Bigger isn’t always better, so ignore flashy marketing and speak to a sales rep about your specific needs.

Follow safety precautions when using a snow blower. Never use your hand to clear clogs or debris. Use a broom handle or similar tool instead. Have family and pets stay inside to avoid ice, debris and other non-snow projectiles. Always wear gloves, hearing protection and protective glasses. Follow the same dressing guidelines as shoveling.

Have needs that can’t be met by a shovel or snow blower? My brother-in-law swears by his skid loader. He bought it when building his home and now uses it as his go-to snow removal tool. If your property is too big or annual snowfall too heavy, you may benefit from heavy machinery.

“Pride goeth before a fall.” That’s especially true when snow shoveling. Don’t let a need for speed or a desire to show off your strength put your health at risk. Following the above tips may not win you any snow removal races, but they will ensure you get through the winter without a visit to the chiropractor or ER.


Copyright © 2024 | Bruzzese Home Improvements | All Right Reserved | Web Design & Development by QualityMust