fbpx ...

Essential Power Tools for Home Maintenance and DIY Projects

A power drill

Proud homeowner or not, we all love the process of creating or fixing things in our homes. Home maintenance and DIY projects have an undeniable allure. They’re not just a way to save money, they’re also a source of personal satisfaction and a unique opportunity to leave your personal touch on your living space. But to transform your ideas into reality and to do these jobs right, you need to have the right essential power tools at your disposal. These tools are the backbone of any successful DIY endeavor, providing you with the versatility and precision necessary for various tasks.

The Importance of Having the Right Tools

Having the right tools can entirely change the dynamics of any project. The importance of using the correct tool is unparalleled – it can transform a challenging task into a simple process. It also ensures that the final result is polished, professional, and exactly as envisioned. Additionally, investing in the right essential power tools can provide significant cost savings in the long run. They reduce the frequency of calling in professional help for minor home repairs or improvements. Interestingly, the right tools also help you gauge when you need professional plumbing help, making you a more informed and empowered homeowner. Indeed, understanding and effectively using these tools is a critical part of successful DIY and home maintenance.

Essential Power Tools for Renovating a Home

Renovating a home can often be a complex task, requiring both a clear vision and the right tools to turn that vision into reality. Each step, from removing old fixtures to installing new ones, can feel like an intimidating mountain to climb. Yet, having the right power tools can simplify these tasks immensely, making the renovation process more manageable. Moreover, the use of these tools can greatly reduce your environmental impact when renovating. The correct selection and efficient use of power tools can lead to significant reductions in energy consumption and material waste. Thus, for any homeowner planning a renovation, a well-chosen collection of power tools can be a game-changer.

Using a Storage Unit

A storage unit may not be a power tool, but it plays a crucial role during home renovations. Amidst the chaos of a renovation project, a storage unit offers a safe haven for your furniture and other belongings. It protects them from dust, damage, and accidental paint splatters, ensuring they remain in good condition throughout the renovation process. Moreover, a storage unit offers additional space, allowing for a more organized and efficient renovation. It makes your home more accessible and easier to navigate during the upheaval of a remodel. In essence, a storage unit can be a valuable asset as it helps to streamline the renovation process, making it smoother and more manageable.

Power Drill: The Most Versatile Tool

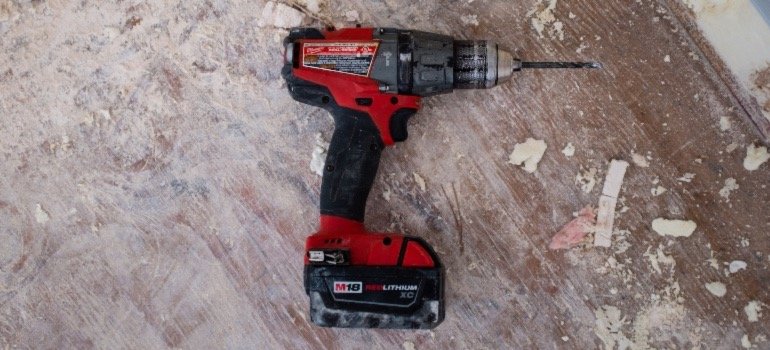
The power drill is often hailed as one of the most versatile tools you can have in your home toolbox. It’s a tool that transcends the boundaries of typical tasks, capable of not only drilling holes but also driving screws and even mixing paint with the right attachment. For any home renovation project, having a good quality power drill can make a world of difference. From drilling holes for mounting shelves to screwing in fixtures, it comes to the rescue in a myriad of situations. With a power drill, even the most daunting tasks become accessible, opening the door to a wide range of home improvement possibilities.

Circular Saw: For the Heavy-Duty Tasks

Next up is the circular saw, a tool that is invaluable for any heavy-duty cutting task. The circular saw is a powerhouse, capable of cutting through various materials with ease. Whether you’re resizing a door, cutting through a block of wood, or even tearing down drywall, a circular saw can make the process much quicker, more efficient, and more precise. It’s a tool that is designed to tackle substantial tasks, offering unparalleled cutting power for those larger, more demanding projects. However, like with any power tool, safety is paramount. Always wear safety goggles, keep your fingers clear of the blade, and follow the manufacturer’s instructions to ensure safe operation.

Jigsaw: Precision in Cutting

When it comes to tasks requiring precision cutting, the jigsaw emerges as the ultimate companion. This power tool is the epitome of precision and flexibility, allowing for intricate shapes and curves to be cut with ease. From crafting an intricate design in a piece of plywood to trimming a piece of countertop, the jigsaw is your go-to tool. It’s not limited to wood, either. With the right blade, a jigsaw can also cut through materials like metal and ceramic. So whether you’re into crafting, carpentry, or just general home improvement, a jigsaw is one of those essential power tools that can significantly enhance your DIY capabilities.

Power Sander: Achieving Smooth Surfaces

When it comes to achieving smooth, flawless surfaces in your DIY projects, a power sander is an indispensable tool. It’s not just about making surfaces look good – a well-sanded surface can drastically improve the adhesion of paint, varnish, or stain, enhancing the durability and look of your project. From reviving old furniture to prepping new woodwork, the power sander can make all the difference. However, as you step into the realm of electricity and power tools, caution is essential. While sanding is typically a DIY task, when dealing with electrical outlets or wiring, it’s best to get the help of a professional electrician.

Router: For Crafting and Designing

When your DIY projects involve crafting and designing, a router is an essential power tool that adds an extra level of finesse to your work. With a router, you have the ability to shape the edges of your wooden pieces, create grooves, and hollow out areas, adding intricate details that can truly elevate the aesthetics of your project. It’s not just about appearances, either. Routers also help in functional tasks like creating joints for furniture assembly. This tool, combined with your creativity, allows you to transform a plain piece of wood into a piece of art, adding a personal touch to your woodwork.

Nail Gun: Time Saver for Many Projects

For tasks that involve nailing, a nail gun is an essential power tool that can save you a considerable amount of time and energy. Traditional hammer and nail work can be laborious and tiring, especially for large projects. However, with a nail gun, the process is accelerated significantly. From framing walls to installing trim, a nail gun can make these tasks more efficient and less strenuous. However, while it’s an incredibly useful tool, it also comes with a level of risk. Nail guns are powerful and can be dangerous if not used properly. Always remember to put safety first, follow the manufacturer’s guidelines, and handle the tool with care.

Power Screwdriver: Essential for Every Tool Box

Finally, we come to the power screwdriver, a tool that may seem small, but packs a powerful punch in terms of usefulness and convenience. Screwdrivers are essential for a wide variety of tasks, from assembling furniture to installing light fixtures, and the power version takes this utility to another level. The power screwdriver eliminates the manual labor associated with driving screws, making the process faster and significantly less tiring. Even for tasks that seem minor, like tightening a loose screw, this tool can save time and effort. It’s compact, easy to use, and is truly an essential addition to every toolbox.

To Conclude

Having the right essential power tools can make your DIY projects and home maintenance tasks a breeze. From power drills to nail guns, each tool plays an important role and can help you achieve professional results. Remember, while DIY can be fun and fulfilling, don’t hesitate to seek professional help when necessary.

Best DIY Projects to Start With a Fixer-Upper

Buying a fixer-upper isn’t just about saving money. Fixer-uppers are incredible real estate investing opportunities for those who enjoy do-it-yourself (DIY) projects. It’s not uncommon to see homebuyers purchase a property and renovate it while living there. This is a good strategy for house flipping because it allows homebuyers to save money on living expenses and also on remodeling costs by performing the repairs themselves.

DIY investment projects also enable homebuyers to go after deals that other buyers would shy away from, such as a property with structural damages or multiple code violations. For homeowners dealing with issues like this, you can view this comprehensive guide on how to sell a house with code violations https://sdhouseguys.com/sell-house-with-code-violations-san-diego/. You can sell nearly any type of property, regardless of the condition, by finding the right buyer. Homebuyers that prefer DIY projects are perfect potential real estate professionals you can sell your home to.

When encountering your next fixer-upper property that needs a ton of work, here are several popular DIY projects to tackle when kickstarting your renovations.

1.    Prioritize Certain Repairs

As with regular home repairs or renovations, fixer-upper DIY projects usually fall under “necessary” and “upgrades when I have time.” Create a scope of work and renovation roadmap for those first. Experienced homebuyers and developers typically have a hitlist of repair items in mind, like the bathrooms or kitchen, that they renovate regardless of the situation. These items normally add value to a home when they are renovated.

Many renovation priority lists are based on budget. When it comes to facelifts for fixer-uppers, larger projects often run between $15,000 and $20,000. These prices vary depending on your market. For example, We Buy Houses in Denver, a homebuyer in Colorado, stated that, “Supplies continue to rise for many items used in DIY home projects. Lumber was a huge increased cost over the past few years that drastically affected the projects we were able to take on.” You can learn more about We Buy Houses in Denver here https://webuyhousesindenver.org/. It’s important to price out the costs of the DIY renovations you’re considering before diving into a project.

2.    Fresh Coat of Paint

A simple yet effective DIY project that will transform any fixer-upper is painting. A fresh modern coat throughout the house instantly changes the feel and opens up DIYers to even more ideas. Consider painting walls, cabinets, or the front door. A fresh coat of paint immediately attracts new eyeballs to a home. If you’re considering selling the property in the future, a new paint job will help you generate more interest. Consider reviewing other homes on the block as well when considering the exterior paint color. It’s oftentimes worth painting the outside of the home as well to make your house pop with a fresh look.

3.    Rethink Shelving 

Have you ever watched a cooking show and admired the use of floating shelves to increase kitchen storage space and display plates, mugs, pots, and pans? The good news is that making floating shelves is one of the easiest DIY projects to tackle. All you need are some 2×3 boards, some power tools, and a free afternoon. Creative shelves can add a fun aesthetic to your house while also being practical. You can think outside the box – and kitchen – when adding shelves throughout your home. Small library-style shelves for books, vases, or plants can enhance the overall style of a room, creating a new ambiance that you can enjoy. If you work from home, creating your next home office is a great DIY project that offers huge returns of happiness once you can start using it.

DIY Fixer-Upper Ideas

The sky is the limit for DIY projects that you can entertain for your next home renovation. Certain DIY projects will be faster – and cheaper – than others. Prioritize what you truly want out of a project. Also, clearly define your end goal. Do you plan to live in this home forever after you fix it? Many homebuyers and homeowners plan to sell their houses shortly after remodeling them. With your end game in sight, estimate the cost of your next DIY home project and dive in.

What Is a Catio and Why Does Your Fur Baby Need One?

Cats are one of the favorite pets in the world. In the US alone, there are around 94 million pet cats. And while cats make great companions, they also have a reputation for being independent and aloof.

If you’re a kitty owner, you know how much your fur baby loves to spend time outdoors. But what about when it’s too hot, cold, windy, or wet outside for them to enjoy? That’s where a catio comes in! Catios are becoming popular among cat owners who want the best for their furry babies. Commonly known as cat patios or enclosures, these structures provide their furry friends with a secure outside space.

What Is a Catio?

A catio is a fenced-in outdoor space that allows your kitty to enjoy the great outdoors while staying safe and sound. Usually, catios are made of wire mesh or chicken wire and can be attached to your home or placed in your yard. It comes in various sizes, and you can customize them to meet your feline friend’s specific needs. It offers a safe place for your cat to roam and explore while keeping them away from the dangers of the outdoor world.

To build a catio for your cat, you can hire welding services. It is essential to do your research before you build a catio, as it needs to be the perfect size for your cat and have the correct type of wire mesh. To search for the best catio builders in your area, you may search online. For example, if you live in Billings, MT, you may search for “Welding Billings MT” or “Catio Builders Billings MT.” It will provide a selection of websites for you to compare and choose the candidate most suited for the job.

Why Does Your Fur Baby Need a Catio?

There are plenty of reasons why your fur baby needs a catio. This section will cover some of the most important reasons for building a catio for your cat.

1. It Provides Them with Fresh Air and Sunshine

Cats who spend most of their time indoors lack fresh air and sunshine. While you may crack open a window for them sometimes, it’s not the same as letting them outdoors to enjoy nature. A catio allows them to get some fresh air and take in some much-needed vitamin D from the sun. It gives your feline friends the best of both worlds – they enjoy the outdoors from the comfort of their catios.

2. Safe Place to Play

Another reason your cat needs a catio is that it provides a safe place to play and explore. Cats love to roam around, but they can quickly get into trouble if they’re not supervised. They love to climb and scratch, so providing them with a safe place to do these things is crucial. Fur babies outdoors are at a higher risk of being hit by cars, thrashed by other animals, or getting into spats with other cats. By keeping them indoors, you can help reduce these risks. A catio gives them the freedom to explore without you having to worry about them getting lost or hurt. It’s the perfect way to let them enjoy the outdoors without danger.

3. Protection from the Elements

Catios are also great for protecting your cat from the elements. Your cat can still enjoy the sunshine and fresh air from the comfort of their catio even if the weather is not pleasant. It protects them from the harsh weather conditions and allows them to stay comfortable no matter what the weather is like. It is especially beneficial for elderly cats or those with health conditions that make them more sensitive to the weather. A catio is a must-have for your fur baby if you live in an area with severe weather conditions.

4. Lessens Your Stress

As a cat owner, it’s natural to worry about your fur baby when they’re outdoors. Cats are naturally curious creatures, so it’s impossible to keep an eye on them 24/7. But with a catio, you can let them enjoy the outdoors without worrying about getting into trouble. It is beneficial if you work long hours or travel often. You may rest easy knowing your cat is well-protected even when you’re not home.

5. Loose Cats Are a Danger to Your Cat

If you live in an urban area, there’s always the risk of your cat coming into contact with other loose cats. These cats may be carrying diseases or parasites that can harm your cat. They may also fight each other, which can lead to serious injuries. Many diseases like rabies, FIV, and feline leukemia are fatal to cats. So, keeping your cat safe from other cats is essential by providing them with their own space in a catio.

6. It’s Good for Their Mental Health

Just like humans, cats need outdoor time to stay mentally healthy. Being trapped in a room can create feelings of boredom, sadness, and anxiety. It can lead to destructive behaviors such as scratching furniture or urinating outside the litter box. A catio gives them a place to explore and helps keep their minds active. It also allows them to get some much-needed exercise, which is essential for their mental and physical health.

7. It’s Good for the Environment

A catio is also good for the environment. Keeping your cat in catios can help reduce the number of birds and other small animals killed yearly by cats. According to a Smithsonian Conservation Biology Institute study, outdoor domestic cats kill billions of birds and other small animals yearly. It has a devastating influence on the environment and wildlife populations. Keeping your cat in a catio can help reduce this number and positively impact the environment.

Conclusion

Giving your fur babies the best life possible is paramount for a pet parent. That means providing them with a healthy and happy environment. A catio is a perfect way to provide them with a secure outdoor experience. Not only will your kitty love spending time in their catio, but you can also feel good knowing they are living their best lives.

DIY Countertop Replacement: A Step-by-Step Guide

On average, US homeowners spend $12,000 on kitchen remodels. The kitchen is often viewed as the heart of a home where family gatherings and homecooked meals happen.

If you want to boost your kitchen space but don’t have the budget for a full remodel, consider countertop replacement. It can breathe new life into your kitchen without breaking the bank.

In this step-by-step DIY guide, we’ll tell you how you can install new countertops in your home.

When to Replace Countertops

Replacing countertops is a big job, and you might not know when it’s time to consider an upgrade. It’s time to think about replacing your countertops when: 

  • You see stains, burns, or scratches
  • They’re outdated
  • You’re looking to boost value
  • You’re renovating
  • There’s been smoke damage
  • You want an upgrade on a budget

If you notice any damage, replacing your countertops is an easy way to breathe new life into your kitchen. 

1. Choose New Countertops

There are several options available if you’re unsure how to choose new countertops. Laminate is an affordable option that is easy to work with for a DIY project, but granite countertops and engineered stone and engineered stone are other affordable options that are easy to maintain with a more high-end. Natural stone tends to need extra care.   

2. Get Your Measurements

Measure the dimensions of your countertops before starting work on your DIY countertop replacement project. It helps to draw a diagram of your counter with your measurements to have a visual guide for your project.  

3. Remove Your Sink and Other Obstacles

Clear your countertops of any clutter or appliances. Then, you’ll want to uninstall your sink and set it aside as you work. Shut off the valve, uninstall the sink drain, and unhook the supply hoses before removal.

4. Remove Old Countertop 

Look inside the cabinets for the brackets and use a drill to unscrew them. Once these are removed, you should be able to lift the countertop right off. If it gives any resistance, don’t force it, and double-check for any missed screws.

5. Cut the Countertop

If you didn’t order materials custom sized to your measurements, you’ll need to cut them to shape. Don’t forget to make your cutout for your sink or other obstacles. After cutting your dimensions, smooth down the edges.

This is often one of the most difficult steps. If you need some more help, check out these home renovation tips for skill levels needed for different DIY countertops.

6. Install 

When it’s time to install your countertop, lift it into its place. To make things secure, drill back into the angle brackets inside your cabinets to tighten your countertop and prevent movement.

7. Shape and Clean Up Edges

If you notice any excess material, shape it to fit the proportions of your kitchen. Afterward, clean up the edges with bevel or trim to create an appealing profile.

8. Re-Install the Sink

Add the finishing touches to your DIY countertop installation by re-installing your sink. Attach the connections and slide your sink into the cutout you made on your countertop.

Countertop Replacement Made Simple

With this DIY countertop replacement guide, you can have a new countertop in as easy as 1, 2,3! A new countertop is sure to be a positive upgrade to your home that livens up your kitchen space.

Head over to our blog page for more home improvement articles.

Questions To Ask Wooden Furniture Parts Provider

Wood furniture can never go out of style, no matter what tries to replace it. The furniture industry in the U.S. stood second place in size, buying up 21% of the world’s furniture. When the COVID-19 lockdowns were imposed, people scurried for makeshift offices and learning corners in their homes. It also gave people time to work on DIY furniture projects.

Wooden furniture parts providers played a crucial role in supplying the difficult-to-carve wooden furniture legs complementing any table. And, square turned table legs were one of the popular items being ordered because they serve the purpose and look appealing.

If you are working on a furniture project, these are the questions you should ask the parts provider.

What is best for making furniture – hardwood or softwood?

Both kinds of wood are suitable for making furniture, but softwood beats hardwood due to its low cost, tracheid content, delicate texture, non-porousness, and low density. It is easier to carve furniture out of softwood than hardwood, which is also cheaper. Therefore, if you find square-turned table legs that are claimed to be made out of softwood, you can purchase them as they absorb adhesive readily and provide a high-quality finish.

What should be the moisture content of the wood?

Wood gains or loses moisture as it interacts with the surroundings, making it hygroscopic. When the humidity increases, the moisture content will increase, causing the wood to expand and vice versa.

That being said, fresh wood has a lot of moisture, and if not dried thoroughly, it can result in cracking, warping, and buckling. Kiln drying is a technique used by furniture makers to bring the moisture levels to about 8%. Checking the moisture levels is critical to the long life of your furniture.

Where is your wood sourced from?

The source of the wood matters as there are a lot of suppliers resorting to unethical sourcing practices to make an extra buck. Therefore, check with the supplier about their sourcing practices. They ensure that the wood is sourced locally and meets the local environment protection norms.

Can you add notches to the table legs?

The legs may require notches to ensure a perfect fit. Notches can be challenging to carve out, and therefore, it is best to have your furniture parts provider do it for you before shipping out these table legs.

What is the return policy?

A return can be due to several reasons, such as you changed your mind, put your project on hold, or the product did not meet your expectations. Check the furniture parts provider’s return policy, the number of days, and the reason for return. Some companies offer outright return, no questions asked, while others will only replace the product with a different one.

Conclusion

Lockdowns have led to many makeshift furniture arrangements. Some created a home office, while others used coffee tables and stools. And then some made furniture to meet their needs. If you are the third kind, who wants to make their furniture, then ordering parts, such as square turned table legs, was never easier. 

The Handyman’s Guide to Installing Plaster for Walls

Did you know that you can expect your plaster for walls to last an indefinite period of time before you require maintenance for your walls? Plastering a room is a job that usually gets handled by experts with all of the best plastering equipment. That doesn’t mean that you can’t turn it into a fun DIY project.

You’ll want to make sure that you have some of the plastering tools needed for the job and you’ll want to have some PVA glue and dry plaster on hand. There are also some important steps that you’ll want to take if you’re set on using plaster for walls as a DIY project in your home.

The good news is that you’ve come to the right place to learn more about the wall plastering process and how to start plastering a room. Continue reading this article to learn more.

1. Preparation

The first thing to do when you’re thinking about using plaster for walls is to make sure that you’re prepared. This means making sure that you have all of the plastering tools that you need in order to do the job as well as all of the supplies required to create dry plaster. You should also lay down a dust sheet to catch any debris or plaster that doesn’t end up on the walls.

Another thing to do before you start plastering a room is to make sure that the walls are clean of any dirt or dust. This is important so that the replacement plaster goes on smoothly. 

2. Apply PVA Glue

The next step is where your PVA glue enters the picture. You’ll want to start applying the PVA glue to the walls that you’re planning to plaster since the PVA bond will help to ensure that the plaster remains on your wall in an even and smooth fashion. When using your PVA glue you need to make sure that it is mixed at a 1-to-4 ratio with water for the best results, and from there, you’ll use a roll-on brush to coat your walls with PVA glue.

3. Mix Your Plaster for Walls

As soon as you finish applying the PVA glue to your walls you’ll want to get started with mixing the plaster for your home’s walls. It is a wise move to wear a dust mask when you start this process.

You’ll want to mix the plaster with some cold water and whisk it for a decent period of time. You’ll know that it’s finished when it resembles custard. Just remember to mix the plaster into the water rather than mixing water into the plaster.

4. Apply the Plaster

Now that your plaster is all mixed up and ready to go you can start applying it to the walls in your home, and you’ll start applying the wet plaster to your walls using a hawk board as well as a trowel and a float. If you don’t get it perfect it isn’t the end of the world. You’ll need to reach out for plaster repair in beaumont

You’ll start by placing some plaster on the hawk board. Do this by scooping it out of the bucket with your handy trowel. Next, you’ll break out your float and use it to push the plaster onto your walls. Start in the bottom left-hand corner and work your way up the wall.

5. Smooth It Out

Next, you’ll want to start smoothing out the plaster on your wall before it becomes dry plaster. A good approach to take is to wait around 20 minutes after you apply the plaster to the walls in your home. Once the twenty minutes is up you can go through and remove any large chunks while getting rid of unwanted bumps in the wall to get that perfect and smooth plaster look.

It is also a good approach to go smooth out the corners of the wall since those are the most troublesome areas.

6. Apply Another Layer

After you get done smoothing out the first layer you can start with applying the second layer. This second layer is the final coat that you’ll to your home’s wall. This layer should be thinner than the first layer. This means that you’ll need to dilute the plaster you’re using by adding a bit more water to the mixture.

A good rule of thumb is to try to add a layer of plaster that is only two millimeters thick. Then let that second layer dry.

7. Add Finishing Touches

The plaster you’ve added to your walls should be done drying after about thirty minutes. At that point, you’re good to move on to the next step in the process. You’ll want to start by polishing your walls where you’ve added the plaster. The best approach to do this is by spraying the walls with water.

Find the edges and spray them with a bit of water before running your trowel down it. This will create a smooth appearance for your plaster for walls. Another effective option if you don’t have a trowel is to use a wet paintbrush. A wet paintbrush is a great choice for handling the more difficult areas like the corners.

After your plaster for walls dries you should go in with some sandpaper and get rid of any unwanted bumps or extra plaster on your walls.

8. Start Painting or Wallpapering

It is up to you whether you want to paint your plaster for walls or put wallpaper up. Once you’ve concluded adding your finishing touches it is up to you how best to proceed. If you choose to paint make sure that you apply a primer later before adding the paint color of your choice.

Now You’re Ready to Apply Plaster for Walls in Your Home

Using plaster for walls is a great way to create beautiful walls that are durable for the interior of your home. This is a task that tends to get left for the professionals but there is no reason that you can’t learn to use plastering tools and PVA glue on your own. Make sure that you follow these helpful steps and you’ll have perfect, dry plaster in no time.

For more helpful articles on a bunch of topics, check out more of our blog.

Why Do You Need DIY Real Flame Electric Fireplace for Your New Home

You have just moved into your new house, and already you have thousands of home decor ideas running inside your head. When it comes to decorating your home, you can’t make a quick decision. However, some ideas don’t need you to think upon them even a second time because you just know that you need them in your home.

One of these home decorating ideas is to have an electric fireplace right in the center of your house. An electric fireplace has a vast number of advantages, while it looks magnificent in your home. That said, these fireplaces are not restricted to one place. Most of them are portable and can easily be adjusted anywhere you want—a perfect DIY opportunity for you to get more out of the available space in your home.

In this article, you will learn why you need an electric fireplace in your new home and how it can enhance the quality of your life and surroundings. Let’s find out:

Brightens Mood and Environment

As soon as you add an electric fireplace to your home, you would realize how positively it changes your home’s whole vibe. These modern pieces of technology go perfectly with your home architect and design. Once you switch it on, you’ll find that a real flame electric fireplace is far better than other conventional home heating equipment available in the market. They don’t only look good in your house, but at the same time, they become a functional piece of technology inside your home. 

Let’s try to explain it with an example. You come home after a long and tiring day at work. All you need now is to relax and cozy in your humble abode. To brighten your mood, you just need some warmth that soothes your mind and body. Sitting right beside your electric fireplace will help you forget all your worries. It happens because the heat an electric fireplace produces tends to feel calm and composed. It is because they don’t have any hazardous smoke to produce heat as they run on electricity. It is also one of the most significant reasons it is perfect equipment for your new home.

Gives Your Home a Modern Look and Feel 

You may have already designed your home with massive stress upon modern architecture. In that case, adding an electric fireplace in your living room will prove to be a cherry on the cake. It will give your home a more modern and advanced look, which perfectly goes with the surroundings of your home.

Another significant advantage you get with an electric fireplace is the magic flames. It means you can even change the color of the fire according to your mood. Moreover, you can quickly increase or decrease the amount of warmth you need. You get comfort, ease of access, and a hi-tech piece of the gadget all in one single device. 

Adds an X-Factor to Your Home Gatherings

Now, it’s time to invite your friends and family to your humble abode. The first they will notice as they enter your living room is the beautiful and attractive-looking electric fireplace. Your friends can’t resist asking about it and from where you’ve got it. With the addition of an electric fireplace, your friends will love your company as they spend quality time in your home.

Conclusion

An electric place can make your home feel like a special place. Also, you get several other benefits, as mentioned above. Additionally, you provide your loved ones with a feeling of warmth and safety with this perfect home equipment.

Practical Ideas for Homecare maintenance amid a pandemic

Wondering how to beat the boredom, improve your home, and still feel healthy and rejuvenated during a lockdown? Well, it’s time to roll up your sleeves and embrace DIY home maintenance projects. Sprucing up your home will make it an ideal place to play, work, and relax and impact our well-being. So let’s explore practical ideas for homecare maintenance amidst the pandemic.

Decluttering your home

Clutter can make your home look unpleasant and unappealing, and it also has more downsides. It can damage your mental and physical health. Mentally, it can cause stress, negative emotions, and physically, cause falls and slips.

During this pandemic, decluttering will impact your quality of life and well-being; as you take control of your residence and straighten things up, it will induce calm and cheer you up.

To start your cluttering process, divide the rooms and decide on where to start. Whether it’s the kid’s room, garage, home office, tackling one room at a time makes the job easier to do and keeps you motivated.

Then, sort the items in different categories to enable you to get rid of them quickly.

After sorting out, fine-tune them by packing them into separate containers, for bathroom items put in zip-top bags, for electrical cords, use a bin. This enables you to choose what to keep, give out or sell. Decluttering will free up your shelves, tabletops and wall space, which in return will make your spaces feel and roomier . 

Redecorate your Rooms

Redecorate your rooms using repurposed items like elegant platters, frames, plants, and trays. Use frame posters or artworks to add more charm in the hallways or office. Paint using colors that speak to and inspire you daily. Use unique items to put things like keys, remotes, and other small stuff.

Having plants keeps your home connected to nature and refreshed.  Recycle containers and repurpose items like glass bottles, cups, and broken bowls into indoor planters.

Fix sticking doors

After some time, even a well-installed door can become loose and start to stick, and the problem is often found within the hinges. Most screws do become loose after a time, causing the door and hinges to sag. Tighten the hinge screw using a screwdriver. Alternatively, replace the original screw with longer ones that drive more into the door frame.

Clean your gutters

Cleaning your gutters is not the best way to enjoy fresh air, but it’s a necessary activity that can be carried out during the lockdown. Clogged drains cause a build-up of sludge and rainwater, leaves that may seep into your walls, damage the roof, and provide a serviceable nest for bugs, rodents, and other pests.

Prop a ladder against your exterior and be careful not to fall or damage your house, put on gloves, and use a trowel to remove the unwanted debris and finish out by washing the gutter using a hosepipe.

Unclog your Sink, drains, and toilets

To perform minor unblocking, use vinegar and baking soda. Start by pouring boiling water down the drains. Next, make a solution of baking soda and vinegar by using a measurement of 1 cup of each. Cover the drains and wait for around 5 to 10 minutes. After, pour more boiling water. The bubbling reaction from the mixture will loosen the clog while the boiling water will flush it away down the pipes.

Transform your Garden

Tidy out your outdoor space by giving it a makeover that requires little maintenance. Lay leftover bricks around the flowers to create a path that mirrors your flower bed shape. This makes it easy to weed while giving your yard an appealing look.

Turn soil flower beds into wood chip beds and replace the perimeter grass with pebbles to give your garden an attractive look while reducing constant upkeep.

Carry out minor weeding activities like pruning the shrubs in your garden. It creates more room for growth. Give your lawn a makeover by cutting back the hedges, pulling out weed and rock painting.

Wash your Garden Patio

Jet washing your back and front yard space makes it look more presentable, and it provides a chance to enjoy the area and interact with nature, thus improving mental health. Jet cleaned patios do appear brighter and bigger.

Clean the fridge

Remove all items from your fridge compartments and shelves and clean them before restocking. Take out drawers or crispers, shelves, and other removable surfaces from the refrigerator and clean them thoroughly using soap and water.

Wipe the inside of the fridge using a mixture of baking powder, vinegar, and hot water. For stubborn stains, remove them using a small amount of white toothpaste. Clean the fridge doors and gasket using a solution of vinegar and water. Pat the gasket dry and apply lemon oil, body lotion, or mineral lotion to keep the gasket rubber supple.

Sanitise the door handles

Cleaning and sanitizing your door handles has become an essential part of prevention during the covid-19 crisis. Ensure that your door handles are cleaned thoroughly after every use and apply antimicrobial protective film to reduce the chances of bacteria growing and spreading.

Polish your wood furnishings

You can polish your wood furnishing like dressing tables, shelves, sideboards, tables to keep them looking good. Wipe down the dirt using a damp cloth from a mixture of water and soap or disinfect using Zoflora. Use an oil solution or varnish to polish the wood and enhance its natural color. Polishing helps to add longevity and shine to your wood furnishings.

Wash windows, walls and doors

Clean your doors, walls, and windows to remove unwanted stains, smudges, and dirt, and keep your home sparkling. For the walls, move everything away and dust the walls using a broom, vacuum cleaner, or dusting brush. Take warm water and soap and wash the wall from top to bottom.

In conclusion, homecare maintenance has an overall benefit to your wellness and health, but it also adds longevity to the exterior and interior fixtures, thus saving you money. Do it practically during this COVID-19 pandemic and lessen the spread of germs, boost your productivity while staying active, mentally, and physically.

The 6 Real Benefits of Creating Your Own Yard Gym

Many of us find sticking to a regular workout routine difficult. Unfortunately, the health risks of not exercising are too serious to ignore, as the chances of developing heart disease, high blood pressure and diabetes all increase significantly through lack of physical activity. Whilst many of us are aware of the health risks of not working out, only 23% of Americans get the recommended amount of exercise.

One of the reasons for this is the time and money required to visit the gym. And for some people, the long queues for equipment and self consciousness also make visiting the gym unpleasant. For anyone who has struggled to commit to a regular exercise routine and hates going to the gym, we recommend creating a yard gym at home. Many of us have a section of our yards that we don’t have any use for – whether it’s a patch of grass or a garage. This space is perfect for creating a yard gym!

Studies have shown that a home gym is 27% of people’s most desirable feature in their home. People are often put off by the cost of installing a home gym however the cost isn’t as huge as you might think. One of the best things about a home gym is that it’s personalized to your needs, which means you only need to invest in the equipment that you know you will use. It’s also a long term investment and much better value than a gym membership.

If you’re aspiring for a better and healthier you in 2019, a yard gym could be a great way to achieve this. In case we haven’t already convinced you, Prestige Lawns have created an infographic to show you 6 amazing benefits of having a yard gym on your property. Read on to find out more!

The 6 Real Benefits of Creating Your Own Yard Gym

The Right Tools for the Job: A Modern Handyman’s Digital Tool Belt

The Right Tools for the Job A Modern Handyman’s Digital Tool Belt

Many people think that a handyman uses a hammer and screwdriver, and that is about it. You know that’s not true. There are so many more tools that you need to get the average job done. This is even an area where technology is becoming more and more handy as the years go by. As you consider all that it takes to get a repair job done correctly and efficiently, technological tools go a long way towards making that happen. If you are a handyman, here are a few tools that you might want to consider adding to your digital tool belt.

Laser Stud Finders 
Every handyman knows the importance of finding strong support beams within the foundation before beginning a big job. This used to involve quite a bit of trial and error before locating just the right spot. If you do not already have a laser stud finder in your tool belt, it is time to put one there. This simple tool will allow you to quickly find the studs that you need to get the job done right the first time.

Electronic Levelers 
It is important to make sure everything in a building is level. Your naked eye will only help you in this area to a certain extent. There should not be any guesswork involved here, as the results will be noticeable only after the job is complete. To avoid an embarrassing situation, make sure you are using an electronic leveler. Not only will this save time, it is 100 percent accurate.

Billing Software 
The days of writing out receipts and recording income on paper should be over. You want to make sure your time and materials are accounted for, and that you are adequately compensated. To do this, you want to be using roofing contractor software, as this will help you to automate the entire process. You’ll be able to focus on getting more jobs while someone else worries about insurance and getting you paid.

Virtual Assistant 
Many handymen are one person operations. You need a way to interact with clients when you are on the job, as you can’t always be in your office to answer the phone or email. There is where a virtual assistant can come in quite handy for you. They are surprisingly inexpensive given the services that they provide.

If you will use these four tools, you should find that your productivity and revenue increases as a result. It is important to remember the skills that have brought you to this point in your profession, but also to use technology as a way to make your life even easier. If you do this, you will find that you have much more time on your hands to enjoy the simple things in life.


Copyright © 2024 | Bruzzese Home Improvements | All Right Reserved | Web Design & Development by QualityMust