fbpx ...

The Ultimate Guide to Caring for and Repairing Your Door Handles

Introduction

Door handles may be a small part of your home or office, but they play a significant role in the functionality and aesthetics of those spaces. While they are arguably the most used fixture in our homes, they are also one of the most overlooked when it comes to maintenance and care. This comprehensive guide will help you understand the importance of maintaining and repairing door handles and provide you with practical tips and tricks to keep your door handles both eye-catching and functional.

Why Pay Attention to Door Handles?

Much more than being mere functional items, door handles contribute to the character and overall design of our homes. They can make an impression about the residents’ style, taste, and even socioeconomic class. Furthermore, door handles are significant for safety and privacy reasons, acting as the first line of defense preventing unauthorized entry into private spaces like bedrooms and bathrooms. On a more pragmatic level, door handles are constantly being used, making them susceptible to wear and tear. Ignoring them may end up costing you a lot more in the long run.

Choosing the Right Door Handle

Selecting the right door handle goes beyond just picking out a design that you like. It requires considering a variety of factors. The material the handle is made from – such as brass, nickel, stainless steel, or antique bronze – will play a significant role in its durability. The style of the handle is also essential, with options ranging from modern, minimalistic designs to more ornate, vintage styles. Furthermore, it is important to consider the room where the handle will be installed and ensure that the handle style matches the room’s decor. Failing to do so can disrupt the overall aesthetic of the space.

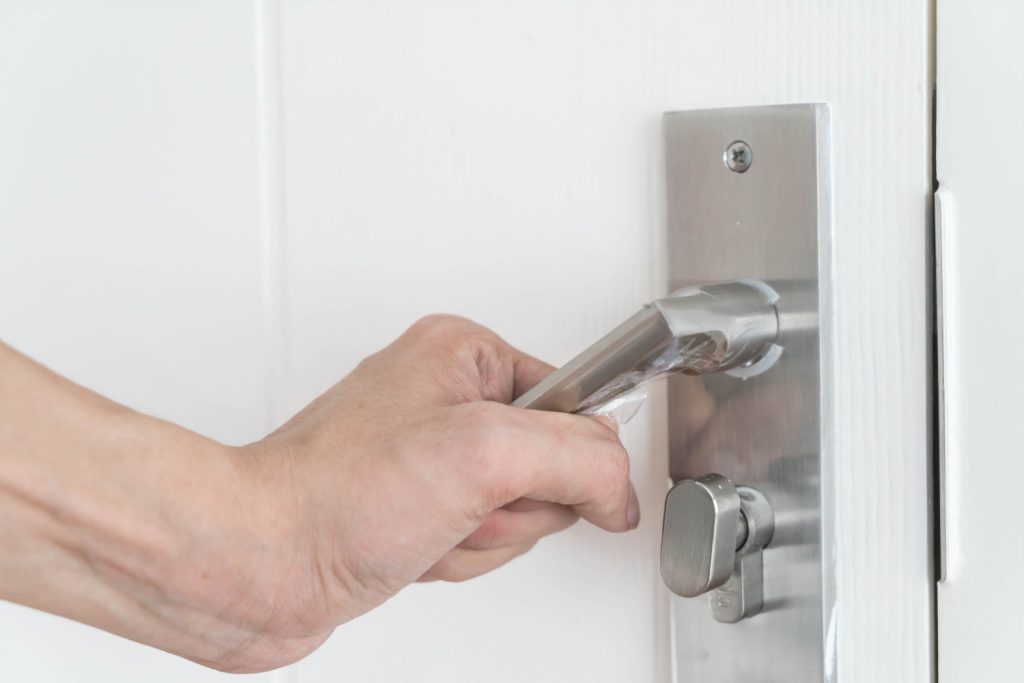
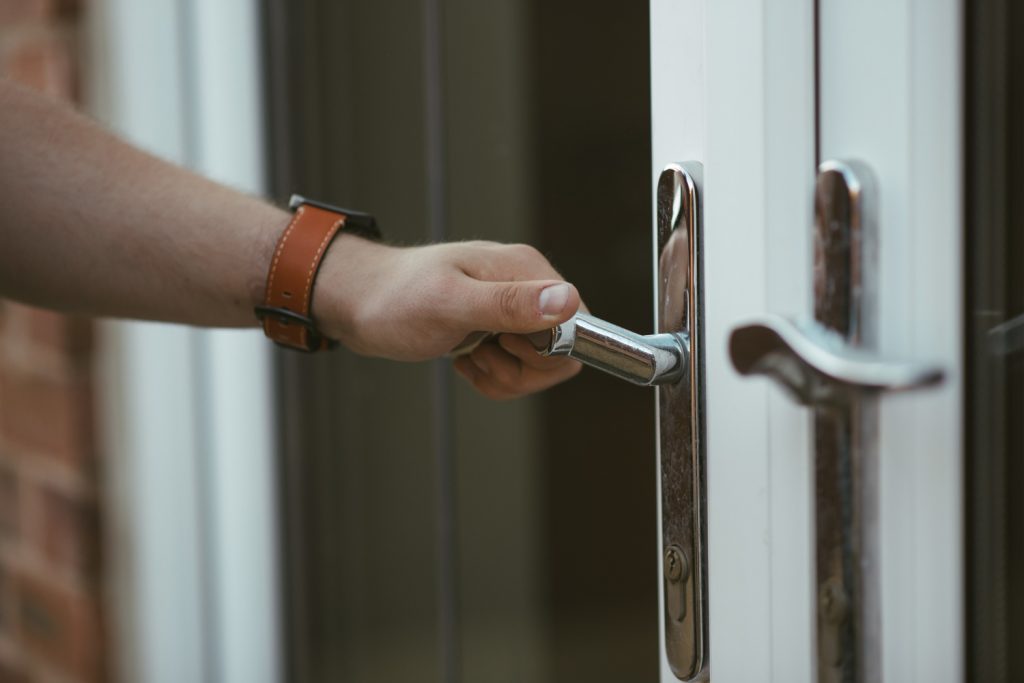
Understanding the Basics: Parts of a Door Handle

A basic door handle consists of several key components. These include the handle itself, which you grasp to open and close the door; the rosette or escutcheon, which is the plate that the handle rests on; the spindle, a small rod that connects the handle to the latch mechanism; and the latch mechanism, which keeps the door closed. Understanding these components can help you diagnose and troubleshoot any issues that may arise with your door handle.

Common Door Handle Problems and How to Identify Them

Like any part of your home, door handles can experience a range of problems. The most common issues include loose handles, squeaky handles, or handles that stick. If the door handle is loose, it may simply need to be tightened. A squeaky handle may require lubrication, while a handle that sticks could be a sign of a problem with the latch mechanism. By understanding these common door handle problems, you can quickly diagnose and fix them before they become bigger, more costly issues.

Simple Maintenance Tips for Door Handles

Regular maintenance can prolong the lifespan of your door handles and keep them looking their best. This can include routine cleaning to remove dirt and grime, polishing to bring out the shine, and tightening any loose screws or fixtures. It’s also a good idea to periodically check the lock mechanism and apply lubricant as needed, to ensure the smooth operation of the door handle.

Step-by-step Repair Guide

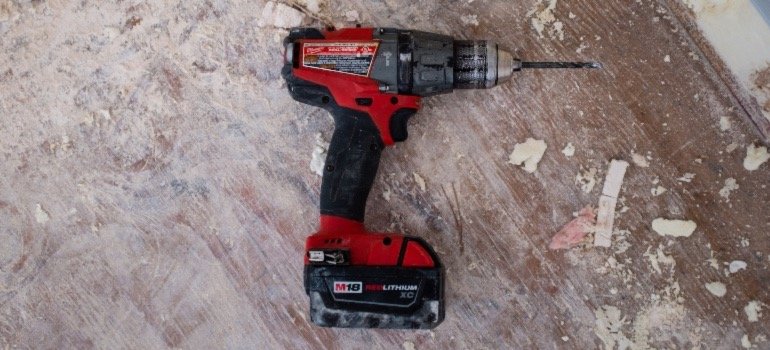
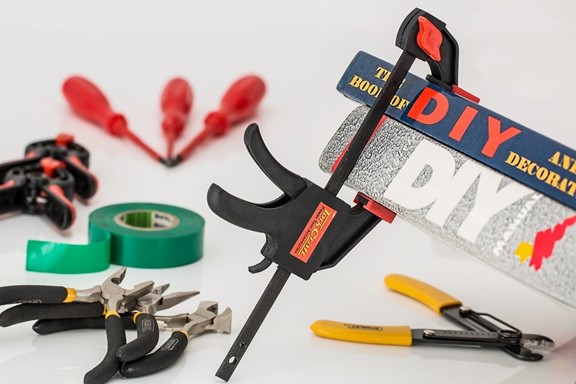
Repairing a door handle might seem daunting, but with the right steps and – potentially – the right tools, it is a manageable task. First, determine the problem. Next, gather the necessary repair tools. Depending on the problem, this may include a screwdriver, pliers, or a specialized door handle repair kit. Follow the step-by-step guide to address the issue, always ensuring to handle all components with care to avoid causing further damage.

When to Call a Professional

While some door handle problems can be addressed on your own, there are instances where it’s more prudent to hire a professional. For example, if you’re experiencing repeated problems, if the handle needs to be replaced entirely, or if the lock mechanism is breaking down. A professional door handle repair person can ensure the issue is resolved quickly and safely, preventing further damage and unnecessary cost.

Sustainability and Door Handles

In today’s environmentally-conscious world, it’s essential to consider sustainability when it comes to door handle maintenance and disposal. This could mean opting for door handles made from sustainable materials, or ensuring that old door handles are disposed of responsibly.

Conclusion

Knowing how to properly care for and repair your door handles can save you time, money, and stress in the long run. Regular maintenance, coupled with a good understanding of common door handle problems, can help ensure your handles remain functional, safe, and aesthetically pleasing for years to come. We hope the tools and information provided in this guide empower you to tackle door handle maintenance with confidence. If you encountered a specific issue that wasn’t covered, let us know. Your questions and experiences continue to enrich the information we deliver to our readers.

10 Ways to Free Up Space in Your Home

In the charming town of Apex, North Carolina, where homes blend traditional and modern styles, managing space efficiently is a common need among residents. Whether living in a historic downtown bungalow or a contemporary suburban home, maximizing space is key to maintaining a comfortable and inviting environment. This article offers practical and effective solutions for Apex residents and beyond, to create more space in their homes. From decluttering strategies to innovative storage ideas, these tips are designed to help you declutter and organize your living space efficiently.

1.      Decluttering: The First Step

The journey to a spacious home begins with decluttering. The change of seasons brings about different lifestyle and home decor needs, it’s especially important to regularly reassess your belongings. Start by categorizing items into those you need to keep, donate, or throw away. Be honest about what you use regularly and what has been gathering dust. For items with sentimental value, consider creative ways to display them or store them neatly. Regular decluttering not only frees up physical space but also brings a sense of order and calm to your home.

2.      Utilizing Storage Solutions

For Apex residents, local storage solutions like Apex North Carolina storage units offer a practical way to manage excess belongings. These units are ideal for storing seasonal items, such as holiday decorations, winter gear, or summer sports equipment. By using these off-site storage options, you can keep your home clutter-free without having to part with items that are only needed part of the year. Additionally, these units can be a lifesaver for those undergoing home renovations or simply needing extra space for family heirlooms and other infrequently used items.

3.      Maximizing Wall Space

Utilizing wall space effectively is an excellent way to free up floor space in your home. Diverse home styles range from historic to contemporary, and wall shelving and hanging organizers can complement any decor. Consider installing floating shelves for books, decorative items, or plants. Wall-mounted racks in the kitchen or bathroom can hold essentials while saving counter and cabinet space. Remember, vertical storage isn’t just practical; it can also be a stylish addition to your home’s aesthetic.

4.      Multi-functional Furniture

Incorporating multi-functional furniture is a smart way to maximize space, particularly in cozy homes or in modern apartments. Furniture that serves multiple purposes, like a sofa bed for guests or an ottoman with hidden storage, can drastically increase your home’s functionality without sacrificing style. Look for coffee tables with drawers, beds with under-storage, or dining tables that can extend for entertaining. These pieces offer practical solutions for storage while keeping your home comfortable and organized.

5.      Digitizing Paperwork and Media

Apex, blending tradition with modern living, offers the perfect setting to embrace digital solutions for reducing clutter. Digitizing paperwork and media is an effective way to free up space. Convert physical documents, CDs, and DVDs into digital formats and store them on a hard drive or cloud service. This not only clears physical space but also provides easier access to your files and media. For those treasured family recipes or historical documents, digitizing ensures their preservation and accessibility.

6.      Efficient Kitchen Organization

In every home, where the kitchen often serves as the heart of the house, efficient organization is key. Utilizing space-saving solutions like cabinet organizers, spice racks, and under-shelf baskets can make a significant difference. In Apex, where seasonal cooking is a cherished activity, maximizing pantry space is essential. Use clear containers for dry goods and stackable bins for canned items. Installing a hanging pot rack can free up considerable cabinet space. Remember, an organized kitchen not only looks great but also makes cooking and entertaining more enjoyable and less stressful.

7.      Bedroom Storage Hacks

Bedrooms in Apex, from quaint historic homes to modern apartments, can benefit greatly from smart storage solutions. Utilize under-bed storage boxes for out-of-season clothing or extra bedding. Consider installing closet organizers to maximize hanging and shelf space. Over-the-door racks can hold shoes, accessories, or small personal items. For children’s bedrooms, use storage bins for toys and books to keep the room tidy and functional. These simple hacks can transform your bedroom into a serene and clutter-free retreat.

8.      Reorganizing the Living Room

In many homes, the living room is a multipurpose space where families gather, entertain, and relax. To keep this area clutter-free, use furniture that doubles as storage, like coffee tables with drawers or storage ottomans. Wall units and bookshelves provide ample storage while displaying decorative items. If space allows, a built-in unit can be a stylish and practical addition. Regularly reassessing your living room setup to ensure it meets your current needs can also free up space and improve functionality.

9.      Seasonal Rotation of Items

In a city where the seasons distinctly change, rotating items accordingly is a practical way to manage space. Store off-season clothing, sports equipment, and decor in labeled bins in closets, attics, or storage units. This not only frees up space but also keeps your home in sync with the season. Make sure to clean and repair items before storing them, and place frequently used items in easily accessible spots. This practice helps maintain organization throughout the year and makes seasonal transitions smoother.

10. Regular Maintenance and Reassessment

Maintaining a clutter-free home requires ongoing effort. Set aside time regularly to reassess and reorganize your space. This could mean decluttering a specific area monthly, revisiting storage solutions, or simply tidying up regularly. Keeping on top of clutter prevents it from becoming overwhelming and ensures that your home remains a comfortable and inviting space. Remember, a little maintenance can go a long way in keeping your home organized and spacious.

Conclusion

Creating more space in your home, particularly in a beautiful and diverse setting like Apex, North Carolina, is about combining practicality with creativity. From decluttering and utilizing off-site storage solutions to rethinking furniture choices and digitizing media, each strategy plays a crucial role in enhancing your living space. Remember, the key to a spacious and organized home lies not only in the initial efforts of decluttering and organizing but also in maintaining these practices regularly. With these tips, you can transform your home into a more comfortable, functional, and spacious haven, perfect for enjoying the unique charm and lifestyle of this delightful North Carolina town.

Transformative Ideas: Unleashing The Potential Of Your Garden Sheds

Introduction

Garden sheds, typically reserved for storing gardening tools or clutter, hold untapped potential. With a dash of creativity and a sprinkle of elbow grease, these humble structures can be transformed into something extraordinary. So, are you ready for some garden shed transformations that go beyond the ordinary?

Ever wondered how you can breathe new life into that humble garden shed sitting idly in your backyard? Well, with a dash of creativity, it’s possible to transform it into something truly extraordinary. Garden sheds aren’t just for storing garden tools anymore. They’re brimming with untapped potential waiting to be unleashed. Think about it – a cosy home office tucked away from the hustle and bustle of your main house, a private art studio where you can let your creativity run wild, or perhaps a tranquil yoga retreat? The options are limited only by your imagination!

The best part? You don’t need to be a DIY whiz to make it happen. With a bit of planning and some elbow grease, you can transform your garden shed into a functional and beautiful space that adds value to your home. And who knows? Your revamped garden shed might just become your favourite spot in the house.

Remember, your garden shed is more than just a storage space – it’s a blank canvas waiting for your transformative ideas. So why not roll up your sleeves and start creating the garden shed of your dreams? With the right approach, your humble garden shed can become anything you want it to be.

Garden Shed Ideas

Garden sheds can be so much more than just a storage space. From a cozy reading nook to a fully functional office, the possibilities are endless. You can even turn your garden shed into a creative studio, a kid’s playhouse, or a tranquil yoga retreat. The key is to think outside the box and let your imagination run wild.

Shed Transformations

Shed transformations can bring a new sense of purpose to these often-neglected spaces. Whether you’re an artist seeking a quiet place to create, a fitness enthusiast needing a home gym, or a work-from-home professional requiring a dedicated workspace, your garden shed can be the answer. It’s all about identifying your needs and tailoring the shed to meet them.

Garden Shed Designs

When it comes to garden shed designs, the sky is the limit. Traditional wooden sheds offer a rustic charm, while modern metal sheds provide a sleek, contemporary look. Depending on your aesthetic preferences and the overall theme of your garden, you can choose a design that complements your outdoor space beautifully.

DIY Garden Shed

If you’re handy with tools and love a good DIY project, building your own garden shed can be a rewarding experience. From selecting the right materials to choosing the perfect spot, every step of the process allows you to put your personal touch on the shed. Plus, it gives you the freedom to customize the shed according to your specific requirements.

Garden Shed Interior

When transforming your garden shed, don’t forget about the interior. A well-designed interior can make your shed more functional and comfortable. Consider installing shelves for storage, adding a desk for workspace, or incorporating comfortable seating if you’re planning to use it as a reading or relaxation nook.

Garden Shed Materials

The choice of garden shed materials depends largely on your budget, the desired durability, and the look you’re going for. Wood is a popular choice for its natural beauty and versatility. Metal sheds are durable and require less maintenance, while plastic sheds are lightweight and resistant to rot and rust.

Garden Shed Benefits

A well-designed garden shed offers several benefits. It provides additional storage space, helps declutter your home, and can even add value to your property. Moreover, if transformed creatively, it can serve as a private retreat, a productive workspace, or a hub for your hobbies.

Garden Shed Storage Solutions

Even if your garden shed serves a specific purpose like a home office or a gym, it can still provide storage solutions. Install wall shelves, hooks, or overhead storage to utilize space efficiently. Consider using storage boxes or baskets for a neat and organized look.

Garden Shed Maintenance

Regular maintenance is essential to keep your garden shed in top condition. This includes treating wooden sheds to prevent rot, repainting metal sheds to avoid rust, and regularly checking the roof for any leaks. With proper care, your garden shed can last for many years.

Custom Garden Sheds

If you have specific requirements or a unique vision for your garden shed, consider opting for a custom garden shed. You can choose the size, design, materials, and interior layout to suit your needs. Although it may be a bit more expensive, the end result will be a shed that’s perfectly tailored to you.

Conclusion

Garden sheds hold immense potential for transformation. Whether you’re seeking additional storage, a dedicated workspace, or a personal retreat, your garden shed can be the solution. With a bit of creativity and effort, you can turn this often-overlooked space into an integral part of your home. So, why wait? It’s time to reimagine your garden shed!

Remember, the magic lies not in the garden shed itself, but in how you choose to use it.


Essential Power Tools for Home Maintenance and DIY Projects

A power drill

Proud homeowner or not, we all love the process of creating or fixing things in our homes. Home maintenance and DIY projects have an undeniable allure. They’re not just a way to save money, they’re also a source of personal satisfaction and a unique opportunity to leave your personal touch on your living space. But to transform your ideas into reality and to do these jobs right, you need to have the right essential power tools at your disposal. These tools are the backbone of any successful DIY endeavor, providing you with the versatility and precision necessary for various tasks.

The Importance of Having the Right Tools

Having the right tools can entirely change the dynamics of any project. The importance of using the correct tool is unparalleled – it can transform a challenging task into a simple process. It also ensures that the final result is polished, professional, and exactly as envisioned. Additionally, investing in the right essential power tools can provide significant cost savings in the long run. They reduce the frequency of calling in professional help for minor home repairs or improvements. Interestingly, the right tools also help you gauge when you need professional plumbing help, making you a more informed and empowered homeowner. Indeed, understanding and effectively using these tools is a critical part of successful DIY and home maintenance.

Essential Power Tools for Renovating a Home

Renovating a home can often be a complex task, requiring both a clear vision and the right tools to turn that vision into reality. Each step, from removing old fixtures to installing new ones, can feel like an intimidating mountain to climb. Yet, having the right power tools can simplify these tasks immensely, making the renovation process more manageable. Moreover, the use of these tools can greatly reduce your environmental impact when renovating. The correct selection and efficient use of power tools can lead to significant reductions in energy consumption and material waste. Thus, for any homeowner planning a renovation, a well-chosen collection of power tools can be a game-changer.

Using a Storage Unit

A storage unit may not be a power tool, but it plays a crucial role during home renovations. Amidst the chaos of a renovation project, a storage unit offers a safe haven for your furniture and other belongings. It protects them from dust, damage, and accidental paint splatters, ensuring they remain in good condition throughout the renovation process. Moreover, a storage unit offers additional space, allowing for a more organized and efficient renovation. It makes your home more accessible and easier to navigate during the upheaval of a remodel. In essence, a storage unit can be a valuable asset as it helps to streamline the renovation process, making it smoother and more manageable.

Power Drill: The Most Versatile Tool

The power drill is often hailed as one of the most versatile tools you can have in your home toolbox. It’s a tool that transcends the boundaries of typical tasks, capable of not only drilling holes but also driving screws and even mixing paint with the right attachment. For any home renovation project, having a good quality power drill can make a world of difference. From drilling holes for mounting shelves to screwing in fixtures, it comes to the rescue in a myriad of situations. With a power drill, even the most daunting tasks become accessible, opening the door to a wide range of home improvement possibilities.

Circular Saw: For the Heavy-Duty Tasks

Next up is the circular saw, a tool that is invaluable for any heavy-duty cutting task. The circular saw is a powerhouse, capable of cutting through various materials with ease. Whether you’re resizing a door, cutting through a block of wood, or even tearing down drywall, a circular saw can make the process much quicker, more efficient, and more precise. It’s a tool that is designed to tackle substantial tasks, offering unparalleled cutting power for those larger, more demanding projects. However, like with any power tool, safety is paramount. Always wear safety goggles, keep your fingers clear of the blade, and follow the manufacturer’s instructions to ensure safe operation.

Jigsaw: Precision in Cutting

When it comes to tasks requiring precision cutting, the jigsaw emerges as the ultimate companion. This power tool is the epitome of precision and flexibility, allowing for intricate shapes and curves to be cut with ease. From crafting an intricate design in a piece of plywood to trimming a piece of countertop, the jigsaw is your go-to tool. It’s not limited to wood, either. With the right blade, a jigsaw can also cut through materials like metal and ceramic. So whether you’re into crafting, carpentry, or just general home improvement, a jigsaw is one of those essential power tools that can significantly enhance your DIY capabilities.

Power Sander: Achieving Smooth Surfaces

When it comes to achieving smooth, flawless surfaces in your DIY projects, a power sander is an indispensable tool. It’s not just about making surfaces look good – a well-sanded surface can drastically improve the adhesion of paint, varnish, or stain, enhancing the durability and look of your project. From reviving old furniture to prepping new woodwork, the power sander can make all the difference. However, as you step into the realm of electricity and power tools, caution is essential. While sanding is typically a DIY task, when dealing with electrical outlets or wiring, it’s best to get the help of a professional electrician.

Router: For Crafting and Designing

When your DIY projects involve crafting and designing, a router is an essential power tool that adds an extra level of finesse to your work. With a router, you have the ability to shape the edges of your wooden pieces, create grooves, and hollow out areas, adding intricate details that can truly elevate the aesthetics of your project. It’s not just about appearances, either. Routers also help in functional tasks like creating joints for furniture assembly. This tool, combined with your creativity, allows you to transform a plain piece of wood into a piece of art, adding a personal touch to your woodwork.

Nail Gun: Time Saver for Many Projects

For tasks that involve nailing, a nail gun is an essential power tool that can save you a considerable amount of time and energy. Traditional hammer and nail work can be laborious and tiring, especially for large projects. However, with a nail gun, the process is accelerated significantly. From framing walls to installing trim, a nail gun can make these tasks more efficient and less strenuous. However, while it’s an incredibly useful tool, it also comes with a level of risk. Nail guns are powerful and can be dangerous if not used properly. Always remember to put safety first, follow the manufacturer’s guidelines, and handle the tool with care.

Power Screwdriver: Essential for Every Tool Box

Finally, we come to the power screwdriver, a tool that may seem small, but packs a powerful punch in terms of usefulness and convenience. Screwdrivers are essential for a wide variety of tasks, from assembling furniture to installing light fixtures, and the power version takes this utility to another level. The power screwdriver eliminates the manual labor associated with driving screws, making the process faster and significantly less tiring. Even for tasks that seem minor, like tightening a loose screw, this tool can save time and effort. It’s compact, easy to use, and is truly an essential addition to every toolbox.

To Conclude

Having the right essential power tools can make your DIY projects and home maintenance tasks a breeze. From power drills to nail guns, each tool plays an important role and can help you achieve professional results. Remember, while DIY can be fun and fulfilling, don’t hesitate to seek professional help when necessary.

Best DIY Projects to Start With a Fixer-Upper

Buying a fixer-upper isn’t just about saving money. Fixer-uppers are incredible real estate investing opportunities for those who enjoy do-it-yourself (DIY) projects. It’s not uncommon to see homebuyers purchase a property and renovate it while living there. This is a good strategy for house flipping because it allows homebuyers to save money on living expenses and also on remodeling costs by performing the repairs themselves.

DIY investment projects also enable homebuyers to go after deals that other buyers would shy away from, such as a property with structural damages or multiple code violations. For homeowners dealing with issues like this, you can view this comprehensive guide on how to sell a house with code violations https://sdhouseguys.com/sell-house-with-code-violations-san-diego/. You can sell nearly any type of property, regardless of the condition, by finding the right buyer. Homebuyers that prefer DIY projects are perfect potential real estate professionals you can sell your home to.

When encountering your next fixer-upper property that needs a ton of work, here are several popular DIY projects to tackle when kickstarting your renovations.

1.    Prioritize Certain Repairs

As with regular home repairs or renovations, fixer-upper DIY projects usually fall under “necessary” and “upgrades when I have time.” Create a scope of work and renovation roadmap for those first. Experienced homebuyers and developers typically have a hitlist of repair items in mind, like the bathrooms or kitchen, that they renovate regardless of the situation. These items normally add value to a home when they are renovated.

Many renovation priority lists are based on budget. When it comes to facelifts for fixer-uppers, larger projects often run between $15,000 and $20,000. These prices vary depending on your market. For example, We Buy Houses in Denver, a homebuyer in Colorado, stated that, “Supplies continue to rise for many items used in DIY home projects. Lumber was a huge increased cost over the past few years that drastically affected the projects we were able to take on.” You can learn more about We Buy Houses in Denver here https://webuyhousesindenver.org/. It’s important to price out the costs of the DIY renovations you’re considering before diving into a project.

2.    Fresh Coat of Paint

A simple yet effective DIY project that will transform any fixer-upper is painting. A fresh modern coat throughout the house instantly changes the feel and opens up DIYers to even more ideas. Consider painting walls, cabinets, or the front door. A fresh coat of paint immediately attracts new eyeballs to a home. If you’re considering selling the property in the future, a new paint job will help you generate more interest. Consider reviewing other homes on the block as well when considering the exterior paint color. It’s oftentimes worth painting the outside of the home as well to make your house pop with a fresh look.

3.    Rethink Shelving 

Have you ever watched a cooking show and admired the use of floating shelves to increase kitchen storage space and display plates, mugs, pots, and pans? The good news is that making floating shelves is one of the easiest DIY projects to tackle. All you need are some 2×3 boards, some power tools, and a free afternoon. Creative shelves can add a fun aesthetic to your house while also being practical. You can think outside the box – and kitchen – when adding shelves throughout your home. Small library-style shelves for books, vases, or plants can enhance the overall style of a room, creating a new ambiance that you can enjoy. If you work from home, creating your next home office is a great DIY project that offers huge returns of happiness once you can start using it.

DIY Fixer-Upper Ideas

The sky is the limit for DIY projects that you can entertain for your next home renovation. Certain DIY projects will be faster – and cheaper – than others. Prioritize what you truly want out of a project. Also, clearly define your end goal. Do you plan to live in this home forever after you fix it? Many homebuyers and homeowners plan to sell their houses shortly after remodeling them. With your end game in sight, estimate the cost of your next DIY home project and dive in.

What Is a Catio and Why Does Your Fur Baby Need One?

Cats are one of the favorite pets in the world. In the US alone, there are around 94 million pet cats. And while cats make great companions, they also have a reputation for being independent and aloof.

If you’re a kitty owner, you know how much your fur baby loves to spend time outdoors. But what about when it’s too hot, cold, windy, or wet outside for them to enjoy? That’s where a catio comes in! Catios are becoming popular among cat owners who want the best for their furry babies. Commonly known as cat patios or enclosures, these structures provide their furry friends with a secure outside space.

What Is a Catio?

A catio is a fenced-in outdoor space that allows your kitty to enjoy the great outdoors while staying safe and sound. Usually, catios are made of wire mesh or chicken wire and can be attached to your home or placed in your yard. It comes in various sizes, and you can customize them to meet your feline friend’s specific needs. It offers a safe place for your cat to roam and explore while keeping them away from the dangers of the outdoor world.

To build a catio for your cat, you can hire welding services. It is essential to do your research before you build a catio, as it needs to be the perfect size for your cat and have the correct type of wire mesh. To search for the best catio builders in your area, you may search online. For example, if you live in Billings, MT, you may search for “Welding Billings MT” or “Catio Builders Billings MT.” It will provide a selection of websites for you to compare and choose the candidate most suited for the job.

Why Does Your Fur Baby Need a Catio?

There are plenty of reasons why your fur baby needs a catio. This section will cover some of the most important reasons for building a catio for your cat.

1. It Provides Them with Fresh Air and Sunshine

Cats who spend most of their time indoors lack fresh air and sunshine. While you may crack open a window for them sometimes, it’s not the same as letting them outdoors to enjoy nature. A catio allows them to get some fresh air and take in some much-needed vitamin D from the sun. It gives your feline friends the best of both worlds – they enjoy the outdoors from the comfort of their catios.

2. Safe Place to Play

Another reason your cat needs a catio is that it provides a safe place to play and explore. Cats love to roam around, but they can quickly get into trouble if they’re not supervised. They love to climb and scratch, so providing them with a safe place to do these things is crucial. Fur babies outdoors are at a higher risk of being hit by cars, thrashed by other animals, or getting into spats with other cats. By keeping them indoors, you can help reduce these risks. A catio gives them the freedom to explore without you having to worry about them getting lost or hurt. It’s the perfect way to let them enjoy the outdoors without danger.

3. Protection from the Elements

Catios are also great for protecting your cat from the elements. Your cat can still enjoy the sunshine and fresh air from the comfort of their catio even if the weather is not pleasant. It protects them from the harsh weather conditions and allows them to stay comfortable no matter what the weather is like. It is especially beneficial for elderly cats or those with health conditions that make them more sensitive to the weather. A catio is a must-have for your fur baby if you live in an area with severe weather conditions.

4. Lessens Your Stress

As a cat owner, it’s natural to worry about your fur baby when they’re outdoors. Cats are naturally curious creatures, so it’s impossible to keep an eye on them 24/7. But with a catio, you can let them enjoy the outdoors without worrying about getting into trouble. It is beneficial if you work long hours or travel often. You may rest easy knowing your cat is well-protected even when you’re not home.

5. Loose Cats Are a Danger to Your Cat

If you live in an urban area, there’s always the risk of your cat coming into contact with other loose cats. These cats may be carrying diseases or parasites that can harm your cat. They may also fight each other, which can lead to serious injuries. Many diseases like rabies, FIV, and feline leukemia are fatal to cats. So, keeping your cat safe from other cats is essential by providing them with their own space in a catio.

6. It’s Good for Their Mental Health

Just like humans, cats need outdoor time to stay mentally healthy. Being trapped in a room can create feelings of boredom, sadness, and anxiety. It can lead to destructive behaviors such as scratching furniture or urinating outside the litter box. A catio gives them a place to explore and helps keep their minds active. It also allows them to get some much-needed exercise, which is essential for their mental and physical health.

7. It’s Good for the Environment

A catio is also good for the environment. Keeping your cat in catios can help reduce the number of birds and other small animals killed yearly by cats. According to a Smithsonian Conservation Biology Institute study, outdoor domestic cats kill billions of birds and other small animals yearly. It has a devastating influence on the environment and wildlife populations. Keeping your cat in a catio can help reduce this number and positively impact the environment.

Conclusion

Giving your fur babies the best life possible is paramount for a pet parent. That means providing them with a healthy and happy environment. A catio is a perfect way to provide them with a secure outdoor experience. Not only will your kitty love spending time in their catio, but you can also feel good knowing they are living their best lives.

This Is How to Build a Shed for Your Home

Experts say the North American outdoor shed market will grow to more than $2.5 billion by 2028. Sheds are becoming popular with homeowners as a low-cost way to add extra space. 

So if you want to add a residential shed to your backyard, you’re in the right place. Keep reading to learn how to build a shed in four easy steps!

1. Prep

Before you begin building a shed, you need to determine the size and style of your shed. Consider the door and windows you want. Do you need a ramp to get large equipment in and out?

Make a shed drawing, identify where you will build it, and create a budget.

The cost to build a shed can vary widely depending on its size, the materials, and any additional features you want to include. Knowing how much you want to spend will help you determine the layout and design of your shed.

Most importantly, get a building permit if your community requires it. 

With a plan, you can collect the shed materials and get building.

2. Build the Foundation

Usually, you can build a wood base on top of concrete blocks set on gravel. However, if your yard has a steep slope or you live in an area with high winds, you’ll want to use a concrete mix to build on.  

Start by building the perimeter of the foundation frame. Then, place the concrete blocks in the corners. If it’s level, you can begin setting the blocks. Using gravel under the blocks helps with drainage.

When the blocks are set, you can place the foundation on top. Finish by adding joists and sheathing. 

3. Frame the Walls and Roof 

With the foundation secure, you can start building the walls. As you construct and secure the walls, install any windows you want. When all the walls are in place, you can nail them to the corners. 

Next, you can build the roof. There are several different ways to frame a roof. They include using:

  • A ridge beam
  • Common Rafters
  • Collar ties
  • Roof trusses

You can use the shed floor to help measure the roof frame. When you finish the frame, secure it to the walls. 

Then you can add siding and roofing. Plywood is a common siding option, as is oriented standard board (OSB). Asphalt shingles are the most common roofing option. 

4. Add the Door and Finishes

Now you can install the door to your front wall. 

Once the door is in place, you can paint or stain the shed. You can also add any extra features, such as lighting or furniture. Click for a battery shed light that will illuminate the entire space without needing electrical wiring! 

How to Build a Shed in 4 Easy Steps

Now that you know how to build a shed, you can begin your project and have a shed in no time. Whether you want to store your gardening materials, have an area for arts and crafts, or just have space for extra storage, you’ll be able to undertake this project yourself.

Looking for more articles like this one? Check out the rest of the blog now!

Ways to Save on Home Remodeling Costs

According to the National Association of Realtors, the average homeowner spends about $5,000 on home remodeling projects each year. So if you’re planning a home renovation, saving as much money as possible is important, so you don’t lose your budget.

In addition to being expensive, home remodeling can also be time-consuming and stressful. The key to a successful renovation is to plan and budget carefully.

No matter your budget, there are ways to save on home remodeling costs. By being creative and resourceful, you can cut down on expenses without sacrificing quality. Here are some tips to get you started.

1. Shop around for the best deals

You’d be surprised at how much you can save just by shopping around. It pays to compare prices at different stores when it comes to big-ticket items like appliances or flooring.

Don’t be afraid to haggle with contractors, either. If you can get a lower price from one contractor than another, go for it. The reason why contractors are willing to negotiate is that they want your business. And, the more project they have, the lower their overhead costs will be.

2. Do it yourself

If you’re handy around the house, there’s no reason to hire a professional for every home improvement project. Instead, if you’re confident in your abilities, tackle simple tasks like painting or installing new light fixtures. Not only will you save money, but you’ll also get a sense of accomplishment from completing the project yourself.

In such situations, a storage unit can come in handy. With a storage unit, you can keep your tools and materials organized and out of the way until you’re ready to use them. But, first, make sure you’re familiar with city ordinances before starting any major projects, as some require permits.

3. Reuse and recycle

One of the best ways to save money on home remodeling is to reuse and recycle materials whenever possible. For example, if you’re removing old flooring, see if you can use it elsewhere in your home or sell it online.

The same goes for furniture. If you’re replacing an old couch, try selling it online or giving it to a friend or family member. You can also check with local thrift stores to see if they’re interested in taking it off your hands.

The reason why reuse and recycle is so important is that it helps to keep costs down. So, not only will you save money, but you’ll also be doing your part to help the planet.

4. Know when to splurge

While it’s important to save money on home remodeling, there are also times when it’s worth it to splurge. For example, if you’re renovating your kitchen, you’ll want to ensure that you have high-quality appliances. After all, your kitchen is one of the most important rooms in your house.

The same goes for flooring. Again, if you’re spending a lot of time in your home, you’ll want to ensure that your floors are comfortable and stylish.

In general, it’s a good idea to splurge on items that you’ll use often or that will have a big impact on the look of your home. However, by being selective with your spending, you can still get the home of your dreams without going over budget.

5. Get creative with financing

If you’re not careful, home remodeling can get expensive quickly. One way to avoid this is to get creative with your financing. For example, consider using a personal loan instead of a home equity loan.

Personal loans tend to have lower interest rates than home equity loans, so you’ll save money in the long run. You can also use a credit card with a 0% APR introductory rate to finance your home remodeling projects.

The key is to find a financing option that works for you. Being creative can save money and keep your home remodeling costs under control.

6. Shop at salvage yards

Check out salvage yards if you’re looking for unique materials for your home remodeling project. Salvage yards are a great place to find old doors, windows, and other architectural elements.

You can also find furniture, appliances, and other household items at salvage yards. Just be sure to scrutinize the items before you buy them.

And, if you’re not sure how to use the materials you find, ask a salesperson for help. They’ll be able to give you some ideas and point you in the right direction.

7. Hire a professional

Hiring a professional is a good idea if you’re not confident in your DIY skills. Yes, it will cost you more money, but knowing that the job will be worth it.

When hiring a professional, be sure to get at least three quotes. It will help you to compare prices and find the best deal.

You should also ask for references and check out the contractor’s portfolio. And, be sure to get everything in writing before signing a contract. However, if you do your research, you should be able to find a reputable contractor you can trust.

8. Stay on budget

One of the best ways to save money on home remodeling is to stay on budget. So before you start your project, make a list of all the things you want to do.

Then, prioritize the items on your list and allocate a certain amount of money. Once done, you’ll be less likely to overspend on your project.

Setting aside some money for unexpected expenses is also a good idea. This way, if something comes up, you won’t have to worry about going over budget.

The Bottom Line:

Home remodeling can be expensive, but there are ways to save money. You can keep your costs down by being selective with your spending, getting creative with financing, and shopping at salvage yards. And, if you’re patient, you can find great deals on materials and labor. Finally, stay on budget and hire a professional if you’re not confident in your DIY skills. Following these tips can save money on your home remodeling project without sacrificing quality or results.

DIY Countertop Replacement: A Step-by-Step Guide

On average, US homeowners spend $12,000 on kitchen remodels. The kitchen is often viewed as the heart of a home where family gatherings and homecooked meals happen.

If you want to boost your kitchen space but don’t have the budget for a full remodel, consider countertop replacement. It can breathe new life into your kitchen without breaking the bank.

In this step-by-step DIY guide, we’ll tell you how you can install new countertops in your home.

When to Replace Countertops

Replacing countertops is a big job, and you might not know when it’s time to consider an upgrade. It’s time to think about replacing your countertops when: 

  • You see stains, burns, or scratches
  • They’re outdated
  • You’re looking to boost value
  • You’re renovating
  • There’s been smoke damage
  • You want an upgrade on a budget

If you notice any damage, replacing your countertops is an easy way to breathe new life into your kitchen. 

1. Choose New Countertops

There are several options available if you’re unsure how to choose new countertops. Laminate is an affordable option that is easy to work with for a DIY project, but granite countertops and engineered stone and engineered stone are other affordable options that are easy to maintain with a more high-end. Natural stone tends to need extra care.   

2. Get Your Measurements

Measure the dimensions of your countertops before starting work on your DIY countertop replacement project. It helps to draw a diagram of your counter with your measurements to have a visual guide for your project.  

3. Remove Your Sink and Other Obstacles

Clear your countertops of any clutter or appliances. Then, you’ll want to uninstall your sink and set it aside as you work. Shut off the valve, uninstall the sink drain, and unhook the supply hoses before removal.

4. Remove Old Countertop 

Look inside the cabinets for the brackets and use a drill to unscrew them. Once these are removed, you should be able to lift the countertop right off. If it gives any resistance, don’t force it, and double-check for any missed screws.

5. Cut the Countertop

If you didn’t order materials custom sized to your measurements, you’ll need to cut them to shape. Don’t forget to make your cutout for your sink or other obstacles. After cutting your dimensions, smooth down the edges.

This is often one of the most difficult steps. If you need some more help, check out these home renovation tips for skill levels needed for different DIY countertops.

6. Install 

When it’s time to install your countertop, lift it into its place. To make things secure, drill back into the angle brackets inside your cabinets to tighten your countertop and prevent movement.

7. Shape and Clean Up Edges

If you notice any excess material, shape it to fit the proportions of your kitchen. Afterward, clean up the edges with bevel or trim to create an appealing profile.

8. Re-Install the Sink

Add the finishing touches to your DIY countertop installation by re-installing your sink. Attach the connections and slide your sink into the cutout you made on your countertop.

Countertop Replacement Made Simple

With this DIY countertop replacement guide, you can have a new countertop in as easy as 1, 2,3! A new countertop is sure to be a positive upgrade to your home that livens up your kitchen space.

Head over to our blog page for more home improvement articles.

Living in Cramped Quarters: Small Space Storage Solutions

A lot of people turn to small spaces due to affordability and easy maintenance, but storage can turn out to be a hassle.

There’s no need to worry, though. With the right solutions and a bit of ingenuity, you’ll find yourself on the way to small space success in no time. We’re here to help you get started, though.

Read on to learn a few small space storage solutions.

1. Don’t Be Afraid to DIY

Buying smaller furniture for a space can be expensive, which is where DIY options come into play. It’s a great way to customize furniture that accustoms your home.

2. Take Advantage of Vertical Storage

Whether you use tall bookshelves, hooks, floating shelves, or even sconces for lighting instead of table lamps, taking advantage of the vertical space your walls have to offer is a great thing to do. You can hang folding chairs or your bike if you have the space, or place your books and other essentials on the shelves you choose to put up.

Hooks are also great for things like shelves, jewelry, towels, and even handbags. You can also choose to display clothes if you have any nicer pieces you’d like to hang up!

3. Double Duty Furniture

Things like murphy beds and ottomans with storage space are perfect for small spaces. When everything has a purpose and a place it’s easier to organize your space the way you want it, rather than having clutter spread everywhere.

You can also opt for stools as side tables that act as seating when you have company over, and a sleeper sofa so you can have guests over with little to no worries.

4. Make Use of Awkward Space

Finally, don’t forget about the doors in your space, or any other oddly proportioned corners that might be in your home. You can opt to hang hooks over the back, or you can place floating shelves in the space between the door jam and the ceiling.

If you have other corners in your space, DIYing a shelf of some kind isn’t hard or expensive. You can also place a small breakfast nook in areas you might not have thought to use before, or make space for a vanity or other creative area.

Blanket ladders are another great thing to use here, and they’re a cute way to store extra towels or other linens you might have lying around. 

Don’t Forget These Small Space Storage Solutions

Now that we’ve gone over a few of the best small space storage solutions, are you ready to get started? Remembering these tips is a great way to make the most of what little space you might have, while still bringing your personal taste into account. Don’t forget to create the space you want, rather than one that’s functional and nothing else.

For more on the latest in home and lifestyle, check out the rest of our website.

Copyright © 2024 | Bruzzese Home Improvements | All Right Reserved | Web Design & Development by QualityMust