fbpx

Making Sure Your Home Move Doesn’t Turn into a Nightmare

Making Sure Your Home Move Doesn't Turn into a Nightmare

All those people who have moved home at least once in their lifetime will vouch for the fact that it is an overwhelming task, regardless if they moved just around the corner or to another part of the world. The stress of having to cover a myriad of activities in order for everything to go as smoothly as possible usually lingers for days after everything passed, not to mention the scope of it if anything serious went wrong after all. Here is what needs to be done so that it does not turn into a nightmare.

Every detail counts

Moving house is a serious task and requires careful planning in order to be successful. What this means is that it is better to take care of every little detail in advance than to be sorry you missed something and end up living your worst nightmare. To begin with, make a detailed checklist of all activities that need to be done. Secondly, make sure you follow it through to the end. Be realistic about your deadline. Do not expect to finish overnight and by all means, do not rush things by skipping anything from the list. If you feel you are way over your head in it, ask your friends for assistance, or hire a professional to help you finish everything smoothly.

Packing

In order to save time and pack everything safely, start packing way prior to your moving day. Start with out-of-the-season clothing and items that are rarely used. If possible, dedicate a spare room or a garage for packed items in order for them not to get in your way in the meantime. Use specialized boxes for sensitive items and additional packing paper for fragile items, especially those made of glass. Clearly mark every single box. It will make loading and unloading, and especially unpacking, a lot easier and save you a ton of time. Finally, take this opportunity and declutter in order to save some space.

Making Sure Your Home Move Doesn't Turn into a Nightmare

Additional packing concerns

Even though boxes will be sufficient to cover the majority of small and mid-sized items, bulkier stuff needs to be protected as well, particularly mattresses and furniture. Using mattress bags is the easiest solution for the former, while furniture pads proved to be most convenient and efficient when the latter is concerned. When artwork and particularly fragile items are concerned, packing paper will not suffice on its own. Use bubble wrap first and then pack everything in packing paper for additional protection.

Choose a reliable courier

All the effort you made carefully packing all your belongings could be in vain if you choose an unprofessional or inexperienced courier. In order for all the items to reach their final destination, every step of the way counts, say the people behind Instatruck.  Everything starts with choosing a truck with a volume suitable to transport all the goods without damaging them. Loading and arranging them within the desired volume is equally important for the transport to go smoothly. Unloading all the items is the final touch that no reliable courier would leave to chance. Once the items have reached their destination intact, it is solely up to you to safely position them in your new place.

Making Sure Your Home Move Doesn't Turn into a Nightmare

Arranging everything in the new place

It is natural that once everything has reached the new destination, you wish to arrange all the items as soon as possible and get on with ordinary life. Once again, do not rush things or you will end up having to rearrange everything several times in order to put everything in its designated place. Read the labels on the boxes, put each in the right room and only then start to unpack. Take your time, enjoy this activity and make your new home immediately feel like one.

Taking your time and doing everything according to your detailed plan guarantees less stressful moving and minimizes the chances of turning it into a nightmare. And, before you know it, everything will be over and your new home perfectly arranged.


The Psychology Of Color On Interior Design

When it comes to interior design, colors are not randomly used. Interior designers know how to use colors to create an emotional impact and achieve a desired result. If you want to feel calmer, more comfortable, more cheerful or dramatic, colors are powerful when you want to improve your mood.  Even though we respond to colors in similar ways, the psychological effects of a color might not be the same for you as it is for someone else.

When choosing the ideal interior color, there are a few things to take into consideration. The amount of time you will be spending in a room, the look and the feel of the space you’d like to induce are important. You would also want to consider the room position and the time of the day that the sun will enter the room. The size of the room will drive your color choice as well. For example, a room can look bigger with a white color where in contrast, a dark color will make a room look smaller.

Check out our infographic provided by IMI Design and learn more about what each color can do for your room. If you feel like deciding on a color is overwhelming, an interior designer can help you with finding the best color that will make your home express your style and personality.

the-psychology-of-color-on-interior-design-infographic

Tips For Creating A More Eco-Friendly Bathroom

Tips For Creating A More Eco-Friendly Bathroom

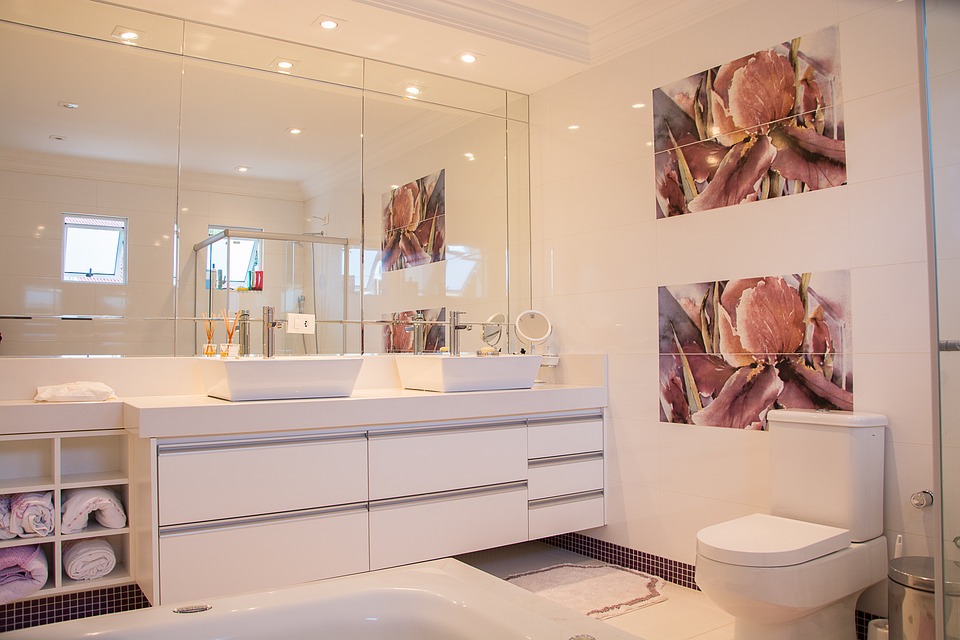
Want a more eco-friendly home? The bathroom is a great place to start. It may be the smallest room in the house, but per square foot it offers more opportunity for positive impact than any other area in your home.

Between fans, hair dryers and other electric devices, lighting and water heating, the bathroom is a hot spot for energy use. Plus, it’s where the lion’s share of household water consumption takes place.

Fortunately, it isn’t hard to create a more eco-friendly bathroom. Here are some ideas to get you started:

1.   Choose a Low-Flow Toilet

The average household flushes 27 percent of the water it uses down the toilet, making this fixture by far the largest water consumer in your home. Choosing a WaterSense labeled toilet can reduce the amount of water you flush by 20-60 percent.

2.   Install Water-Saving Fixtures

Replace standard bathroom faucets and aerators with high-efficiency ones. Today’s high-efficiency models work great, and they can save you up to 700 gallons per year. Consider also installing a WaterSense labeled showerhead. If your shower water consumption is anywhere near average, it can save you $70 per year in utility costs!

3.   Weatherize Your Bathroom

A drafty bathroom is uncomfortable and will cause you to turn up the heat and prolong your showers. Nip that cycle in the bud with some simple weatherization. If your bathroom has an exterior window, use caulk to seal around it. Also, seal any cracks in the woodwork, around your tub or shower, and around fans, vents and plumbing penetrations.

4.   Insulate Your Pipes

Insulating your hot water pipes is an easy one-hour home improvement project nearly anyone can do. It can raise your domestic hot water temperatures by up to 4 degrees. That means you can set your water heater temperature lower, which saves energy! You also will run less water because it will not take as long for hot water to reach your tap.

5.   Switch to LED Lighting

You need good lighting in the bathroom. It’s also a place where you’re likely to turn the lights on and off frequently. If you haven’t yet made the switch to LEDs, this is the place to start. LED bulbs offer high-quality light and are the most energy-efficient lighting option available. They are also the most durable type of bulb, which is good news if you hate messing with your bathroom light fixtures. And, unlike CFLs, LED bulbs are unaffected by frequent switching on and off.

6.   Choose Eco-Friendly Bathroom Materials

Next time you remodel or outfit your bathroom, pay attention to what goes into it. From bathroom cabinets to toilet paper to towels to cleaning supplies and body care items, today’s market offers many recycled, organic and other environmentally friendly options from which to choose. Not only will you be helping the planet, but selecting eco-friendly items is usually healthier for you and your family, too.

7.   Take Clean Air Action

High humidity in such a small space can lead to mold growth and other indoor air quality issues in the bathroom. Clear the air by installing a high-efficiency exhaust fan. Green Tips For Creating A More Eco-Friendly Bathroomplants can also help keep your bathroom air clean. And, next time you paint your bathroom, choose zero VOC (volatile organic compounds) paint to avoid off-gassing fumes.

Greening up your bathroom doesn’t have to be a major endeavor, and it needn’t be expensive. Nearly all of these ideas are easy for the average homeowner to do. Most are quite inexpensive. If you do them one at a time you will hardly notice the difference in your family budget — but you’ll definitely notice the utility savings and enjoy increased comfort in your bathroom!

Author bio: Erica Garland is Content Marketing Manager at Modern Bathroom and has 15 years of experience in the bathroom renovation industry. Modern Bathroom sells a variety of products you would need for any bathroom renovation project. With such a large selection of contemporary bathroom vanities, sinks, toilets and bathtubs for sale, Modern Bathroom is sure to have the perfect piece to give your bathroom an updated look.    


Top Ways to Make Your Home Eco-friendly and Save Money

When it comes to eco-friendly living, a lot of people think that it involves spending more money on fancy products or letting go of the comfort and convenience they are accustomed to. However, the reality could not be more far from true. In fact, some small changes to the way you live can help you go green and put some extra cash in your wallet too! For example, simple eco-friendly habits like remembering to completely unplug your appliances when they are not in use and waiting to use a dishwasher until you have a full load can bring you huge savings on your utility bills. To know more such easy ways to create an eco-friendly home, please check out the below infographic from the Roofing Outlet.
Ecofriendly home infographic

The Most Important Winterization Projects For Your Home

The Most Important Winterization Projects For Your Home

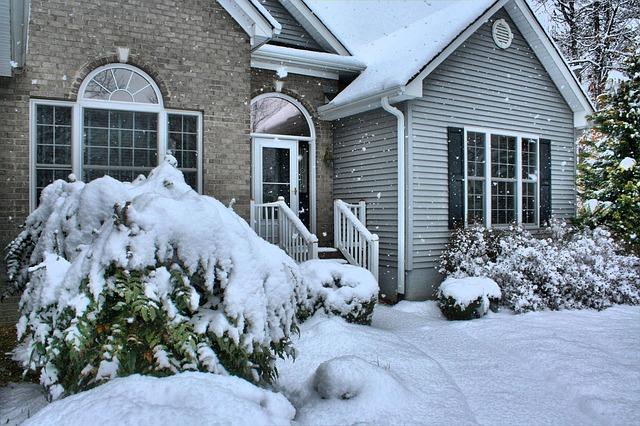
Winterizing your home is extremely important because it cuts energy use and costs and can help you and your family stay safe and warm during the long, cold months of winter. However, many homeowners don’t know where to start, or have trouble figuring out which projects to tackle first. The most important projects are those that will save you money while keeping your home safe from winter’s ravaging winds and temperatures, and many of them are easy to do.

Here are a few of the best ways to winterize your home and save money.

Ceiling fans

When the winter months come knocking, check your ceiling fans. Most of them come equipped with a switch that will allow you to change the airflow direction, meaning running it in reverse will pull warm air down from the ceiling. This can cut your heating costs by about ten percent, making it a quick, easy project that will show real results.

Clean those filters

Air filters can get dirty fast, especially in the furnace. Check and replace them often in winter months to keep airflow steady and to keep your furnace from kicking on needlessly and running at a high demand.

Replace windows and doors

If you can feel a cold breeze coming through the cracks around your windows and doors, it might be time to consider replacing them. Storm windows will help seal in warm air, keeping you from paying outrageous heating bills during winter months. Storm doors can also help save you money and will give you the extra benefit of allowing light and solar heat into your home.

Consider smart technology

Setting the thermostat at a lower temperature can help save you quite a bit of money during colder months, especially when you’re not home. It may be a little cooler when you return, but it will be worth it in the long run. Consider installing a “smart” thermostat that allows you to program the temperature from anywhere with a remote.

Clean the gutters

Making sure the gutters on your home are free of debris and leaves will ensure that water can flow freely rather than pool up and freeze, which can cause myriad problems in winter months.

Check your water heater

Before the coldest months hit, flush your water heater to remove any sediment that might hinder the heater’s ability to work up to its potential. Then, lower the temperature to make sure it won’t heat the water too much. 120 degrees is just about perfect, and will keep your heater from working overtime.

Don’t Forget the Pool

To get your pool ready for the winter, start by closing it and adjusting the pH to the appropriate level, adjusting water hardness to the proper level of calcium, adjusting alkalinity and chlorine, and then cleaning and storing equipment. Don’t forget to clean the pool filtration system.


5 Tips to pick the right blinds / curtains

blinds

In modern times we have so many choices available to us, that they can often paralyze us to the point where we can’t ever seem to make a choice at all. This is true for so many aspects of our lives. I have found that it often becomes easier to make a decision when we get advice from someone who knows a bit more about the topic than we do.

As someone who has worked in the blinds industry for many years, I wanted to write this article to share my knowledge, and hopefully help others when it comes to making the decision on purchasing blinds. In this article, I will share 5 of the best tips I have when it comes to choosing the best blinds for you.

1.  Consider lighting and privacy

What are you looking to achieve with the decision you are making? If you are purchasing blinds for a bedroom, you are likely looking to block out the sun. There is nothing worse when you are trying to sleep late than the sun shining in on you. Make sure to consider this upfront as it’s too late once they are already installed!

2.  Colours and Hues that suit the room

This is not an easy decision as it depends entirely on the colour scheme of the room. I find that many people often go for more of a subtle colour when decorating a room. Neutral colours are proving extremely popular in 2016 and seem to blend effortlessly with many different room styles. However if you are looking for a more fun or dramatic feel to your room, you may be interested in some of the bolder colours.

3.  Style

As with the colour, this depends a lot on the style and design of the room. Are you looking for a formal look, or something more casual? When it comes to style, the possibilities are endless. I would recommend learning more about the different kinds of blinds, perhaps even visit some local business to see the different types in person. Vertical blinds seem to be the most popular option for many, as they offer the benefit of being affordable as well as practical and attractive. Some others to consider are roller blinds, roman blinds, venetian blinds, bamboo blinds, and the list goes on!

4.  Price and Budgeting

The price can vary tremendously based on the materials. Another factor effecting the price is how many windows you are planning to outfit. I would definitely recommend measuring exactly how big the window is (you can easily do this yourself with a tape measure). Once you know this, you will be able to obtain a realistic quote. This will help you avoid surprises down the line. Always make sure you are aware of the full costs before entering into any contracts.

5.  Cleaning – Simple and easy

Like everything else in your house, blinds do collect dust. The positive side is that they only need the occasional clean, and even better, they are easy to clean. Obviously it depends on the type of material and design you have chosen, but don’t worry about having to hire a professional to clean them. You can easily do this yourself. Usually all you need is a good duster and you are ready to go. This is not something many people think about upfront, but as an added tip, I suggest asking the seller before making any purchase on how they recommend cleaning the materials.

Ensuring that you have the perfect blinds for your room is essential. We spend so much time in our homes that it is important to make them a place that we feel proud of. A small change like replacing old blinds can really give a room the pick-me-up it needs. Choosing the perfect blinds may take some time, but it’s definitely worth the effort.

Author Bio:

Elaine Guinsberg is an entrepreneur and small business owner working in Cape Town, South Africa. Elaine owns her own blinds business ‘Elaine’s Blinds’ and had been working in blinds industry for past two decades.  Through her work she has gained priceless knowledge and expertise about the blinds industry.
Business site: http://www.elainesblinds.co.za

First 4 Things You Should Repair on That Fixer-Upper Home

first-4-things-you-should-repair-on-that-fixer-upper-home

There are all kinds of reasons for buying a fixer upper home. Maybe the structure is going to be restored into your dream home. Maybe you just want to live in it for a few years while fixing it up to sell for a profit. Maybe it is all your budget will allow at the moment. Regardless, there are some things that need to be fixed first on fixer-upper residential homes. Here are the top four renovations you should consider early in the restoration of your bargain home purchase.

Replace the Roof

This is the part of the exterior of your home that gets pounded with everything from the hot sun to driving winds and rain. All of your interior upgrades and renovations that are next on your list can be ruined by even small leaks from a roof that is in poor condition.

You need to make sure that the roof over your head is keeping out the elements before upgrading any insulation, especially attic insulation. A qualified roof inspector can let you know if your roof is leaking even a little bit. Plus, because of how large a roof on a house is means that fixing it will make a dramatic difference in its visual curb appeal.

Update the HVAC System

Chances are the furnace and air conditioning system in the home is very old. The house obviously did not get into its fixer-upper status by a former owner who went all out with upgrades and renovations.

HVAC companies like Pacific Aire, Inc. offer expert advice for HVAC systems and advocate repair where possible and replacement when necessary. They typically advise us to keep in mind the statistic published by Energystar.gov, which indicates almost half of HVAC systems are incorrectly installed and correcting installation issues may be all that is necessary for an efficiently functioning system.

Replace Flooring

The floors are the first thing people notice when they come into your home. One of the first things you should do is to look underneath wall-to-wall carpeting in every room and hallway where it is installed. Owners of fixer-upper homes often find hardwood flooring that only needs refinishing. That nice shiny oak hardwood flooring that is so popular in new homes today may have been preserved under carpeting for decades.

Do not judge it by its current looks. Check it to make sure no holes have been cut and replaced with plywood and look for other serious damage. If the planks are intact, they can be sanded and refinished to shine like diamonds at far less cost than installing a new floor. For areas that do not have hardwood subflooring, clearance laminates, vinyl and ceramics are available at less than a dollar per square foot. Also, many flooring types are available for easy DIY installs.

Upgrade the Electrical Service

Even if you cannot get into the wiring in the walls that feed every outlet and ceiling fixture in your fixer-upper, you should install a new service panel including the main service entrance power cable and electrical meter box. Most building codes require a 200 amp breaker panel for a regular residential home. Some older fixer-upper homes have a 50 amp fuse box. This is completely inadequate for today’s families and their electricity needs.

If you have ungrounded, non-polarized outlets, that wiring should be replaced immediately too. You should never use an adapter to plug in your three-prong appliances. Upgrading the main service entrance, breaker box and household wiring is one of the wisest and safest things you can do first for your new bargain home.

Unless your fixer-upper home is really old, the plumbing is likely to use copper supply lines and PVC drains. If you suspect a terracotta sewer line underground, have it inspected by camera for tree root intrusion and broken pipes. Simply put, work on the infrastructure of your home first. Your renovations will go smoother as you go along if you have a sound infrastructure to work with.

Guest Post By:

Anica Oaks

Freelance writer and web enthusiast
Read some of my published work on my Google+ page.

10 Functional and Stylish Vanity Units Available for Modern Bathrooms

bathroom-vanity-units
Vanity Units

The modern bathrooms contain lots of accessories, which are needed for various purposes that are fulfilled only inside the bathroom. All these articles cannot be stacked over the sink counter or on the floor, as the objects may get damaged. Hence, it is necessary to have a storage space in the bathroom for keeping all these accessories. But most of the modern bathrooms have very limited space where an extra cabinet cannot be accommodated. Thus, the vanity units perfectly fulfill this purpose of storage in a limited space.

This bathroom unit is mainly constructed as a unique cupboard that holds the sink on top of it and is placed over the floor of the bathroom. Nowadays, varieties of vanity units are available in the market, each differing from the other in appearance and also functional qualities to some extent. The customers need to choose any specific variety, according to their needs and the budget, as the costs of these units also vary from each other.

Different kinds of trendy vanity units ready for use in the bathrooms

  • Wall mount vanity – This bathroom unit is attached to any of the walls of the bathroom, preferably near the bath space and above other bathroom fixtures. So, it does not require any space over the floor and can be used even in a very small bathroom, where there is hardly any space for any other fixture, apart from the toilet.
  • Corner vanity – This special type of vanity basin can be just kept at any corner of the bathrooms, as it does not demand much space. Moreover, it can be seated over the floor and thus, has no hassle of installation. Its back portion is usually angled, for which it cannot be placed against flat walls and work best in the bathrooms where there are enough free corners.
  • Stainless steel vanity – The whole unit is made of stainless steel, for which it is much more durable than other types of units. Also, it is very easy to maintain as it just needs occasional wiping or simple dusting. This type of vanity basin is also preferred for having a classy appearance.
  • Wooden vanity basin – The wooden units can be made of various kinds of woods; like teak, mahogany, oak and cherry. But these kinds of woods are quite costly and may not always fit into the bathroom décor of all houses.
  • Glass bathroom unit – The glass unit has a sleek and stylish look in it, but it is hard to maintain, mainly when there are children at home. The glass surface is easily stained from simple things, like the toothpaste or even mineral water, which may accidentally drop over the counter. Moreover, the glass parts can be easily cracked or even broken, if by mistake, hit with any heavy object.

bathroom-vanities
Bathroom Vanities

  • PVC unit basin – The PVC unit is preferred at many households, due to its cheap price range. It is also easy to maintain as it requires nothing more than regular wiping. But this material lacks the stylish look and is available in a very limited range of colors, which gives lesser choices for the house owner to choose from.
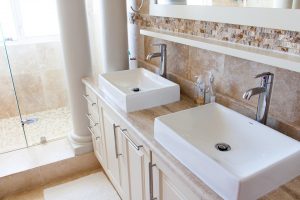
  • Multi sink unit – If there is necessity of more storage space, the units with double sinks can be chosen, which are wider than the ordinary ones. The storage space can be increased further by choosing the units with two recessed sinks on the countertops. These units are provided with many drawers, the sizes of which should match the requirements of the house owner.
  • Vanity basin with open and closed storage – This unit is usually a long one where the storage space directly under the sink can be an open one, while the rest of the storage space can be closed, by covering with a sliding lid.

So, if you are confused for selecting vanity units for your bathroom then the above options will help you to select best one.

Author Bio :
I am Lara Buck, a knowledgeable and qualified blogger. Here you can see my skills which gives you brief ideas on understanding all the concepts with different themes. I adore to write blog on many topics, like: Home Improvement, Automotive, Business, Health, Lifestyle, Entertainment, Pet, etc.

Follow These Steps to Keep Commercial Driveway Gates in Good Condition

Having gates, automated or simple, is the best way to keep your residential as well as commercial property secure, safe and protected all the time. With properly maintained gates, you can rest in the knowledge that your commercial settings or residential possessions are going to be in safe hands. Different types of establishments need specific, purpose-oriented gates to ensure the property under your possession has firm, solid and lasting metal security standards.

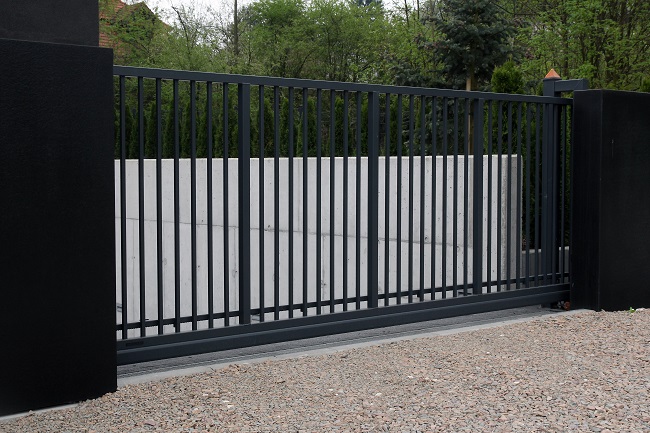
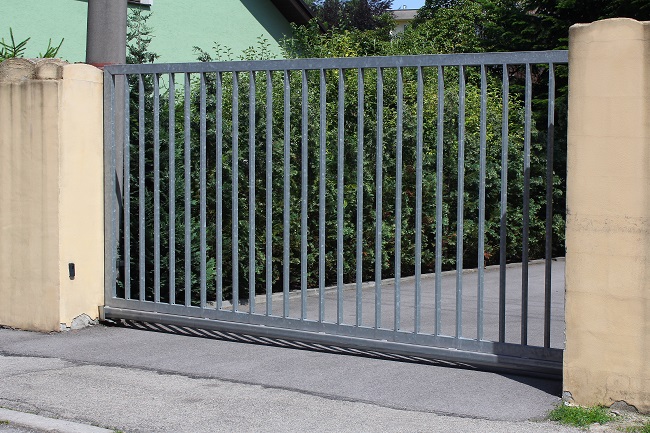
Automated sliding gates, for instance, are often found in commercial settings especially just before the driveway. Commercial driveway gates, like all other types of gates, need perfect, regular maintenance. Gates are operated mechanically and involve many parts that drive its movements and operation. To ensure the security gates work consistently and with efficiency, you need to perform certain maintenance maneuvers so that it will remain operable and healthy for long period of time.

The bits of maintenance procedure depends on the type of automated gate you have installed for your commercial premises. It is essential to comply with regular maintenance standard which can be achievable through the help of a gate maintenance specialist. The following are the tips for commercial driveway gates maintenance:

commercial-gate

Do thorough inspection

  • Some of the components of sliding automated gates that need your regular attention are gate opener, metal racks, drive belt (or chain belt), panel board, electrical connections, bearings, springs, and rollers. Check your sliding gates for any fault or malfunctioning of these parts.
  • Bolts often come loose, so inspect them to confirm if they are tightly fixed in the place. Don’t try to fix loose bolts yourself as the might damage something else in the effort. It is better to call a maintenance expert.
  • Check for the prominent signs of visible wear and tear in bushes, bearings and pivot points that often move and go through direct metallic friction.
  • Metal doors often catch the humidity of surrounding weather and foster the growth of corrosion and rust. So if you have found such rusty patches, it signals the need to apply the splatter of paint. Use high-quality paint that does not come off easily for a long time.

Kill the rust and take pre-emptive action

Don’t wait until you see rust running its regime all over your commercial driveway gates. As we all know, dirt and weather beatings affect the appearance of gates and form a coat of roast that does not look good. Notice the signs of metal parts getting the touch of rust.

You can simple wash it away with mild household detergent if it is not too extreme. But if the rust has got stubborn and deep, you can opt for scrubbing with sandpaper. But if the problem still persists, it is better to cease doing it all on your own and assign the task to professional automated gates specialist.

commercial-gates

Keep the surface clean

Commercial settings need technical care and thorough maintenance for it to look clean. Make a promise to wash and wax your metal gates at least once a year. This way you will be able to see shine and gloss on gate surface for a long time. This is also not very expensive option compared to refurbishment. One thing to remember as caution is to never bring door opener in contact with water or it will damage the normal operation of commercial driveway gates.

Lubrication increases the life of its vital parts

Every mechanical parts that have to go through a lot of frictional movements need proper lubrication periodically. In case of automated commercial driveway gates, you should make a routine of lubricating chain, roller, pulley, screws and hinges. Use appropriate lubricant for the job. Gates won’t work smoothly if the surface is harsh. Lubrication also helps minimize the intensity of wear and tear, thus increasing their life.

Examine the reverse movement of automated gates

Check the strength of reverse functioning of automated sliding gates every month. You can test the accuracy of this function by placing an obstacle in the middle of the doorway. If the door opener senses the obstruction and stops the door from getting closed, it means the gates are working properly. If it swerves off this expected behavior and does not reverse, the door opener has to be inspected by a professional gate maintenance expert.

General care

Regular care and small maintenance efforts go a long way for keeping its longevity and performance up to expected standards. Commercial driveway gates require your proper care and general inspection so as to decide if they need high or medium scale maintenance. Also, it is wise to follow the maintenance guidelines provided by manufacturers and take help of their competent, qualified and trained service technicians in case the job is overwhelming.


Avoiding Broken Pipes: 5 Tips to Put Your Mind at Ease

avoiding-broken-pipes-5-tips-to-put-your-mind-at-ease-1

Winter is almost here, and for many homeowners that will mean dealing with frozen and bursting pipes. If a pipe breaks, you might have to call a service like First General Services to fix water damage or even remediate mold, so it’s important to avoid this problem in the first place. Here are just five solutions that will keep your pipes from breaking and leaking once the temperature starts to drop.

1. Turn On Your Faucet

In some cases, you can prevent your pipes from freezing simply by keeping water running through them. You shouldn’t turn on your faucets all the way of course, but all you need is a small trickle to prevent freezing in extremely cold weather.

2. Leave Cabinet Doors Open

Cabinets that are located underneath sinks often hide exposed pipes. If you want to keep these pipes from freezing, simply open up the cabinets so that the plumbing receives plenty of warmer air while you are out. This is especially important if your kitchen sink is against an outer wall, as is often the case.

3. Disconnect Your Hose from your Outdoor Faucet

If you’re the type to leave your garden hose connected to an outside faucet at all times, don’t forget to disconnect it before it gets too cold outside. Leaving a hose connected will prevent water from draining out of the hose bib, which can cause it to freeze. Disconnecting your hose and putting it away safely for the winter will also keep it in good shape once the next spring comes along.

4. Keep the Heat On

If your home is occupied during the winter, you most likely will have your heat turned on. If you’re going to be leaving town for an extended period of time, you should still keep your thermostat turned to above 32 degrees Fahrenheit at all times.

5. Insulate Exposed Pipes

Finally, you should take the time to insulate any exposed pipes in your basement or garage. These are especially vulnerable to the cold for obvious reasons. Plumbing insulation can be purchased at just about any hardware store, but if you don’t have any, some old blankets or towels held in place with duct tape will also do.

Broken pipes are a common problem in the winter, even in modern homes with plenty of insulation. As long as you follow these tips and keep an eye on your plumbing, your pipes should be safe this winter.

Copyright © 2024 | Bruzzese Home Improvements | All Right Reserved | Web Design & Development by QualityMust