fbpx ...

Blog

15 Must Have Items for Your First Nursery

baby girl

There are so many options for baby gear out there that it can be a little overwhelming when you’re shopping for your first nursery. If you’re a minimalist, on a budget or just lacking the space, check out this list of nursery must-haves.

1. Changing Station

Changing stations are a necessity in a nursery but you don’t need to have a changing table. You can use a short dresser that can double as storage. Make sure your changing station is stocked with diapers, wipes, diaper rash cream, a thermometer, extra onesies, lotion and hand sanitizer. Here’s another helpful tip: attach a lingerie laundry bag to the changing station and use it for tiny, dirty socks. When it is time to do a load of baby laundry, toss the bag in with it. This will ensure that those miniature socks don’t end up lost in the laundry.

2. Crib

This is kind of a no-brainer, but there are a lot of things to consider when choosing a crib. You need to make sure it’s sturdy and reliable. Decide if you want a crib that will later convert cribinto a toddler bed, because that can certainly come in handy. Choose the right crib for your baby based on functionality, style, safety and budget.

3. Storage

Babies come with a lot of stuff. Make sure you have storage to handle all of that baby gear. Besides using a dresser as a changing table, you can put shelving on the walls to hold books and toys. Use a closet in the nursery to hold clothing your baby will grow into, your stock of diapers and wipes, and any baby gear that isn’t in use. Find plastic containers that will slide under the crib and use them to hold sheets and blankets.

4. Extra Sheets

When it’s three in the morning and your newborn has an explosive diaper, you’ll be glad you kept extra sheets in the nursery. You don’t want to have to search through your linen closet half asleep. The trick is to change your baby and the sheets as quickly as possible so that both of you can get back to sleep.
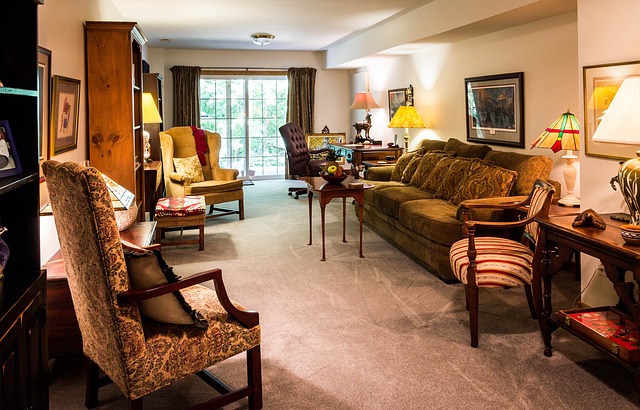
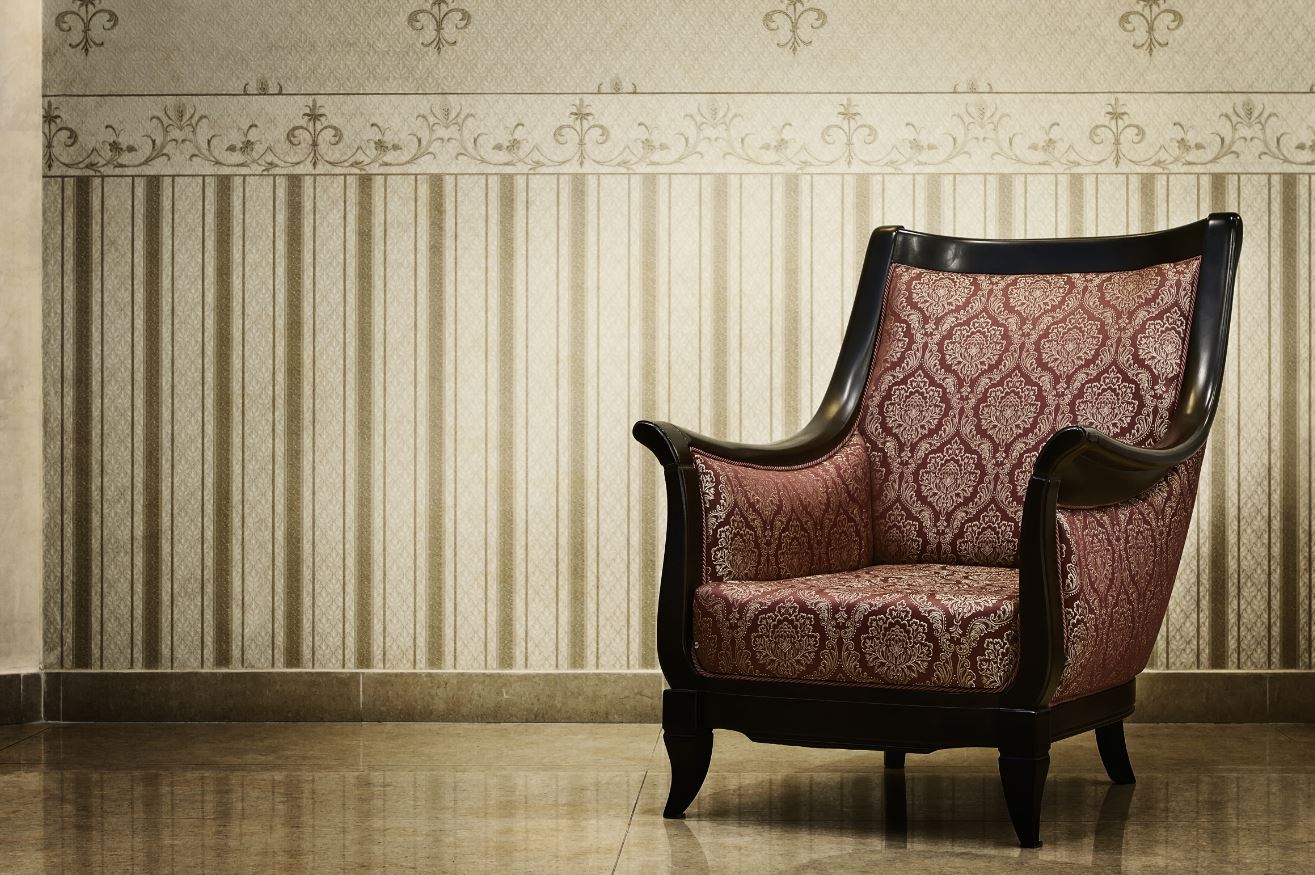
5. Rocker or Glider

Some of the sweetest moments you’ll have as a new parent will be rocking your baby to sleep. Pick out a comfy glider or rocking chair and set it up in the corner of your nursery. Savor those few months when your baby is tiny enough to rock to sleep. Plus, it’s nice to have a place to sit during a midnight feeding.

6. Nightlight

Some parents want their baby to sleep with a nightlight on and some don’t. A soft light to turn on at night is good for when you need to change a diaper or rock your baby back to sleep. Put it beside or above your changing station. You won’t be sorry!

7. White Noise Machine

A white noise machine will help your baby sleep better. While you’re vacuuming or when your dog barks, a white noise machine will muffle the sounds so your baby stays asleep. If you’re on a tight budget, consider using a fan you already have instead of purchasing a new white noise machine.

8. Curtains

You need blackout curtains or dark window shades in your nursery. These will help during the day when it’s naptime.

9. Swaddle

Some babies love being swaddled and some hate it, but either way it’s good to have a swaddle blanket in the nursery, just in case. Find one that your baby won’t escape from like the Ollie Swaddle, which uses Velcro and a very breathable material, or the SwaddlePod.

10. Humidifier

Humidifiers put moisture back into dry air, especially in the winter when you’re running the heat. Baby skin is sensitive, and babies are susceptible to congestion and colds. A humidifier will help bring moisture and healing to chapped and dry skin, as well as help your baby breathe easily.

11. Nursing Station

If you plan on breastfeeding your child, set up a nursing station in the nursery. You should also consider doing so in other main rooms of your house, such as the living room and your bedroom. Use a small basket to hold nursing pads, lanolin, tissues, water bottles, granola bars, burp cloths and maybe a book you’re reading. You’re pretty much stuck in one spot until your baby finishes nursing, so it’s good to have everything you need within reach.

12. Diaper Pail

There are certainly differing opinions on whether or not diaper pails actually work. Despite all of that, you at least need a trash can with a lid. Blocking some of the smell of dirty diapers means you don’t have to walk out to the garbage can 10 times a day. Do some research and decide what product is best for you.

13. Something for Your Baby to Look at

Studies show that babies respond best to high contrast colors. It helps their brain development and vision. Blacks, whites and reds are most appealing to babies. So get a mobile with artisticcontrasting colors and hang it above the crib. Consider black and white crib sheets or some artwork with high contrast colors.

14. Books

It’s never too early to start reading books to your baby. In fact, there will come a point when you aren’t quite sure what to do with your baby when he or she is awake. They aren’t playing with toys yet and they seem to just lie on a blanket and look around. Books in the nursery are a great option. Babies love the sound of mommy’s voice, and hopefully they’ll grow to love reading too!

15. Safe Surfaces

Babies love to feel different textures. A sheep or cow skin rug on the floor or over your glider will make the nursery a safe place to learn how to crawl and walk. Decorate it with pillows and cuddly stuffed animals. The nursery should be a great room for every stage. You’ll be spending a lot of time there, so create an atmosphere that both of you will love!

Potentially Deadly Side Effects of Home Disasters

deadly side effects of home disasters

Two of the most dreaded home disasters are fire and flooding, and for good reason. The damage they cause can be so extensive—and expensive, that home insurance categories were specifically created in recognition of their destructive power. While everyone recognizes the threat of fire and flooding, many people remain unaware of the dangers that remain after one of these disasters strikes.

Flooding

The use of advanced meteorological technology like Doppler radar and satellites have increased our ability to predict the weather. These advances have resulted in far fewer deaths from drowning during floods. However, drowning is only one of the dangers of flooding.

Electrocution

Electrocution is the second leading cause of death resulting from flooding. Often, the main electrical switch is located in the basement, which is the first place to be flooded. Experts advise that in the event of a flooded basement, the safest thing to do is disconnect completely from the electrical grid. That requires removing the electrical meter face from the meter pan, which can be done by an electrician or a utility company employee. It may also be necessary to shut off the gas if there are gas appliances in the basement.

If you must go into the basement before having disconnected completely from the electrical grid, it is advisable to wear rubber boots. In order to reach the main electrical switch, use a non-metal step-stool. If the rest of the house isn’t flooded, you can shut down just the basements circuits and use the electricity upstairs to run a shop vac. However, this can be risky, and if the water is too deep to ensure that the electrical cord doesn’t come in contact with the water, it’s best to call a professional with equipment designed specifically for job.

Once the water has been drained, it’s important to address the potential danger of damage caused to heating and cooling systems that have been submerged in water. Your system and appliances should be inspected before attempting to use them, since a malfunctioning system can be extremely dangerous. Rust can also prevent proper grounding.

Mold

Despite numerous medical studies that demonstrated the potentially deadly effects of some toxin-producing molds, the EPA has still not set any minimum standards for acceptable levels and types of molds. However, while many molds can result in allergies or respiratory ailments, others can produce deadly toxins. To prevent mold, adequate sunlight and ventilation are vital. A dehumidifier can also be helpful in damp climates.

Fire

According to FEMA, the top three causes of residential fires are cooking, faulty heating systems, and malfunctioning electrical appliances. Not only is fire itself a danger, but the heathome fire from a blaze can create other dangers, including injuries from breaking or falling objects.

Smoke

While everyone knows that prolonged smoke inhalation is deadly, but many people don’t realize how dangerous even brief exposure can be. Many items commonly found in homes are made of materials that undergo pyrolysis when exposed to heat. The chemical composition of plastics, synthetic fabrics and asbestos change and become toxic carcinogens.

Soot

Like smoke, the potential health risks associated with inhaling soot are increased according to the type of material that produced it. The size of a particle of soot is estimated to be 2.5 microns, which is capable of deep lung penetration. Larger particles can get trapped in the upper respiratory system. Since the size of a speck of dust is 40 microns, soot particles can’t be seen with the naked eye.

Preventive Measures

A few initial preventative measures and investments can help reduce the risk of flooding. Checking and clearing your rain gutters and inspecting your foundation for cracks regularly is essential. A sump pump and a generator in case the power is lost can reduce flooding damage as well as raise the value of your home.

Fire prevention means regularly testing smoke detectors, especially in the kitchen. Regular safety inspections of heating systems and replacement of aging electrical appliances are essential. While all home disasters are tragic, none is quite as tragic as a preventable one.

Simple Projects You Can Do In A Weekend To Improve Indoor Air Quality In Your Home

cleaning your home

If you’ve ever thought about improving the air quality in your home, you may be surprised to find out that your project can be achieved in very little time. In fact, you can try some of these simple projects to ensure that you can breathe a little easier at home:

Clean Your Home

When it comes to dust and allergens, there’s no better way to get them out of the air than to have a strict cleaning regimen. When cleaning your home, you should not only vacuum the pet hair out of your carpet, you should also try to keep your pets as clean as possible. If you have any pet supplies like toy baskets, litter boxes or food bowls near your vents, you need to move them because of the propensity for vents to blow airborne irritants around your home.

Upgrade Your Bathroom Vent Fans

Your bathroom can eventually develop poor air quality because of mold and mildew. Therefore, you should make sure you remove excess moisture from this area by installing quality vent bathroomfans in every bathroom of your home. Newer models of bathroom vent fans come with humidity sensors, which make them far more effective than their predecessors.

Test for Radon

It doesn’t really matter if your home is old or new, you should always test for radon. Since radon is colorless and odorless, there’s only one way to find out if it’s inside your home. Over time, it may affect your health, so getting this checked is important.

Add Spot Ventilation

Many times, closets and closed in spaces get musty odors. If you want to combat these potential irritants, try installing a recessed light fixture and vent fan combination. These nifty devices are also useful for ventilating humid air from laundry rooms.

Get your Heating System Checked

A malfunctioning heating system can contribute to poor air quality, so be sure to get your heating filter changed and get your heating system checked. It’s important to replace faulty and older units that aren’t working well, and professionals can help make sure it’s replaced or repaired properly. You can also consider other indoor air quality products like UV lights to help improve the air you breathe in your home.

Your family’s health can be greatly affected by the air quality in your home, so it’s important to take necessary steps to make improvements. These tips will help you get started to making your home air quality better.

Informational credit to One Hour Air Conditioning & Heating.


5 Home Renovations for Winter 2015

remodels for winter 2015

By tackling a few home renovation tasks during the winter, you can increase your property’s value and lower your utility bills. The biggest benefit is that most projects can be completed on a budget.

Redecorate the Walls

If your walls are dull, a fresh coat of paint, crown molding, and a new trim can instantly change the look of the space.

Painting on a cold day while the windows are closed is totally safe if the paint is water-based and environmentally friendly. Eco-friendly paints dry fairly quickly and do not emit any harsh fumes. Using painter’s tape and a bold paint color is highly recommended because dramatic patterns or stripes will give your walls visual flair.

Redesign the Kitchen

For about $100 dollars, you can customize your kitchen by adding a backsplash. Over 400 sizes and styles are available at most home improvement stores. If you prefer a classic design, kitchen backsplashtile or metal is a great choice.

Because the process of installing a backsplash is time-consuming, you should begin this project during the weekend. To avoid costly errors, set aside time so that you can prepare and test a design template. If this step is skipped, you will have problems installing the materials in irregular spaces.

Update the Bathroom

You can transform your regular bathroom into a spa by installing new faucets, fixtures, and tiles. Because a bathroom renovation project is ambitious, professional help will be needed. To achieve the best results, choose a BBB-Accredited business, such as Bruzzese Home Improvements.

Install New Lighting

ceiling-fanA ceiling fan that has multiple lights can lighten up your home on dark winter nights. If you choose a modern fixture, you can update the style of the space as well.

Fixtures that use LED lighting should be considered since LED bulbs use less electricity. In the family room, install dimmers because they can help you save even more energy.

Do not install any lighting fixture without professional assistance. If you hire an electrician, the best installation procedures will be implemented to prevent future electrical issues.

Replace Old Doors

When doors age, they usually develop cracks and scratches. By replacing your outdated doors, you can give a dull space an updated look at a low cost.

Although sliding doors are popular, double doors are more stylish and functional. However, if your home needs more natural light, a French-style door is a better option.

By completing any of these home renovation projects, you can impress your guests this winter.

About the Author: Lizzie Weakley is a freelance writer from Columbus, Ohio. She went to college at The Ohio State University where she studied communications. In her free time, she enjoys the outdoors and long walks in the park with her 3-year-old husky Snowball. The information in this article is credited to A P Plumbing.


How To Get Creative With Your Kitchen

A cottage style kitchen is one of the most elegant and ideal choice when thinking of adding creativity to it. The following post describes some unique ways of adding creativity and charm to your kitchen.

The following are a few ways to create a unique yet so simple and fulfilling kitchen for your home.

Add Glass Paneled Cabinet Doors

glass paneled cabinets

A shift from wood framed cabinetry to tempered glass inserts can altogether give a different look to your kitchen. You can choose from a variety of glass style from frosted to ribbed. You can use glass paneled cabinets to store dishes, glassware, pitchers, and trinkets. The glass door cabinetry is not just a way to expand storage but also add style and charm to the kitchen.

Tip! You can even paint the edges of shelves similar to the color of kitchen walls or in contrast to create a more vibrant look.

Install Open Shelves

open shelves

Mounting shelves will add to the storage space and also add to the charisma of your kitchen. You can mount open shelves in the vertical spaces near the windows, between upper cabinets, next to major appliances and wherever it is practically possible to fit in. these open shelves can be used to display multi-purpose items such as old metal pitchers, crockery, plants, and charming woven baskets.

Tip! For making it visually more appealing, you can paint the shelves with the same color as that of cabinet trim.

Replace Modern Hardware with Vintage

kitchen hardware

Vintage varieties have a class of their own. You can install porcelain knobs and handles, floral accents for metal varieties. This is a less tricky job as you will find endless styles and designs for handles and knobs.

Tip! New hardware is an easy way to add a new look to the cabinetry instead of replacing the cabinets.  

Decorate With A Vintage Wooden Sideboard

wooden sideboard

A vintage wooden sideboard is an excellent choice while decorating a cottage style kitchen. It is the best way to keep stacks of plates, other dishes, knickknacks, and the most treasured cottage style crockery. Moreover, this fulfills the need for extra space during a buffet meal and will not consume extra counter space needed for food preparation.

Tip! In all, adding this sideboard will avoid the chaos during the dine time and will help you in managing things better. 

Wall Decor Ideas

kitchen wall decor

Even if you have the world-class kitchen accessories, expensive kitchen shelves and cabinets, your kitchen is still incomplete without a wall décor.

You can choose any decorating theme to glorify your kitchen which reflects your presence in the kitchen. Choose a wall art considering the theme and color of the kitchen. Floral canvas wall art and elegant wrought iron wall decor are classy choices which are available in all sizes, colors, and varieties that would fit to your budget.

Tip! A beautiful wall art can make your kitchen vivacious.  

Author Bio: – Dan Kogan is owner of NY handyman NYC, one of the leading handyman in New York City, with more than 20 years of experience. He is passionate about all things related to home improvement.


Housewarming Essentials: Building a Bar in Your New Home

housewarming

After days and weeks spent looking for a new home, cross-comparing removal company fees and packing your gear, it is finally time to move in and settle down. There is no better way to celebrate the successful completion of the house hunt than to throw a housewarming party and invite all your friends to break in the new place.

Naturally, you will need drinks, glasses and other bartending essentials for the occasion – and for future enjoyment as well, so make sure you stock up your spirits and organize the bar before first guests show up for the party. Lacking the know-how? Here are several useful tips on how to build a liquor haven in your new home.

From Kitchen to Bar: Miscellaneous Staples

Any experienced bartender can tell you: though prepping a perfect cocktail calls for extensive knowledge about liquor proportions and mixing procedures, it is the extras that add the final kick. For a refreshing concoction of spirits, grab ice, sugar, fresh lime, lemons and seasonal fruit from the kitchen and finish the mouth-watering heady combo with a pinch of aromatic herb leaves (mint, basil, lemon verbena and thyme are most common herbal cocktail ingredients).

Bar Tools: Bartending Fundamentals

To put on a true-blue liquor mixing show (remember Tom Cruise in Cocktail?), you will need some basic bartending gear such as a citrus reamer, cocktail shaker, muddler, jigger, bar spoon, paring knife and bottle opener. Of course, if you do not want to spend extra money on these bar accessories, you can improvise and use a long kitchen spoon instead of its bar counterpart or swap the jigger for standard kitchen measures – after all, it is quality liquor that matters most.

Tipping the Glassware: Different Glass types

With the liquor cabinet loaded, it is time to move onto glassware. Different liquors are served in different types of glasses, so you will need at least a set of martini glasses, tall champagne flutes and stemmed wine glasses in your cupboard if you are to impress the guests with your knowledge of the spirits and serving routines. As you level up your bar contents, consider adding shot glasses (for strong drinks) and slender highballs (for cocktails) to your glassware collection.

The Indispensable Essentials: Base Spirits

The list of basic ingredients for a home-based bar includes foundation liquors such as vodka, gin, full-bodied wine specials, whiskey, tequila and dark and light rum. Next, you will want to add a dash of spicy and get some flavorful cocktail ingredients such as bitters, vermouth (dry and sweet), cointreau and triple sec. With these liquors, you will be able to mix up most basic cocktails such as Cosmopolitans, Margaritas, Manhattans and Martinis.

A Zesty Flavor: Liqueurs, Aperitifs and Cordials

Now that you have the bar fundamentals, it is time to move on to aperitifs, cordials and liqueurs. Crème de Violette, Lillet, St. Germain Elderflower Liqueur, Campari, Amaretto, Grand home barMarnier and Baileys are a must-have for a well-stocked bar, but you can add any other hooch you like to throw down now and again for diversity’s sake.

Mixer-uppers: Add the Bubbles

To round off your bar collection, grab a handful of mixers such as tonic water, club soda or seltzer, fizzy lemonade and sparkling beer or ale. Bubbly and refreshing, mixers will add the final touch to your liquor-master pantry and help you whip up delicious alcoholic combinations with just a tinge of fizz to ward off potential morning-after hangovers.

Building a bar at home is probably one of the most rewarding and enjoyable DIY projects for established liquor connoisseurs and cocktail enthusiasts. Even if you do not possess stunning mixology skills and experience, a well-stacked bar will certainly impress everyone you invite over for a round of drinks, and it will definitely help your guests get into the right mood during the housewarming party, so do not forget to get all the staples before it is time to rock out some whiskey on the rocks.


Tips to Redesign and Make Use of Your Backyard Space

backyard garden

When you step into your backyard, it should be a sanctuary for relaxation, entertainment, and play. If reality does not match up with expectations, then perhaps it’s time to create anew. When considering any redesign of backyard space, it is wise to think holistically and leave nothing out of the creative process. Adopting some, or all of the following redesign tips will likely enhance the enjoyment you get out of your own backyard.

Statuary, Yard Art, and Garden Decor
Throw open your back door, step outside, and survey your redesign challenge. Backyards should be a place where imagination dominates design. However limited the area, your backyard should reflect more than the surrounding architecture and landscape. It should take its aesthetic cues from your own personality. Art pieces let you add flair to your space without ever having to get your hands dirty.

Think Vertically
garden flowersInstalling multiple tiered planters and vertical gardens will help you maximize your ground space while providing an opportunity to cover your walls and fences with interesting colors and textures. All you need are planters you can stack or hang from vertical surfaces. Vertical gardens have the added benefit of producing fragrant flowers and sometimes edible goodies such as herbs, berries, and vegetables.

Outdoor Seating
Your outdoor seating should approach your indoor furniture in terms of comfort if you want visitors to stay for more than a brief chat. Modern patio furniture from places like Design Furnishings is comfortable and can survive the most violent rainstorms between uses. Laying down decent quality outdoor carpets or mats on your patio will provide a surface that lets you walk barefoot even on the hottest days. Using screens made from natural fabrics and materials such as bamboo will help you sell the natural experience.

Water Features
If your backyard feels chaotic or perhaps too dull, you may be able to change things by putting in a water feature that gurgles, or just encourages you to sit and think on things for a while. backyard pondYou may want to try a classic Koi pond or something far simpler like a store-bought garden fountain or a shallow, brick-lined reflecting pool that you create yourself. Even a small bird bath can be a good option if you don’t have a lot to spend on maintenance.

The atmosphere reflected by a home’s backyard design and landscape choices should be soothing to the senses and welcoming to visitors. While touring local neighborhoods, you can see examples of the very best in home architecture paired with careless use of backyard space. Sometimes a simple arrangement of shrubs and flowers, a well-planned garden, a creative patio or deck design can make all the difference. When carefully thought out, tiny backyard design changes can create a space with a higher aesthetic and functional appeal.

Vintage Value: How to Decorate With Antique Pieces

Vintage Value - How to Decorate With Antique Pieces

Clean, modern furniture doesn’t appeal to everyone. If you feel most comfortable surrounded by items dating back to last century, follow these tips to decorate with antique pieces in style.

Focus on Condition

An antique sofa might look great in your living room, but not if you find mold stains underneath the cushions or a big chip missing from one of the legs. Evaluate every potential purchase for defects or health hazards. Many vintage connoisseurs don’t mind the occasional fabric tear or dented surface. Decide what you find charming and what turns you off, then stick to those standards.

Create Subtle Vignettes

vintage collectionA group of like objects carries more weight than a single find. If you love scouring antique malls and flea markets for vintage finds, think like a collector. Maybe you’ll create a vignette of antique rolling pins, film cameras, board game pieces, or architectural hardware salvage. If you amass a large collection, look for a curio cabinet in which to display every element in an organized fashion.

Turn One Thing Into Something Else

Stack a set of vintage suitcases to form a makeshift bedside table or wrap an old wine crate in chicken wire to create a floating shelf. Think about ways to repurpose antiques if you can’t use them in their current condition.

Choose an Era You Love

A house filled with antique furniture often looks best when each element comes from the same period. You might prefer Queen Anne furnishings or Edwardian pieces. If you can’t pick a antique furnituresingle era, mix and match at random. A collection of antiques from all different periods might work with your eclectic style and seems more purposeful than a single out-of-place element.

Find One Similar Feature

Decorating with antiques means you can’t possibly match every piece of furniture in your home. To create a cohesive style, look for a single similar feature that weaves a thread of commonality among all your finds. Look for similar wood finishes, complementary color palettes, and other ways to tie it all together. If necessary, you can always add new stain, paint, or other embellishments to items that don’t match.

Shop Online

One of the best ways to find great antique furnishing and accents to match these is to look online. There are some great finds on the web—you just have to do some digging to find the perfect ones for your design sense. Online shopping can lead you to one-of-a-kind vintage pieces and, with Soft Surroundings coupons from Discountrue, you can find beautiful vintage furniture for a great price.

Protect Valuable Finds

When you buy an antique or vintage couch, you should sit on and use it. However, some antiques—particularly decorative pieces—require protection. Place them behind glass doors or on tall surfaces to prevent kids, pets, and wayward elbows from damaging them.

Decorating with antiques can prove both rewarding and exciting. When you learn how to incorporate them into your home effectively, they become even more priceless.


What Does Your Decorating Style Say about Your Personality?

Interior design - Yellow couch and decor

Image Source: Depositphotos.com

Everyone is unique, and this is often reflected in the way we decorate our homes. Have you ever wondered what people think about you when they see your home? Keep reading to find out what your decorating style says about your personality.

Traditional

Traditional décor is sophisticated and classic. Maybe you have beautiful floral paintings hanging on your walls or an antique cabinet to display your grandmother’s china. Traditional decorators use symmetry, classic furniture, and formal accent pieces. If you need inspiration for your own home check out Traditional Home, where you will find lots of examples of elegantly decorated rooms.

If you are a traditional decorator, you care about history and traditions. You take the time to get to know your neighbors and invest in your community. You like staying close to home and your family is very important to you.

Modern

modern kitchenIs your décor simple and contemporary? Do people see clean lines and lots of open space when they walk in? Is your home mostly white with splashes of color? Is your furniture sleek and stylish? Do you appreciate the elegance of HD Brooks mattresses from Haynes Furniture and similar suppliers? You are probably a modern decorator.

Modern decorators are very organized. They adapt easily to new technology, but clutter stresses them out. Modern decorators need open space to think creatively and they find comfort in unity. If you are a modern decorator, you care about cleanliness and appreciate simplicity. You are aware of the world around you and interested in what is trending, but you have a clear idea of what you like and only incorporate trends that match your style.

Rustic

Rustic homes are often found in resort towns, near lakes, and in the mountains. The close proximity to nature is reflected in the decorating style—rustic decorators use natural materials rustic living roomlike leather, stone and wood. They may have log furniture, wood floors, stone fireplaces, or hunting trophies hanging in the halls. Artwork on the walls usually portrays landscapes or animals.

Rustic decorators love nature. They find comfort, refreshment, and inspiration when they are out of doors and use their decorating style to bring nature into their homes. If you are a rustic decorator, you aren’t afraid to get your hands dirty, you know how to work hard, and you are practical. If you are interested in a rustic look, you could check out places that offer classic hardwood flooring to amplify that country feeling.

Casual

Casual décor is all about comfort and function. Casual decorators choose furniture that is useful and comfortable—not always the most expensive.  They choose low maintenance pieces that are practical and functional.

Casual decorators care about function more than form. While they like things to look nice, they care more about usefulness. Casual decorators want to be comfortable, and they want others to be at ease when they visit. They like to have fun, relax, and spend time with friends.

Eclectic

eclectic interiorEclectic decorators aren’t afraid to mix patterns and styles. They choose furniture from different periods. Eclectic decorators use many different materials—they aren’t afraid to put a vintage metal headboard in the same room as oak dressers. Check out this post from Apartment Therapy if you need help making your eclectic style work.

Eclectic decorators are collectors and adventurers. They like exploring new places and discovering new things. They know what they like and don’t care what others think. They aren’t afraid to make bold choices and they appreciate little details.

Whatever your personality is, choose a decorating style that will allow you to thrive and feel relaxed and happy in your own home.


Anica Oaks
Freelance writer and web enthusiast
Read some of my published work on my Google+ page.

Paint Like a Pro: Handling Tricky Situations

paint like a pro

Some people build bridges, other put up walls. Whatever your personal approach to people and life in general may be, we all know that shabby walls do not make a home, which is why professionals in the painting business recommend applying a fresh paint coat to the walls and ceilings at least once in a few years.

Unfortunately, not all surfaces in our homes are pitch-perfect and easy to handle: there may sometimes be peculiar nooks, awkward angles and uneven textures that need to be tackled properly and with more care if you want the brand new paint number to truly show and make a difference.  Here are some tips on how to avoid common painting pitfalls and handle tricky surfaces like an experienced professional.

Edges at Odd Angles

Homes with modern designer looks often have edges sticking out at odd angles, a decorative technique which contributes to greater visual interest – but it also adds hassle to otherwise straightforward painting tasks. You can apply a single color to the entire surface to avoid dramatic effects, or you can highlight the awkward interplay of angular oddities by painting the prominent aspects in bright/dark accent tones – this will create an attention-grabbing contrast across the room.

Immaculate Niches

Another challenging aspect of your home that may leave you clueless, niches can be tackled in two ways. Depending on the look you wish to achieve, you can either paint the back wall only or you can paint the entire surface. Most people paint only the back wall as this is easier and makes for a nice decorative contrast, but painting the entire niche will render a more elegant, consistent feel to the room.

Tray Ceilings at Their Finest

ceilingTray ceilings are an excellent architectural touch for spacious indoor areas, but they are nevertheless rather complex when it comes to DIY painting projects. In a recent chat with the people behind Apcoatings, it was brought to my attention that tray ceilings can serve as an eye-catching room focal point if painted in a combination of light and metallic tones, while darker shades interlaid with soft natural tones will fare better in case you want to achieve the visual impression of added height.

Painting in the Bull-nose Corner

Bull-nose corners add a gentle, fluid feel to the indoor area but can be problematic come painting time. You can either use the same paint tone for the entire wall surface (rounded corners included) or you can paint the walls in one color and add graduated accents to mark the transition at the curved angles. If you want to stay on the safe side, opt for neutral or muted tones, but if you want to be creative and experiment a bit, bold shades can prove an engaging décor transition.

Moldings for a dose of chic

Just like tray ceilings, moldings can add sophistication to your workplace or living area, but they require more attention in wall painting. For a well put-together impression, paint the moldingstrims in slightly lighter or darker tones than the rest of the wall – or go artistic with bolder contrasts, complementary colors or glossy paint. Just remember: high contrasts and daring accents in moldings may visually diminish the room, so avoid them if your home is not overly generous in terms of size.

You need not be a new Michelangelo to refresh your home with a dash of fresh paint. Yes, there are options to consider and decisions to make, but at least now you know some basic hacks on how to make the most of the unique features your home already has and use them to the overall décor’s advantage. Pick a feel and look you want to create in your office, studio or apartment and work out a color scheme that fits the desired ambiance best. Life can be simple, painting included, for as long as you know what you want to achieve and are able to keep your eyes on the target.


Copyright © 2024 | Bruzzese Home Improvements | All Right Reserved | Web Design & Development by QualityMust