Scandinavian ideas to decorate the homes have been ruling the Interior Décor world for a while now. There won’t be a single person on the planet who might not have heard the terms like Lagom and Hygge.
And it is no wonder that the simple, yet classy Nordic ways are so admired and followed worldwide. Scandinavian lifestyle ensembles as simple as white or light-coloured walls, cosy warm rugs, and the addition of few decor elements to combat the chilly winters in a chic way.
Here is an Infographic by Insulation Express, consisting the snapshots and ideas from each Nordic country to help you style your home the snug Scandinavian way. It’s amazing how the assorted colour palette on the walls simply translates and reflects the characteristics of the respective region.
Moisture and water in the basement primarily comes from two kinds of sources. The first source is indoor humidity which will condense and form droplets of water, and the second reason is water vapor or water itself which comes from outside. Melting snow, rainwater and groundwater can saturate soil around the foundations of your house, thus allowing water to come in. water can even leak through cracks, penetrate porous masonry and concrete walls in its vapor form. To understand which problem it is, use aluminum foil to tape to the basement wall and look at it a few days afterwards. If there is moisture on the outer surface, then there is quite high humidity indoors, and moisture behind foil means that it is leaking through the walls. Now that we have figured out which of the two it is, let’s look at how to tackle this problem.
No Excess Humidity: while doing basement waterproofing there should not be any humid air around. You should seal the dryer vents with tape to cut off the excess air that enters. Just taping will not do, it tends to fall off easily, instead, also add a vent fan to the basement bathroom and use it during showers. Also keep basement windows closed when there’s humid weather. Even better is a dehumidifier.
Insulation of Pipes: if there is condensation coming from cold pipes, they add to the basement water issues. All cold water pipes need to be covered with foam pipe insulation in order to halt condensation. This is an essential step in basement waterproofing. You will find that foam insulation is quite cheap and easily cut by scissors.
Wall insulation: the exterior walls must be insulated to prevent any condensation. In colder climates, if you insulate your basement walls, it saves energy and reduces electricity costs. The only problem you might face is the occasional mold.
Water Separate from Foundation: if you find your basement leaking after a spell of heavy rain or snow, you should ensure that the water is diverted away from the basement. It is quite common for soil along the house to settle down over time and create a moat which will collect the runoff and direct it down the walls of the foundation and inside the basement. This problem can be solved by erecting a six feet wide slope which will drop about 4 inches away from the foundation. Cover the soil that is sloping with a 6 mm poly. Then you need to cover the poly with gravel and grass as well as a layer of soil so that the water does not soak in near the foundation.
Adding gutters and extending downspouts: consider adding gutters if your basement starts to leak after a spell of rain. Whether it is an old or a new gutter, the downspouts should have four to six feet of horizontal extensions to remove the water from your house.
Plugging holes and cracks: if you use hydraulic cement to seal the basement holes, it works best because it sets even underwater, and it expands as it sets. This gets rid of any small channels as well, just follow the packaging instructions and you should be able to do it, it’s quite easy.
Waterproofing walls: remove loose material with the help of a wire brush, clean off any efflorescence with masonry cleaner. You should follow the instructions carefully, especially the section on safety precautions.
Water in the basement is a common problem, and it is a good DIY on a lazy summer afternoon. Just be diligent and pay attention to the work you are doing, and basement waterproofing should not be much of a headache.
Moving back into your home after it has undergone substantial remodeling can be as physically and mentally demanding as relocating to a new one.
The entire process can be highly stressful because several things are happening at once and in different stages (packing things, cleaning the house, moving to a temporary home, adjusting to a different routine, moving back in, getting settled).
What’s more, people find themselves under significant pressure to restore order to their lives and get back to their regular routines as quickly as possible.
If you are now in the stage of moving back into your newly remodeled house, having a meticulous and strategic plan is crucial.
According to AFRA (Australian Furniture Removers Association) and accredited removalists on the Gold Coast, you need to take special care during the unpacking process because this can help set the right tone for your family’s new beginning in a freshly remodeled or repaired house.
To make unpacking an efficient and organized process, here are seven smart tips for you to follow.
1. Prepare a checklist of everything you need to do, in order
Preparing a checklist is key to an organized process. This will ensure that you are not missing anything and you have covered everything that you set out to do.
2. Pack things and label their boxes by room.
When you pack, it’s crucial to use the right packing materials; Gold Coast removalists stand by this time-tested tip. The appropriate materials ensure that all the items to be moved are properly protected. Also, if you buy good quality packing materials, you’ll find that they are easier to put away once you start unpacking, and can even be reused for other purposes.
Unpacking will automatically become easier if everything is clearly labeled because you will unpack the items only in the places where they will be stored. You won’t become frustrated from unpacking all the contents of a box in one room and realizing that it should have been brought into another room.
3. Prepare labels for the rooms.
Aside from labeling the boxes, labeling the rooms can also make the unpacking and moving-in process smoother for all parties involved.
Match the labels for the rooms to the labels you’ve placed on the boxes so the removal team won’t have a hard time finding the correct “drop off” points in the house for certain boxes. This can help them become more efficient at their job as well.
4. Make cleaning the first thing you do when you arrive.
Tidying up first will streamline the unpacking task. Once the house is clean, there’s nothing to distract you from immediately and continuously unpacking and moving belongings to where they need to go.
5. Set up all the big items first.
This pertains to the beds, the living room couch, chests of drawers, cubby house, a piano (if you have one), the washing machine and dryer, the refrigerator, and other bulky possessions.
It’s best to set these down right where they need to be while the house is still somewhat free of clutter and you still have the removalists with you. You want clear walkways and rooms as you move these large items around.
Once you have all of the bulky furniture and equipment where they need to be, the smaller belongings inside cartons, like clothes, lamps and books, can easily be moved directly from the boxes and into their rightful storage space.
6. Get all the essentials out.
These are the things that you and your family will need to use right away such as bed linen, blankets, pillows, bath products and towels (for the bedrooms), plus plates, glasses, utensils and the like (for the kitchen).
Take all these items out, put them in order, and you’ll instantly feel a sense of being settled into your new home.
7. Unpack by room.
Follow this order:
Kitchen – Once the kitchen is organized and you can go about preparing food, you’ll feel less inclined to dine out or have food delivered for the day.
Bedrooms – You’ll gain peace of mind when you know that you have a comfortable place to sleep at the end of the moving day.
Bathrooms – Unpacking for these rooms doesn’t take long, and it’s nice to know that all the personal hygiene products are there so you can use them throughout the day.
Living room – You may not be entertaining visitors anytime soon after moving back in, so this can be attended to last, along with the other smaller rooms in your house.
Unpacking and settling back into your newly remodeled home is a huge task, but when you take the time to plan the process carefully, you can tackle it more effectively. In no time, you’ll slip into a comfortable routine (especially with the great improvements made to your home), and you’ll have more free time to just sit back and truly enjoy your beautiful new space.
AUTHOR BIO
John Pfeiffer has been the proud owner of Ashtons Removals for over 40 years. His attention to detail, a product of his accountancy background, and his emphasis on training and empowering his team members, has ensured the vast number of Gold Coast families who have been moved by Ashtons Removals, have had their furniture and effects moved undamaged and with minimum fuss.
With energy costs on the rise, it’s more important than ever for homeowners to look for ways to reduce the amount of energy they use. Luckily, there are several home improvements you can make that will not only help save you money but also increase your property’s value.
While some require a decent initial investment, others are relatively cheap to implement, and all will pay for themselves over time. We take a look at some of the top energy-efficient home upgrades you can make that are great for both the environment and your bank account.
Install Solar Panels
Solar panels are becoming more and more popular, and it’s not just because people are starting to care more about the environment. In fact, a recent survey by Lendi found that the main motivation Australians would have for installing solar panels on their homes would be to save money, with 60.5% of respondents looking to reduce their power bill, and only 38.2% being interested in doing so for environmental reasons.
Besides generating heat and reducing your overall bills, solar panels also generate energy that can be used to power your home and any extra can even be sold back to the grid for someone else to use. So, not only are you able to save money on your energy bills, but you may even be able to earn some money in the process.
Swap High-Energy Appliances for More Efficient Models
You would be surprised to learn just how much inefficient appliances could be adding to your energy bills each month. The biggest culprits in the home are water heaters, dehumidifiers, heating systems, air conditioning, and refrigerators. So, if any of these appliances haven’t been updated for many years, it may be time to consider purchasing a new one.
Heating systems are usually considered inefficient by today’s standard if they are more than 15 to 20 years old, while air conditioning systems that are more than ten years old may already need to be replaced. While you will need to spend some cash on a new appliance, making the switch is a great way to save money in the long run.
Insulate and Get Rid of Drafts
Poorly insulated roofs and walls could be costing you as much as $200 a year extra in energy bills. Rather than allowing heat to escape, lay down some decent loft insulation and you’ll also help keep your house cool during the warmer seasons.
As well as improving loft insulation, be sure to get a good seal on your doors and windows to avoid air leaks. You can eliminate drafts on windows by adding weather stripping or caulking and purchase stick-on insulation to run down the sides of doors that have a bit of a draft. Older windows, however, may need to be replaced altogether as sealing around the frame may not suffice.
Another trick to help keep the heat in is to hang thick curtains over windows. Not only will this help to improve comfort and reduce energy bills, but it will also help improve the aesthetics of your home.
Improve The Lighting
Did you know that lighting can account for up to a third of your total electricity consumption? There are several ways you can reduce the amount you spend on lighting, including installing new light fixtures or even switching to LED or CFL bulbs.
If you want to reduce your reliance on electricity altogether, then focus on natural lighting. You can install larger windows or skylights that allow more sunlight into your home, which not only reduces your need for artificial lighting but also adds some free natural warmth to your home during the winter.
Monitor Your Energy Use
One simple home improvement you can make is purchasing an energy monitor, which allows you to watch your energy consumption closely. Some gas and electricity companies give these out for free, so be sure to check with yours first before going off and purchasing one yourself. However, they are relatively cheap to buy if you consider how much they could help you save.
Try placing it in a commonly used area, such as the kitchen so that the whole family can see it. Being able to see how much energy you are using makes it easier to cut back as it acts as a constant reminder of how much you’re spending.
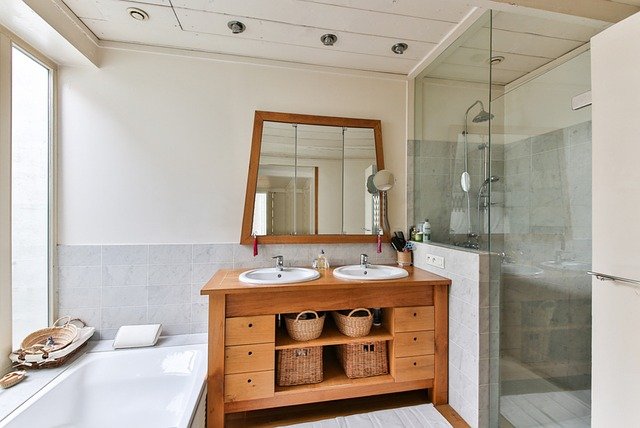
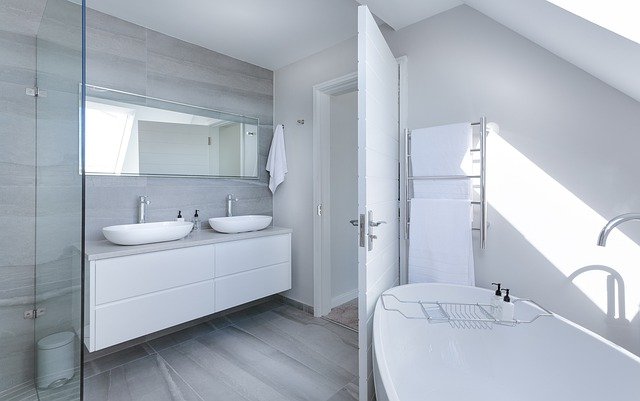
One of the most frequented rooms in the house is the bathroom, so a plumbing system that functions properly is a basic requirement. We tend to take running water for granted as it’s conveniently there every time we open the faucet or flush the toilet. However, if the system is not well-maintained and a plumbing emergency arises, we become painfully aware of our dependency upon it.
In order to avoid such inconvenience and stress, all you need to do is regularly maintain the plumbing, from the toilet and showerheads to the faucets and drains. The small amount of your time and money that you invest in proper plumbing servicing will by far outweigh the risks and potentially high costs in case anything goes wrong.
Here are several simple tips that can help you maintain your home plumbing system better.
Repair leaks
Frequently, the main source of bathroom leaks is the toilet and it can be easily avoided by regular check-ups of the toilet tank. You need to make sure that the water level is normal and it isn’t overflowing. You can do that by checking the overflow pipe in the middle of the tank. This pipe is connected to a tube and if water is running over it, you need to adjust the fill valve so the water level stays at least one inch below the top of the overflow tube.
The next step is to add a few drops of food colouring into the tank to test the flush valve mechanism. If the water in the toilet bowl has changed colour after 15 minutes, it means that the ball or the flapper are leaking and you’ll need to have them replaced.
Another important tip is to avoid using your toilet bowl as a waste basket. Make sure all garbage such as cotton balls and swabs, sanitary products, diapers and make-up tissues are thrown in a proper trash bin and not in the bowl, as they can’t be dissolved and will clog the pipes.
If you notice any type of damp spots or discolouration on the floor or walls, it’s a sure sign that there’s a leak somewhere. You must react immediately. You might be able to fix a minor leak with your tool kit, but if there’s a more serious problem, don’t hesitate to get professional help. Reliable experts, as this plumber servicing Canberra, will surely know what to do in cases of blocked drains, burst pipes, leaking taps or toilets and problems with heating and hot water supply.
Prevent clogging
The best measure of prevention you can perform yourself is making sure that clogging doesn’t happen. Simply use strainers in tubs and showers to catch hair and soap chips, and clean them regularly. Also, run hot water down the drain once a week to keep it flowing freely. Once a month, pour down a mixture of vinegar and baking soda down the drain. Let it stay for 10 minutes, and rinse away with hot water. This will help the pipes stay clean and prevent unpleasant odours.
Maintain the faucets and showerheads
The sources of your running water, faucets and showerheads, greatly influence the comfort and success of your bathroom experience. Firstly make sure there are no leaks, as dripping faucets can waste up to 11000 litres of water per year.
The second problem you might have is low flow and it’s usually caused by lime build-up and mineral deposits inside the aerator or showerhead. Both can be easily disassembled and carefully cleaned with a brush. This will remove sediment and allow free water flow.
Dedicating a portion of your time and effort to regular maintenance of your plumbing will help keep the system in pristine condition. It will also contribute to the reduction of water consumption in your home and make it more sustainable and energy efficient. In the long run, you’ll have lower utility bills and minimal impact on the environment.
Plantation shutters are a stylish touch for any home. Depending on their finish, they can play upon the elegant or rustic qualities of a room’s décor. Not unlike other slatted window treatments, they do require some attention in order to remain clean. To make this task a little easier for you, here are three ways you can keep your plantation shutters virtually dust-free.
Matter of Consistency
Floating dust particles are in endless supply. They settle and build quickly when given half a chance. Getting into the habit of cleaning your window shutters weekly is one way to avoid dust buildup, making maintenance an almost subconscious routine. Rather than reserving this job for the seasonal cleaning list, do it every time you do more than just a quick tidy up around your home. Prior to vacuuming and dusting the rest of the room, use a soft bristled sweeper brush and give your shutters a gentle dusting to remove any accumulation. Ideally, this job should be done with a brush connected to your vacuum hose to keep dust particles contained.
Stubborn Dust
Using soap and water on stubborn shutter grime can often leave you with a wet, muddy mess dripping everywhere. Instead of wetting the blinds with water, use a dry cleaning method. Take a laundry dryer sheet and run it back and forth across the shutter slat, loosely wrapping the dryer sheet around a toothbrush to access tight corners. The same agents used in dryer sheets to soften your clothing will also help soften the grime that has adhered to your shutters. Additionally, dryer sheets are made of a textured material that will help scrub away dirt and dust without damaging the finish on your shutters. Note that it is always wise to consult your plantation shutters owner’s manual to check for brand specific care recommendations or warnings.
Keep Them Slick
It might sound funny, but when something is slippery, dirt and dust has a more difficult time adhering to it. Keeping your shutters coated with a polish will give them a nonstick surface that is ideal for easy upkeep. You’ll want to choose a dust and shine spray that is not waxy or oily. These could potentially leave behind a residue that will attract and trap dust molecules, achieving the opposite effect you desire. After you’ve thoroughly cleaned your shutters, you should only need to polish them about once a month, with your weekly routine cleanings in between. Remember, dust will still settle on your plantation shutter slats, but, if they are polished slick, the dust will sit on them rather than set on them.
If kept clean and well-maintained, plantation shutters are a valuable and luxurious upgrade that will offer years of beauty and service. Keeping them bright and clean is a cinch when you employ the right tools and techniques.
There are few things DIY enthusiasts love more than finding out new and clever ways to make projects easier to create, or ‘hacks’ as they are usually called. Once an innovative shortcut has been discovered, and if it is trialled successfully, it’s very likely that you will swear by it going forward.
We came across this info graphic from Crowe Sawmills which details 10 hacks that could work brilliantly for woodworking projects. These involve simple substitutions, original ways of using an assortment of items or a clever combination of items to form a very handy tool. One such example is known as a notched square blade, where you take a regular trisquare and file a notch at the end of it for holding a pencil in place. You then slide the trisquare along the edge of a piece of wood to draw a perfectly straight line. It seems like such a simple concept but the vision to spot this and create a workable solution is remarkable.
Other woodworking hacks are considerably simpler, with regular household items performing a basic yet clever task. For example, a clothes pin can be used for holding a nail in place when hammering it into a wall, sparing you from gripping it carefully with your thumb and forefinger. Similarly, if you have a comb lying around the place, you can use it to store nails upright, making them much easier to grab than if they were lying on their side in a crowded toolbox.
Check out plenty of other clever woodworking hacks in the infographic below.
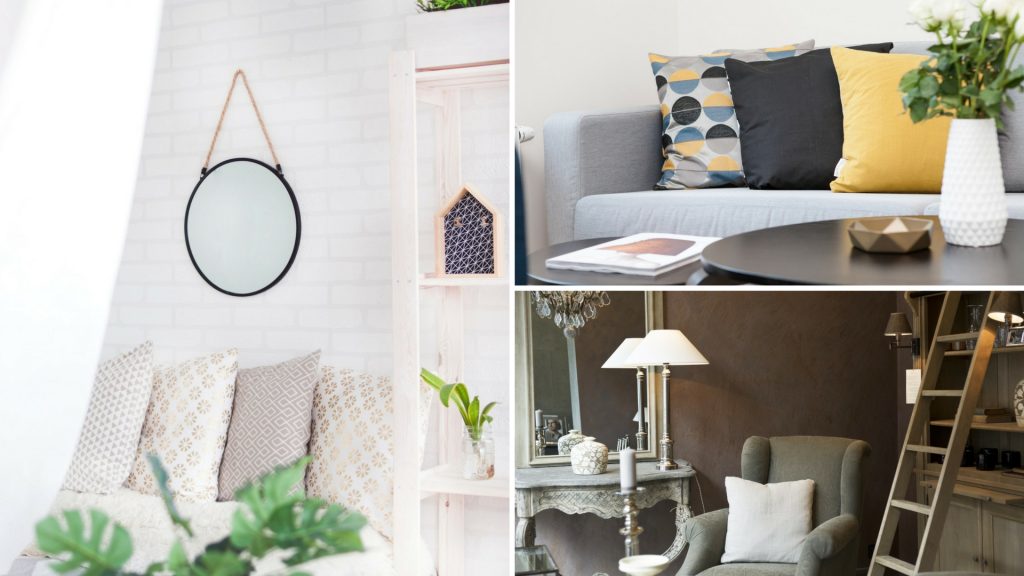
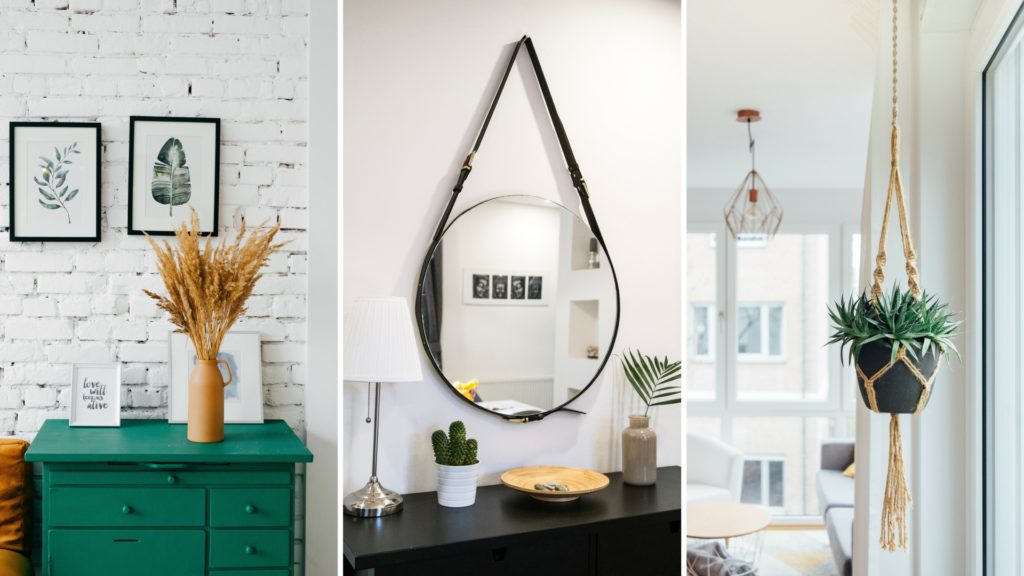
Only when you add the final touches to a space does it gain an authentic character. Whether it’s a statement piece or a few decorative details, perfectly combined elements can round up a space and make it feel complete. In addition, the final decorating stages also provide you with an opportunity to give your personal touch to a room and express your own personality and style. Here are several ideas that will spark your imagination and creativity and help you style up your space to perfection.
Install the perfect lighting
Lighting is a barely noticeable element that can either make or break your space. With the perfect lighting, not only can you accentuate the stunning features of your room, but you can also create a specific ambience and set the mood. Introducing different layers of light is key to creating a perfect lighting scheme. Apart from the main source of light, such as a stunning chandelier, you also need task lights, for example, a lovely freestanding lamp next to your comfy armchair for reading, and accent lights, such as chic fixtures that work as decorative details. Thus, it’s important to think about the atmosphere and ambience that you want to create and then introduce lighting fixtures that will help you achieve that.
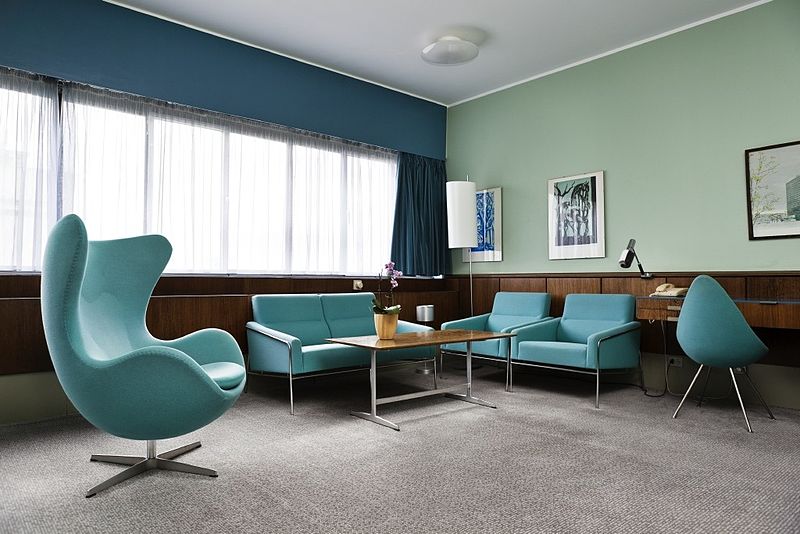
Use an egg chair to create a comfortable atmosphere
Egg chairs have become quite popular around the world, especially in Australia, due to their unusual, stunning and comfy appeal. This type of chair works perfectly in different settings, be it a traditional or modern space. Giving away the impression of being in a cocoon, these chairs are a perfect choice for creating an atmosphere of comfort and cosines in your space. Furthermore, they come in a variety of styles that can truly elevate home décor. For example, comfortable and trendy egg chairs in Australia feature the traditional Arne Jacobsen design, as well as a less traditional eyeball shape. Furthermore, they can be found in a range of eye-catching colours and different materials, including wool and leather. Introducing an egg chair to your space will truly add to its comfort and work as a stunning focal point.
Group of three
Stylish groupings of decorative items can work as enchanting accent details in a space. However, it’s important to group them in odd numbers in order to make them more memorable, and the magic number is three. For example, if you have a lovely console table, you can decorate it with a chic lamp in combination with a vase of fresh flowers and a candle. The diversity of these three items will add to the appeal of the grouping yet a joint feature, such as a particular hue, will create a cohesive look. Varied combinations will enable you to mix different materials, colours or patterns, but always make sure that the items share a feature in order to create a more balanced effect.
Design a mesmerizing wall display
Walls should never be left bare because they offer so many design opportunities. Even a single detail embellishing a wall can style up a room instantly. However, if you want to create a truly enchanting look, you should create a stunning wall display. Gallery walls have become a popular trend, with homeowners displaying their favorite pieces in a fashionable way. It’s important that you place the artwork at eye level instead of too high. When designing a gallery wall, you should use paintings and other wall art that share the same motif or are painted in a similar style. You can also add a chic mirror as long as it fits into the overall design. In addition, don’t be afraid to experiment with the arrangement for a whimsical vibe.
Choose the right area rug
An area rug can truly tie a room together and create a layered, cohesive look that exudes cosiness. Not only will it embellish your floors perfectly, but it will also provide you with an opportunity to style up a monochromatic design and introduce a pop of colour or a play of patterns. However, you need to choose the right rug that fits your space in order to give your room a trendy flair. Apart from considering the size of a rug and different colour schemes, it’s important that you pick the right material. Typically, you should choose a material that differs from the one used for your furniture. For example, if you have leather furniture, you should pick a soft, plush material for your area rug. This way, it will create a balanced look in your space and truly stand out.
With the perfect finishing touches, your space will gain character and truly reflect your personal style.
About the author:
Chloe is an interior design consultant from Adelaide and a regular contributor to Smooth Decorator. She loves everything related to decor, aesthetic and lifestyle topics. She is also passionate about photography. Her biggest dream is to travel the whole world and take some stunning photographs of beautiful places. Beside all this, she enjoys drinking coffee and reading a beautiful book from time to time.
Keeping a great garden can be lots of fun, as well as a way to make your home look better from the outside. If you grow vegetables, it can also be a great source of fresh, nutritious foods for you and your family. Here are some of the best tips for turning your garden into the envy of everyone else in your neighborhood.
Start with Great Soil
If you want plants to grow well, you need to start with rich soil that will provide them with plenty of nutrients. Organic topsoil, sold by the bag at many hardware stores, can give your garden the start it needs to grow healthy plants. If you want to make your soil even richer, you can consider incorporating manure or compost for extra nitrogen. Mix these additives into the soil that’s already in your yard, and you’ll have a great foundation for your garden.
Choose the Right Seeds
If you want the perfect garden, you need to be selective with your seeds. Not only should you choose plants that will look and grow well together, but you should also consider whether or not the seeds you’re getting are good for your particular climate zone. If you plan to grow vegetables, consider the yield of each hybrid variety in order to get the most out of your garden.
Optimize Your Irrigation and Drainage
Everyone knows that plants need water to grow, but getting the exact amount of water right can be a little tricky. A good solution is to install an automatic irrigation system that will water your plants at specific times and for specific periods to ensure that they’re getting exactly what they need. You should also install a good garden drainage system, since plants can be harmed by water sitting on their roots for too long.
Rotate Seasonally
One thing that will easily make your garden stand apart from your neighbors’ is rotating the plants you have in it with the seasons. If you’re growing a flower garden, this means planting annuals for spring, summer and autumn. With vegetable gardens, you have even more latitude to rotate, as you can start with crops such as peas that mature early, then plant autumn harvest crops like squashes. Tomatoes, peppers, green beans, lettuce and broccoli can fill out your vegetable garden, as they’ll produce consistent harvests throughout the summer.
By keeping these simple tips in mind, you can create a great garden that will be the envy of all of your neighbors. Keep in mind, though, that keeping a great garden will still require plenty of work on your part.
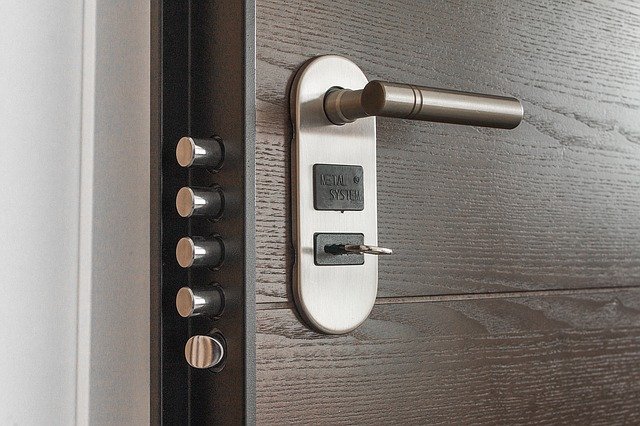
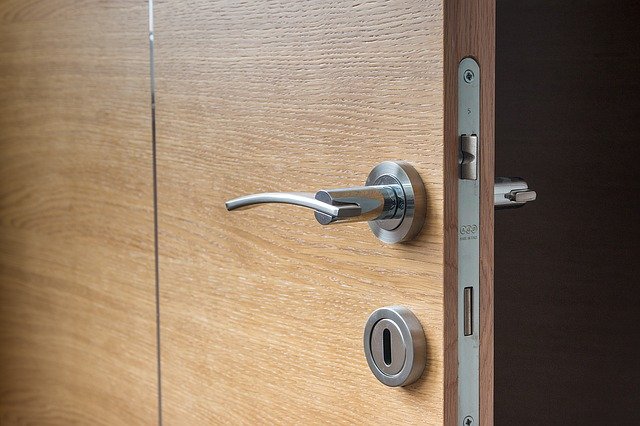
Most homeowners have never heard of the term rekeying a lock, and at the mention of it, they look confused. It’s not surprising as commonly everybody jumps to the quickest solution without thinking too much and opt for replacing the entire lock. Not that it’s the wrong option, but it may not always be necessary. Rekeying door locks might just be a better choice than changing all locks, and if you’re still torn about what to do, here are some pointers to help you make your decision.
Rekeying the locks
Rekeying the lock essentially means readjusting the internal workings of the lock so that it can function with different keys, without putting your home security at risk. You get to keep your old lock, but the keys you had been using up until then, will not work any longer. For this exact reason, the whole process is very cost-effective since it keeps the existing lock body, with only a few things reworked and upgraded. You end up paying only for the labour cost when you hire a locksmith, who will get the job done quickly, hassle-free and with only a few tools.
In the rekeying process, the locksmith will remove the springs and pins from the lock cylinder and replace them with new ones that will work with a different key. Unless the lock is broken or malfunctioning, most locks can be rekeyed in this manner and still kept in service, often operating even better than before.
As a safety option, rekeying is much preferred by new homeowners as it boost the overall sense of security. It gives them the chance to reset their key control and eliminate the risk all the other keys that were once in function pose. This helps prevent previous homeowners, or anyone with a key copy, from simply walking into a home that no longer belongs to them.
Replacing the locks
The main difference between rekeying and replacing the lock is that you will now have an entirely new and different lock body. It is more expensive since you are getting a whole new lockset and you still have to pay for the labour, but it comes with its own benefits.
Installing completely new locks provides you with the option of customizing your home security. You can choose longer screws in the lock or additional security pins as well. You also have the luxury of upgrading your locks, which also means upgrading your overall home protection. Another choice is even to abandon traditional locks entirely and go for the smart locks. This may not be an easy decision to make, and whether you’re doing it as a part of a renovation project or in a case of an emergency, it’s recommended you get professional advice and help from a reliable 24-hour locksmith, who can assist you in making the best choice possible.
Certain circumstances will require locks to be replaced, as they do wear from use, sometimes beyond the point where rekeying might help. Or, it could be for aesthetic reasons or to accommodate disabilities. For instance, lever handle locks are much easier to use than door knobs and they are much more attractive. On the other hand, electronic smart locks are a new popular trend and can be conveniently operated using an app on your phone.
Essentially, it’s never a bad idea to upgrade your locks. When you consider what you are protecting inside your home, an investment in high quality locking hardware will pay off long term.
Unfortunately, there is no “one-solution-fits-all” in this case. Every home is different and each family has different demands, so in order to make the best decision that will work for you and your home, you need to consider all aspects, re-examine your needs and weigh out the pros and cons. Possibly the best solution is consulting a professional locksmith to help you determine what is your most suitable and affordable choice.