fbpx ...

Eco Inspired Home Improvements

plastic recycleFor the past several years, many people have decided to use eco products in their effort to preserve the environment and their health. They recycle and use natural cleaners for their households, solar panels to heat the water, and even hybrid cars. But many don’t just stop here. There are people that turn their homes into entirely eco-friendly and natural places, made of materials that are not harmful to the environment.

Going green seems to be not only healthy but also less expensive. For this reason, now more people think of eco-friendly methods that can be applied in their everyday activities and habits. Here we will show you a few interesting and innovative eco home improvements that you can use for your home if being kind to nature is what you desire the most.

The number of improvements you can do is practically endless but in this article we will show you a couple of examples that have been carried into practice. We will talk about what things you can do to change the interior of your house and some of the products you use.

Avoid using plastic stuff

You may find this ridiculous but, if you turn around, you will notice that you have too many plastic bags in the household. When you shop, carry jute or cloth bags. You can find bio-friendly bags in stores.

Every time you have to make a choice about materials in your household, always decide against plastic. For example, pick up wooden chairs instead of plastic ones; glass bottles instead of plastic ones, glass mugs instead of plastic ones, etc. When you think about it, you will see to what extent plastic has pervaded your life.

Avoid using papers

Magazines and newspapers that can be found on the internet can be easily accessed in the digital world. Instead of buying an actual copy, go for its online alternative. This will save you money and help preserve trees.

In addition, if you have a smartphone, use it to take pictures of receipts, bills, tickets, boarding passes and anything that you need to print out. Physical books can only take up space at home that you can use for other purposes. At first, it may be difficult to get used to e-reading, but you will see how easy it gets in time.

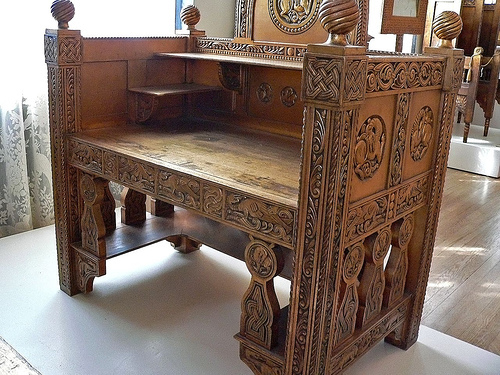
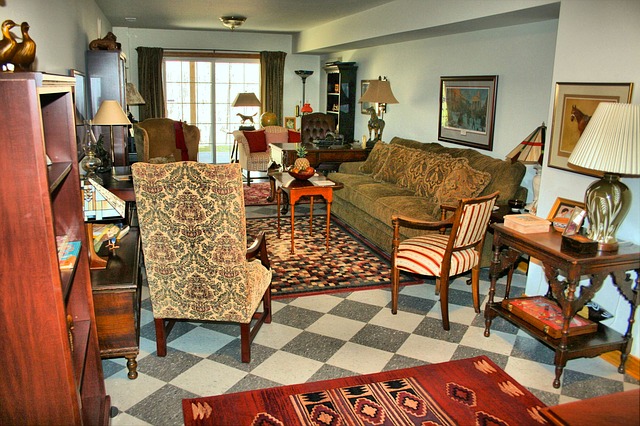
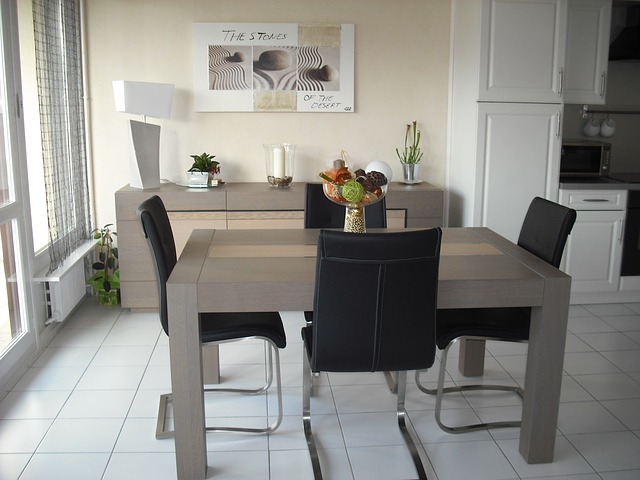
Eco-friendly furniture

Thinking of refreshing the interior a bit? Why don’t you purchase eco-friendly sofas? Use natural wooden frames that are non-toxic or carcinogenic compared to some of the other materials that sofas are made of. Cushions made of jute, cotton, linen, latex or wool will also work.

Don’t forget to apply this rule if you are planning to buy beds, chairs and other items. Not to mention, the market offers furniture made of organic and recycled material. When you consider purchasing anything like that, it is a great idea to do some research before you head for the furniture store.

These are just a couple of eco-friendly ideas that you can use to make your home safe for you and the environment. Every small step towards eco lifestyle will bring you closer to nature.

Guest Post By:  July Minor consults http://www.cleantoperfection.co.uk/deep-cleaning-w7-hanwell/ for using eco friendly cleaning solutions and methods for the services they offer.

How to Buy a Backup Generator

The Workbench Life: Home

How to Buy a Backup Generator

By Jason Carpenter for The Workbench Life

There are numerous reasons for a power outage to happen in your town, but there’s no reason for you to be unprepared. A backup generator can provide power to your entire home to keep you and your family safe and comfortable.

The first step is to write down all the appliances that you want to power in a blackout. The most common (and urgent) items needed to stay powered up during a blackout are:

  • Refrigerator
  • Well water pump
  • Basement sump pump
  • Minimal lighting
  • Electric range or microwave oven
  • Furnace
  • Freezer

If you’re one of those homeowners who wants to have all their comforts available in a blackout, make a second list of helpful electrical items such as:

  • Computer equipment
  • Air conditioning (either central system or window units)
  • Television(s)
  • Gaming systems

Once you’ve come up with your list of electrical items, you can calculate the total wattage required to power those items (refer to the tag on each of the units). Now you know how much power you’ll need in a generator.

Gas-Powered Portable Generator

This type of backup generator is great for providing power to essential electrical items during a power outage, but you’ll have to start it up manually and keep enough fuel on hand to keep it running in a prolonged blackout. You’ll have to plug your appliances (via long extension cords) into this type of unit, which typically has anywhere from two to four outlets.

Tip: To avoid running electrical cords, you can have an electrician install a subpanel that will allow the generator to power entire circuits in your home.

A generator with a 3,200-watt output costs around $500, while a 10,000-watt output generator can cost up to $1,500. Those with wheels and key-starts cost a bit more.  Some have tanks that hold enough fuel to run the generator for only a few hours, where others gas tanks to keep the generator running for 10 hours or more. Remember to plug in a carbon monoxide detector while using a portable generator.

Tip: Get one with wheels. Generators are very heavy and you don’t want to mess around with one without wheels in the dark.

Standby Generator

This type of generator sits at the ready, buried or installed next to your home. Its sensors detect a lack of electricity coming into the home and start the unit automatically. They are typically fueled by natural gas or propane and start at $5,000 (with installation). If you want to run your entire home during an outage, or if you live in an area common to power outages, this is the choice for you.

With a standby generator, you don’t need to worry about running extension cords across your floors. Because of its dedicated fuel source, you won’t need to worry about storing enough gasoline in your home or garage. One last, important benefit of the standby generator is that it’s far quieter than a portable unit.

However, installing a standby generator is not a DIY project — you’ll need to hire a professional electrician to hook up the generator and install a transfer switch and subpanel. Price is another major difference from the portable unit, as standby generators start around $5,000 and can exceed $15,000 once you consider wattage output and installation costs. Generators on the lower end of the price scale typically have a 7,000 watt output, and those on the higher end have 30,000-watt output — enough to power an entire home and all of its electrical appliances and gadgets.

Jason Carpenter (yes, that’s his real last name) loves to tackle DIY projects on weekends; his work has appeared in This Old House, Men’s Health, Consumer Reports and other publications that appreciate good tips and tools. Jason is a frequent contributor to The Workbench Life

Using Gutter Guards In Extreme Weather Conditions

gutter guardFor many homeowners cleaning the gutters is one of the least appealing household chores. The build-up of rotting leaves and decomposing insects is enough to make even the bravest homeowner a bit queasy. Some of us choose to ignore the clogged up gutter, saying, “it can wait until tomorrow.” But during extreme weather conditions, tomorrow is too late. Did you know that a clogged gutter could cause roof damage, home flooding, and damage to your gutters and home? A gutter protection system is a must-have item for home protection, and should be installed before extreme weather strikes again.


Types of Gutter Guards
: Many companies offer gutter protection systems, including gutter guards of various shapes and designs. Gutter guards offer peace of mind and protection from falling debris, gutter clogging leaves, and excessive water flow during extreme weather conditions.

  • Filter Inserts: Filter inserts typically slide onto existing gutters. They are designed to keep leaves and debris out, while letting water flow into the gutter. Leaves are supposed to slide off of the filters or dry up and blow away; however, it is a good idea to check filter inserts before extreme weather. A quick check will allow you to remove any debris that has collected.

  • Screens: Gutter screens are sturdily constructed to protect your gutters from leaves and debris. Unlike the filter inserts, gutter screens typically have hinges that attach to the gutters. The hinges make for easy lifting and cleaning. Prior to extreme weather, gutter screens need to be checked for stuck debris. Sometimes leaves can clog up the screens holes, which will prevent water from flowing into the gutter.

  • Service Tension Unit (hood): Gutter hoods allow water to follow the hood straight into the gutter. The direct flow of the water pushes leaves off of the roof, while keeping them out of your gutter. Smaller debris (such as pine needles) can still gather in gutters. It is best to check hood installation and gutters before a storm.

  • Hybrid/Combination: A hybrid or combination gutter guard merges two gutter protection systems into one. This system is designed to maximize the benefits of two gutter guards, while maintaining a low-profile design. Hybrid or combination gutter guards are meant to be effective but not visually distracting from your home’s décor.

Installing Gutter Guards: Whether you choose to hire workers or do it yourself, installing gutter guards is a fairly easy process when you follow these steps.gutters

  1. Check current gutters: Test your gutters by using a garden hose to check water flow. Note where water isn’t flowing properly, and check for gutter damage.

  2. Clean current gutters: Remove any clogged debris from the gutters. Be sure to wear a pair of gloves; you never know what might be living in a clogged gutter.

  3. Measure gutters: Depending on the type of gutter guard that you choose, you will want to make sure that you purchase the correct length. Gutter guards come in various sizes, as such, you might need a saw or metal cutters to cut the gutter guard down to the appropriate size. Gutter guards should be the exact length of your gutters, so be sure to measure correctly!

  4. Installation: Filter inserts and screens fit directly into your existing gutter and should slide or clip easily into place. A service tension unit or combination gutter protection system will require nails, screws, or pop rivets to hold it in place. Check your toolbox before purchasing this type of gutter guard, and be sure to properly align the gutter guards with your gutters.

  5. Enjoy gutter guard protection during extreme weather: Your home and gutters will thank you for installing gutter guards!

Author bio: Suzan Hall is a part time blogger. She covers various topic related to home, interior decoration, and home repair etc. She loves to spend her time with family, friends and enjoys sharing tips and advises online. Over the last two years, Suzan has been blogging and contributing for home improvement and gutter protection systems.

Wooden Furniture Cleaning Tips

wooden furniture
http://farm4.staticflickr.com/3081/2690793628_3005a25f52.jpg

Wooden furniture has an invariable level of aesthetically pleasing qualities and is frequently presented with a serious price tag, which means that you have to take good care of it in order to prevent it from being wasted, damaged, or otherwise have its  natural constitution reduced in any way, shape or form. Concordantly cleaning your wooden furnishings using methods that preserve their natural properties is essential if you wish to stop the irrevocable appearance decline of your wooden articles and lose the substantial investment you’ve made in acquiring them. Of course, wood, as a material, has inherent imperfections, ergo the eventual diminution in the condition of the furniture is inexorable. Be that as it may, you can still take action towards at least retarding the otherwise inevitable outcome. Here are some tips you might find useful in your quest.

Everyday Cleaning

All cleaning, be it everyday or special, should be performed with the utmost diligence and care and should employ the use of a microfiber towel for the best results. Microfibers pose little to no threat of scratching the surface of the wood which makes them ideal for this little endeavor. It is of paramount importance that you perform a prophylactic sweep at least once a week in order to prevent the eventuality of dust, dirt or bacteria accumulating near, in or on your wooden furniture. Prevention, as they say, is the best cure.

As for the cleaning agent you should employ for everyday cleaning, the market offers a wide variety of options so you have the opportunity to choose in accordance. It is important to realize, however, that there is a difference between a cleaning product and a polishing product, even though some will claim that they can do both. It’s advisable that you purchase different products for cleaning and polishing – one will take care of the exasperating dust and dirt, and the other will restore the material’s former beauty.

Most wood polishes are either wood or wax based. It is essential that you use the same type every time because otherwise the two types might interact, contradict and otherwise leave your wooden furniture in a substandard, unsatisfactory condition.

If you do not wish to purchase cleaning products from the store, whether you doubt their efficiency or simply wish to protect the environment, you can always use olive oil as polish and hope that the microfiber cloth alone will be enough to remove the dust accumulated through the week. Of course, if you wish to go down this path, it would be advisable that you clean more regularly. For the most part, it will be sufficient and will not pose threat to the environment. In interest of preserving the wood’s constitution, use no more than a few drops of oil on the cloth and use different cloths for the different stages of the purification process.

Special Cleaning

Special cleaning is a bit more tricky as it involves the use of intense cleaning methods and is usually caused by an emergency. For example, you have to perform this type of cleaning when there is a stain or something along these lines, which is otherwise breaking the routine. If you are facing such dire circumstances, fear not – it won’t be as hard to deal with as you initially might think. You will probably have to use synthetic materials this time around, though.

It’s important to act quickly. Try to remove at least part of the material you have to clean with a cloth. Imagine, for instance, that there is a ketchup drop on your wooden sofa. The first action you should take is removing as much of it as possible, without spreading it. Then use the synthetic cleaner and carefully polish. It’s important to act quickly, otherwise it might be impossible to remove later on. Clean the whole piece, not just the stained area and then polish it.

Author Bio: July Minor is blogger keen on cleaning and home improvement topics. She has a lot of experience at her job http://www.callcleaners.co.uk/cleaners-w6-hammersmith/ and she loves to share it.

How to Make a Home Fish Pond

fish pondA fish pond can be the focal point of your garden allowing you to build everything else up around it. However, paying for the installation of a full-sized pond can be fairly expensive, not to mention the cost of the materials. Though let’s say for a moment that you could handle the material costs and do the work yourself: Would that be worth it?

While investing some energy and free time, even the casual gardener and do-it-yourselfer will certainly be able to handle the process of installing a reasonably sized fish pond.

If you’ve decided to undergo this project, here’s what you’ll need to purchase:

     Lining

     Rocks or pebbles

     Pump

     Surrounding rocks

     Surrounding landscaping

These are the “base items” that you’ll need to construct your pond. Depending on the complexity of it, you might want to add bridges, stone walkways, or other aspects that we won’t cover here. Essentially, you can make it as complex as you want it to be.

We’ll just cover the basics, then you can add bells and whistles as you see fit.

1. Dig — It sounds simple, and it is for the most part. Measure out how big and deep you want your pond to be, purchase the corresponding sized lining and then go out and dig the foundation for your pond.

You’ll just need to be sure and measure as you go to make sure you’re not digging too wide or too deep. It’s hard work, but these ponds typically aren’t massive in size, which means it won’t take quite as long as you might think.

Plus, it’s the hardest part of the job, and it’s the first thing to check off the list. Once you’ve got the digging done, it’s all downhill from there.

2. Lining — There aredifferent types of lining you can get. You’ll either have a flimsy material that you lay into the hole you’ve dug, kind of like a blanket, or you’ll have a shell that’s pre-shaped. The shell lining is going to be a little less forgiving when it comes to the quality of your digging job, and is also less likely to leak water.

Consider the shape and contour of your pond before you decide which kind to get, as a more textured or layered pond would be better suited for a more forgiving liner.

3. Pump install — You’ve got some options when it comes to your pump as well. You can hide it in rocks or landscaping, or purchase an extension so that it can be kept in your house or garage. Most pumps you buy will come with specific instructions, so make sure you check to see what size pond the pump can handle, and then pick out a place to stash it so that it’s out of plain sight.

4. Landscaping — Once the pond and pump are installed, all that’s left to do is get things decorated. Make sure you line your pond with rocks or pebbles to hide the lining. You can then use rock or outdoor tiles for surrounding the pond, depending on whether you’re going for a natural look or not. Add plants and flowers around the pond as you see fit.

At this point, it’s all just a matter of style and preference. You can even add bigger components like a garden water fountain, particularly if you have several levels of water to work with.

Easier than it Looks

A fish pond sounds like a huge job on the surface, but in reality, there are only a few steps if you can plan well and buy the right materials. A fish pond is a foundational piece for any garden, so consider installing one early as opposed to waiting.

Marcela De Vivo is a freelance writer in Southern California. She loves being outdoors and enjoying the property around her home, and is always looking for ways to make it look more aesthetic. Follow her on Pinterest for more great ideas!

Give your living room a new lease of life

The living room is arguably the most used room in any home. Watching television, entertaining guests, chatting and chilling with family are just some of the activities that take place here, so the right planning is important to ensure it’s up to the job.

Assess your needs & requirements

living roomBefore you start planning, think about how you’ll use your living room and what furniture and accessories need to be included within the confines of its shape and size. For example, if you plan on making it the main entertainment area, you’ll need an adequate seating arrangement plus space for the television and related accessories. Or maybe you plan on creating a dual purpose room that incorporates a dining area into the design.

Create a main focal point

Living rooms always work better when they are planned around a main focal point, such as the TV, a great view, or the fireplace, so it’s important that you arrange you’re seating to make the most of this. If your living room doesn’t have a natural focal point, create your own! You can do this by painting a bold shade on the main wall of your room or place your armchairs and sofas around a coffee table in an interesting and creative way. Make sure access from the patio doors or doorway isn’t obstructed and that you can easily move around the room. If you have enough space, don’t push your furniture right up against the wall as being able to see behind it can create the illusion of more space.

Getting the layout right

Use the proportions for the living room to your advantage. Long, narrow rooms are often divided into separate areas, for example, one end of the room can be used to watch TV and relax, while the shorter area of an L shaped room can be used as a dining area or home office. Take a piece of paper and draw a plan of your living room and include any accessories and furniture that will need to go in it, then alternate between different layouts until you find one that works. It is also worth doing this with your furniture, spend some time moving it around until you find the best arrangement. Quite often, the least obvious layouts are more effective than the ones that look good on paper.

Plan adequate amounts of storage

From CDs and DVDs to games, toys and television equipment, there are so many items to store in a living room. You can keep your living room clutter free by hiding unused objects in floor to ceiling cupboards. These can be fitted along one wall or in alcoves either side of your fireplace. If you prefer to display your books, you can incorporate open book shelves into your design. Other space saving ideas include footstools with space for storage underneath, or built in window seats, and dual purpose pieces of furniture, such as coffee tables or sofa beds that have adequate room for spare bedding.

Sofa suggestions

Sofas are usually the pieces of furniture that cause the greatest amount of difficulty. They are one of the most used items in any home so it’s important that you get it right. Will your chosen sofa fit into your living room? If you’re considering a corner sofa, make sure that all the doors will open properly when it’s in place. Chesterfield Leather sofas are ideal; they are durable, attractive and easy to maintain. If you choose a material sofa, it’s recommended that you buy one that has washable covers, these are very practical.

Dress your windows

Unless you live in an ultra modern glass walled home, bare windows aren’t a good look. Even if you have an amazing view and aren’t overlooked by neighbors’, roman blinds, sheer curtains or shutters will enhance rather than detract from your windows. For larger windows, go for curtains, vertical blinds or roller blinds. If your room is plain, you can add any pattern or color with curtains and blinds.

This is a guest post by David at Thomas Lloyd Leather Furniture

Kitchen Gadgetry: Unique, Useful and Fun

kitchen gadgetCooking can be a daily chore or an experience to be embraced. Gadgets in the kitchen can make the difference. Whether to make your cooking experience easier, more convenient or just more fun, gadgets can be exactly what you’ve been looking for. Some are simple and inexpensive but nevertheless extremely helpful in the kitchen. Other gadgets require more expense and/or space to accommodate into your kitchen design. Let’s start with some simple gadgets that might help alleviate the stress of cooking.

Digital Meat Thermometer

This gadget helps measure the exact degree of cooked chicken, roast or turkey so it does not become overdone and dried out. It can also be used as a measure for the warmth of the water when dissolving yeast so it’s not killed by overly warm water.

Silicone Baking Sheets

If baking is your forte, silicone baking sheets will help those cookies slide right onto your cooling racks. Being eco-friendly, silicone baking sheets eliminate the expense and waste of using parchment paper.

Kitchen Tablet Mount

Using technology in the kitchen is becoming truly necessary—after all, Pinterest has all the recipes you could ever want! Because of this, the tablet is becoming a fixture in the kitchen. To protect your iPad or tablet, install a mount that will keep it at eye level and out of the mess of cooking.

Parchment Cooking Bags

These handy cooking bags make cooking without extra butter and oil a reality. They can be used to cook vegetables, as well as fish and meat. They help keep the moisture in food without any added fat.

Herb Mill

If fresh herbs are used frequently in your kitchen, an herb mill is the gadget you need to get the freshest chopped herbs into those recipes with just a turn of the wrist.

Pasta Maker

There is simply nothing as delicious as freshly made pasta. A pasta maker is a must if you’re taking on the task of creating your own spaghetti, ravioli or fettuccine. Simple to use and fun, the pasta maker is worth it, eliminating the need to roll pasta by hand.

Some gadgets that help make the kitchen the room of choice are not as inexpensive and simple, but definitely can make the kitchen a happier place!

Pot-Filler Faucet

With a gallon of water weighing in around eight pounds, this gadget is a wrist saver. The faucet is plumbed right behind your stove, making it a convenient tool with which to fill a pan right on the stove (and no spilling!). Many models come with swing arms so they can be out of the way when not in use.

Beer Tender

If someone in your home enjoys a frosty mug of beer, this appliance will please. Basically, it is a small appliance for your kitchen that refrigerates your beer, keeping it at the perfect temperature (37.4 degrees) for optimal enjoyment. Beer is drawn right from the tap, making it extremely convenient. The cooling system is quiet but effective at keeping a brew nice and frosty!

The kitchen has always been the nucleus of the home: it’s where you gather with your loved ones with few distractions. With so many new, unique and innovative gadgets available today, that nucleus can keep getting stronger!

This article was provided by Chase Roberts, home and garden expert and kitchen gadget guru. If you’re looking for replacement parts for a kitchen appliance, Chase suggests checking out http://www.yourspares.co.uk/.


Tips for a Cozier Apartment

apartmentWhen you’re renting a place, it can be easy to forget all the ways you can make it feel like a home and less like a rental. Whether you will be renting short term or long term, there are many ways you can make your rental feel cozier. Even if your space is small, adding the extra touches below will make it feel warmer, more inviting and more like your home.

Paint

Check your lease to see what restrictions you have when it comes to painting your rental. If you are able to paint, add a warm or trendy color to your walls. If you don’t want to paint your walls in their entirety, paint the wall trims a different color or stencil a pattern around the center or top of your walls. If you are not allowed to paint at all, check your local home improvement store or visit websites for temporary wallpaper or decals.

Decorate the Walls

While paint, wallpaper and decals can give your room more style, color, and textures, you still want to decorate your walls. You can use artwork and framed photos to create focal points that will make your rental feel more personalized and cozier. Your wall décor can be large or small; just make sure scale matches the size of the room.

Add Natural Elements

Adding a touch of nature to any room will make it feel more like a true home. You can do this by decorating with items found in nature like placing beautiful stones in a decorative bowl or filling a vase with twigs and branches. You can also buy art that depicts nature such as a photograph of a forest or a painting of a landscape. If you have a green thumb, you can place plants on shelves, create a windowsill garden or bring in fresh and dried flowers arrangements.

Buy Window Treatments

Many rentals come with inexpensive white or off-white blinds. While they do the job of creating privacy, they are not particularly decorative. A simple way to make your rental feel cozier is to install a rod and hang single or double paned curtains. The curtains will add a pop of color to your room, will allow you greater control of incoming light, will help keep cold air out and can help muffle outside noise. If curtains aren’t your first pick, opt for higher-end blinds that come in different colors, textures and materials other that the standard plastic or metal.

Buy Comfortable Seating

Sometimes when you select seating for a rental property, your primary focus is size and scale. While you do want your seating to be size-appropriate for your room, you also want it to be livable. When picking seating, make sure it is something comfortable and inviting: something that you would want to curl up in or sit in for long periods of time. To make less comfortable seating more comfortable, add throw pillows, throw blankets or chair cushions for hardwood seating.

All of the ideas above are easy ways to make your rental feel warm, cozy and inviting. By adding a few extra touches, you will express your personality and sense of style, and you will create a space that you’ll enjoy spending time in.

This article was provided by Chase Roberts, home & garden expert and current apartment dweller. If you’re renting your place and were looking for ways to keep your belongings safe and secure, Chase recommends Protectyourbubble.com renters insurance.

Looking to spice up your walls with a new coat of paint and live in the Westchester NY area?  Give us a call and take advantage of our 10% discount for all painting projects scheduled for the month of September! ~Gary B.


How To Clean Window Blinds

window blindWindow blinds cleaning is a truly tricky subject as it’s an intricate process of removing dust and possible stains, spots and even grime, abhorrent in nature and with a molecular structure tough to remove from the almost unreachable places the polymer shades landscape presents. It is truly one of the greatest challenges to tackle in the cleanup field, but difficult, as it may be, the good news is that getting rid of the genuinely vile physical contaminants from your window covers is not impossible if you’re intimately familiar with the methods that have proven themselves as the most effective cleansing techniques ever conceived of by man. If you are facing this unpleasant state of affairs and you have remove the particles causing aesthetic distress to your window blinds, then you’ve come to the right place as I will share some unquestionably useful tips with you and enable you to handle this undoubtedly troubling situation with grace and finesse. Prepare for a spectacular performance of epic proportions.

Step 1: Gathering supplies

It is a universal albeit obvious and banal truth that every great journey begins with the first step and as you venture into a world of cleaning objects as delicate as your window blinds, you need to be well prepared and equipped in order to face the inevitable complications that will arise along the way. Keep in mind that this will be no walk in the park, especially if you’ve left the situation blow out of proportion by following its natural course, which is, of course, accumulating dust and dirt until your shades start screaming for help.

The supplies you will need are as follows: a cotton glove (it can be substituted with a microfiber cloth but sadly will not be nearly as effective due to access restraints; this is one of the few exclusionary situations where cotton is better than microfiber for cleaning), a vacuum cleaner with a  soft duster brush attachment (this is a really useful contraption that will let you remove a large portion of the accumulated filth without compromising the integrity of your blinds), window cleaning product (or alternatively a solution of lemon juice or white vinegar and water in a 4 to 1 ratio), and last but definitely not least – paper towels.

Step 2: Preparing the field for cleaning

If you have any curtains, this is the time to either remove them for washing, or better yet if you’re not feeling in the mood for multitasking – tie them up so they obstruct the otherwise hard enough to reach locales of the individual slats. Once you’ve achieved this minor and fairly undertaking, you should prepare yourself for the next course of action you will have to take in order to reach your objective – the complete and utter cleanliness of your window blinds.

Shut the blinds down like you have something to hide, which I dare say is indeed the case if you haven’t tended to the needs of your polymeric window covers in more than two weeks, attach the extension I mentioned above to your vacuum cleaner, after which slowly and carefully try to remove as much of the accumulated dust as possible. Upon completing this action, reverse the blinds and repeat, then restore them to their original shut down position.

Now put on the glove and slowly wipe each and every individual slat with proper care and caution. Then reverse and repeat. While you are cleaning, try to detect stains or other aesthetic obstructions and use the window cleaner or water/vinegar (or lemon juice) mixture to remove them. Don’t spray the blinds directly – instead spray the glove. Apply caution! If you have wooden blinds, then by all means, skip this step. Finally, wipe them dry with the paper towel and your mission should have been a success if you’ve carefully followed my instructions.

Author Bio: July Minor loves to share her experience on topics about cleaning and home improvement. She works as a manager at http://www.topdomesticcleaners.co.uk/domestic-cleaner-south-east-london/ and thanks to that she has so much knowledge on cleaning topics.

We love sharing July’s articles!  They’re always informative and written in an entertaining way!

Bathroom Cleaning Tips

bathroom cleaning tips
Image Credit: http://farm8.staticflickr.com/7098/
7339536898_a507abaa9b.jpg

You may not realize this yet, but people who come to your home, whether they are friends or relatives, will judge you based on everything they see. From the entry way and your living room, to the bathroom, all of the surroundings will make an impression, even if that person doesn’t want it to. It’s not going to happen because they are judgmental (although some of them might be) but because that’s how we naturally function – we notice aspects of places and situations and based on those observations we draw certain conclusions. It’s not a conscious process but that doesn’t make it any less relevant. My point is that if you want to leave a good impression on people who visit, you have to do your best to keep everything clean and tidy. Usually the bathroom causes the biggest troubles, so I will give you a few tips on how to clean it better.

Knowing is Half the Battle

In his magnum opus “The Art of War”, Sun Tzu states that in order to win every battle, you must both know thyself and thy enemy. Don’t get me wrong, I’m not saying that cleaning your bathroom is a battle. I’m saying it’s a perpetual and ongoing war and if you want to stand a chance, you must employ elaborate tactics and plan things accordingly. Before you act, you must plan. Before you plan, you must know. What is so important that you need to know? It is the fact that you can’t win this war. But you can win every battle by simply being persistent and smart about it. Let me elaborate. Your bathroom is one of the rooms in your home that will get the messiest the quickest. It’s small and used by many people on a daily basis. That’s why waiting for it to get nasty means you will have to spend that much more time and energy on cleaning it. However, since you already know that’s going to happen, you will be able to counteract it. What most people don’t see is that cleaning your bathroom (or any other room, for that matter) before it’s dirty is actually much more beneficial. The whole cleaning process will consist of a few wipes and tidying up a bit for no more than five to ten minutes. Try it. You will win every engagement in your own terms instead of letting your bathroom dictate the rules.

 Supply the Troops

I wasn’t planning on using a war metaphor for this article but since it works so well, I think I will stick to it. In order to win battles, your troops (that’s you) need constant supplies. You need your cleaning equipment in a close proximity to the areas you are cleaning. How can you clean your bathroom in ten minutes (even when it’s not really dirty) if you have to run around the house gathering your supplies. You can’t! But you can easily achieve it if you place them near the places where they will be needed in time. This means you will always have backup and you won’t have to waste time with logistics. You will be surprised as to how many battles have been won just because of better supply lines.

Consider the Terrain

The Art of War
http://farm4.staticflickr.com/3607/4563839366_765653816a.jpg

Sun Tzu is one of the first people who consider the terrain as being an important aspect of warfare (at least as far as literary accounts are concerned). What is it about the bathroom you need to consider? First of all, as I said, it is one of the smallest premises in your home. This means that there should be no excessive objects held there. Anything that does not belong should be immediately removed. This will make cleaning it much easier later on.

If you employ these tactics on a daily basis, you will find how easy it is to maintain a clean bathroom and leave good impressions on people who visit you. Also, “The Art of War” is a great read so I would definitely recommend it.

Author Bio: July Minor is really passionate about blogging. She loves to write different topics for home improvement. She runs a small cleaning company http://www.carpetcleanerlondon.org.uk/south-east-london/se21-dulwich/ and she really enjoy that. In her spare time she loves to read and take long walks.

Interesting take on cleaning your bathroom!

Copyright © 2024 | Bruzzese Home Improvements | All Right Reserved | Web Design & Development by QualityMust