fbpx ...

Blog

How to Maximise Space in the Hallway

How to Maximise Space in the Hallway
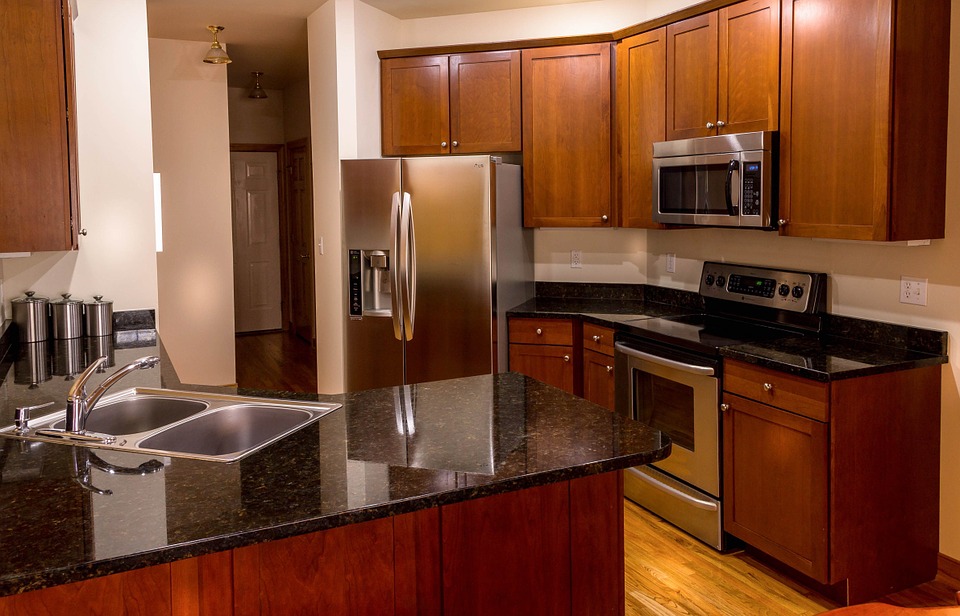
Light colors from top to bottom make a smaller space seem much bigger.

There are lots of positives about living in your home but a negative may be the lack of usable and accessible storage space in the hallway.

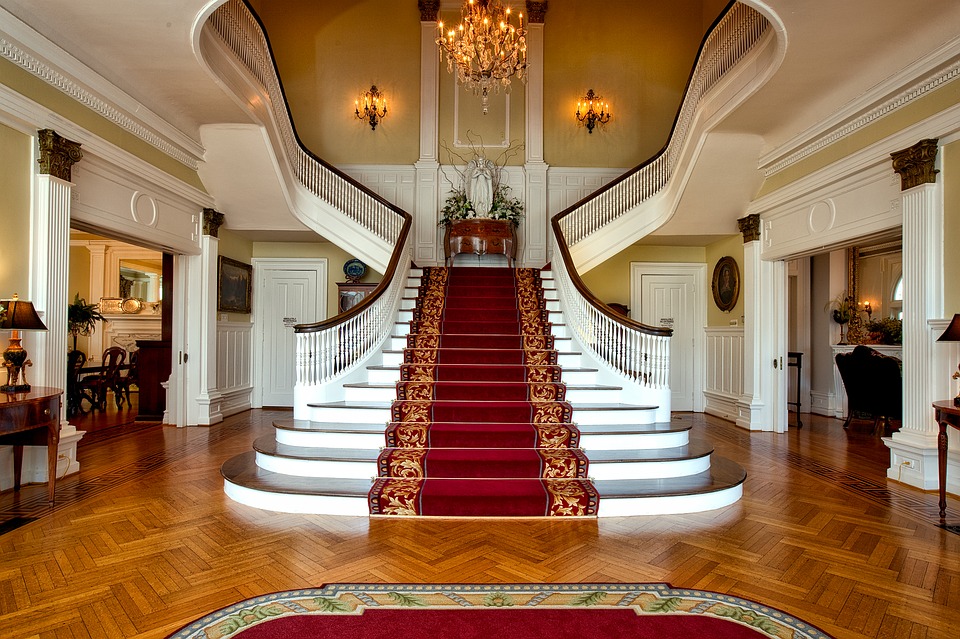
The hallway is an important space. Above all else, it needs to be functional but this sometimes means that style takes a back seat. And there are also hallways in homes across the country that fail to tick any boxes; in other words, there is no storage space for shoes, coats, school bags, dog leads and other paraphernalia we tend to keep in the hallway.

What if Balustrade Components told you that you can have storage AND style in the hallway? When space is limited, here are 10 great ideas for maximizing space;

#1 Every piece of furniture must have a role

You know how you like the small table with a vase of flowers on in the hallway? Ask yourself, apart from making the space look nice, what function is it playing?

It is something where car keys could be kept, or the phone book could sit? Every piece of furniture in the hallway has to be there for a reason. Sounds hard but you don’t have oodles of space to fill with pretty bits and bobs.
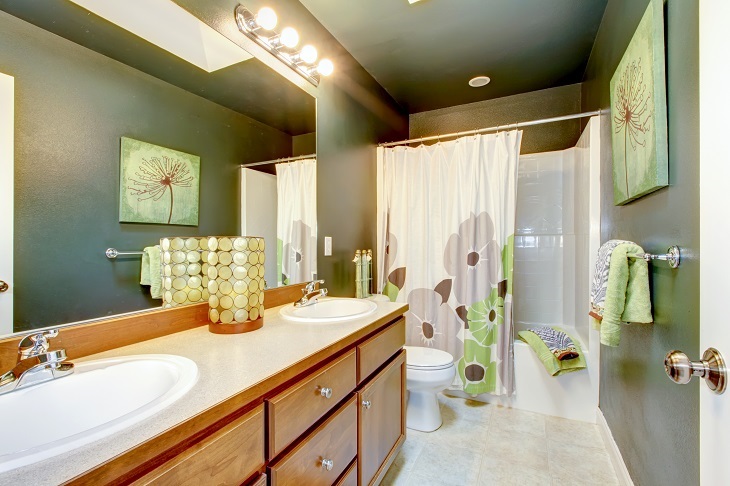
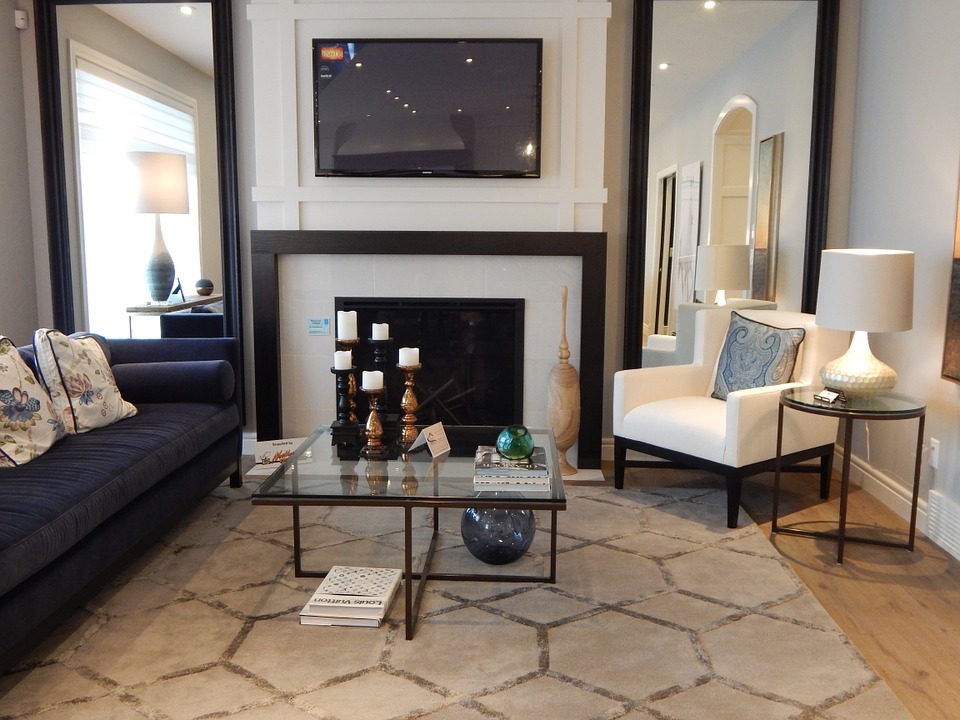
#2 Mirrors

Mirrors perform an illusion: they bounce light around a space, making it appear bigger. What’s not to love about staggering mirrors around the hallway?

If you can, place a mirror opposite a window so that the light pouring in from there is maximized. Always choose mirrors with frames so that they look ‘finished’ and neat.

#3 Foldaway furniture

This may sound a bit odd but certain parts of the hallway can become the space that you need with an impromptu gathering.

Upstairs hallways can be a great place to have a sofa bed, and when you have a family gathering such as Christmas or birthday, a folding table for keys, bags etc. can be a great way to keep clutter out of the main rooms.

#4 Let there be light! (and as much as possible)

Light is the key to making a space feel bigger. As well as staggering mirrors around the hallway and up the stairs, follow these hints too for more light;

  • Keeping window dressings lights and make sure they don’t stop light flooding the hallway.
  • Use glass infills in balustrades as this allows to flood through the entire area.
  • Use bright, but warm lighting throughout the hallway, including central light fittings and smaller lights in treads.

#5 Vertical storage

When we think of storage areas, we often look to the space directly in front of us or at floor level. To maximize storage space, think vertically. In other words, build storage up rather than across.

#6 Large-patterned flooring

Interior designers often suggest that larger patterns close down a smaller space but when it comes to flooring in the hallway, larger tiles can actually work to give the impression of more space.

Look for larger tiles or linoleums with larger patterns. Laminate also works well, especially when laid width-ways as this can give the impression the hallway is wider than it is.

#7 Build-into space

Under stairs space is often wasted and one way that all this space can be utilized is to build in the space with a bespoke storage solution. For example, storing shoes is often difficult but with bespoke cubes for storing shoes and so on, your hallway can be storage rich rather than being deficient in storage solutions.

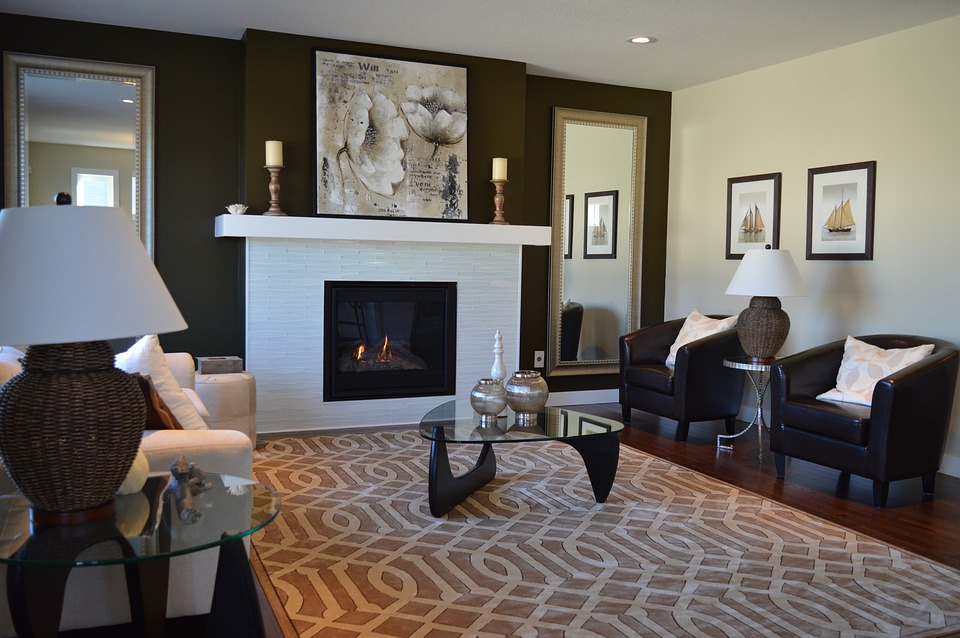
#8 Light, block colours

Forget complex wallpapers and patterns in the hallway as too much detail can make the space smaller and cluttered. Think streamlined and minimal, which is why light, neutral, block colours work better than dramatic feature walls.

#9 Doorways

You may not have the budget to widen doorways but if you have, then creating wider doors out on to a hallway can really open it up. This is because it creates an illusion of more space as well as allowing more light into the hallway.

#10 Be organised

The problem with a hallway is that they are often the place that things get dumped until they are either dispensed of or they find a new home. This can take anything from a day or two to weeks, months or years.

Frankly, the key to making your hallway look bigger and more spacious than it is, is to create bespoke and functional storage solutions, keep it light in colours and be organised!

Balustrade Components create balustrades for hallways, as well as barriers for decking, mezzanine floors, outdoor balconies and more. Using glass in balustrade panels is one way of adding more light to any space, but certainly a welcome addition in the hallway.

How to Create a Truly Kid-Friendly Bathroom

Introducing a child to a family bathroom can be a veritable nightmare and a test of patience. Kids in their early age are by nature disorganized, and to make things worse, they own a mountain of stuff.

How to Create a Truly Kid-Friendly Bathroom

When a big family of seven shares only two bathrooms, some adjustments have to be made to accommodate the needs of the tiny users. Spacious washrooms can even be more challenging, allowing kids to wander about and make an even bigger mess. Check out our tips on how to make your bathroom truly kid-friendly.

Step stool

Teaching your kids to be more self-reliant from a very young age is highly recommended. After all, you don’t want to spend all day running behind them, making sure they have washed their hands or teeth. Buy each of your little ones a step stool or built it into the vanity so it doesn’t obstruct the routine of other house members. Also, make sure they can reach the faucet with simple add-ons. This will encourage your kids to wash up on their own more regularly.

Open shelves

While this seems like a disaster waiting to happen, open shelves are a great way to boost your kids’ organisational skills and facilitate their bathroom experience. Having their possessions on a neat display will allow them to memorize where particular items belong and prompt them to put it back or help their parents store it. Everything from bath toys to towels can be placed on special kiddy shelves and open compartments. They will love having their own nook in the bathroom.

Towel bars and safety measures

Do you often get greeted by the frustrating image of a messy pile of towels curled at the bottom of a towel bar? Most adults don’t bother with careful placement and adjustment of their towels after use and kids are no different. Still, they need a drying station, and that’s where simple, smooth (no sharp edges!) hooks come into play.

Invest in some sturdy elements that can withstand constant use and pressure. Lastly, put some rubber covers on sharp edges and slippery surfaces.

kid friendly bathroom

Sink and countertop

Opt for more sizable sink when shopping for bathroom fixtures and furnishing elements. If you’re blessed with a spacious bathroom, advised at Blue Lagoon Bathrooms, skip the double sink set-up and consider incorporating a single, large through sink. When you’re in a hurry, this will allow more kids and people to fit at once, instead of just two, and they’re easy to clean up. Pair your large sink with a massive, granite countertop. This will eliminate any stains and scratches that may occur.

Decoration

Go out of your way to make your kids feel comfortable and eager to be in this space. For starters, hang some family photos to add a touch of home to this space. You can even ask the kids to pick their favorites. Apart from items that will make bathroom more familiar to kids, you can insert some colourful learning pieces as well. It’s well known that kids acquire knowledge on the go, so it pays off to plant some framed alphabet panel, or displays of animals or geometrical forms.

Wall protection

It depends on your preferences and options, but you can choose between wainscoting and full tile when choosing a wall protection solution. Wainscoting can safeguard your walls from kids’ naughty escapades (dents and scratches) while adding a vintage feel to this space. On the other hand, you want to consider full wall tile for the splash prone surfaces. This will prevent mold and blotches caused by our little flippers.

Out of reach sector

While kids do need to feel this space is theirs too, some areas should be off limits for them. This includes the cleaning chemicals cabinet, as well as the medicine drawer. Kids tend to put strangest things in their mouth, and it’s best to keep them out of their reach. Tall cabinets and locked compartments usually do the trick.

Teaching kids about proper hygiene can be a painstaking process, making them do it – even harder! Commit to some bathroom remodeling to make this space more appropriate and inviting for them.


How Renovating Your Staircase Can Improve Your House Value

how-renovating-your-staircase-can-improve-your-house-value

The staircase is often the first thing that people see when they enter your property so it makes sense to make a feature out of something that is not only necessary, but functional.

Renovations add value to your property, with some adding more than others. Replacing a staircase in a property can be a wise move, especially if the new staircase is a style that enhances the interior of the property.

Balustrade Components look at five main factors that help you add value with a new staircase.

#1 Materials

Staircases in most properties tend to be made from wood. Strong and robust, wooden staircases can be ornate and detailed, or plain and streamlined.

However, if you are installing a new staircase, you may wish to be a little more decadent with your choice of materials – if your budget can withstand it!

At the top end of the scale, you have the decadence of glass. Glass staircases look simply stunning. If your budget will stand it, choose glass treads as glass infill panels for balustrades. Frameless glass balustrades, for example, look simply stunning.

If your budget is under pressure, using a mix of materials can be the solution to getting a staircase that looks decadent and stunning without a hefty price tag. Using a mix of materials such as wooden treads, glass balustrades and aluminium can create a streamlined, minimalist effect.

If you opting for a traditional design, then a bespoke wooden staircase will tick all the boxes.

#2 Utilise the hallways space better

The staircase can be a cumbersome feature in a home and can swallow a large chunk of the little amount of space available in a hallway.

By renovating the staircase, you could utilise this space better. If you are struggling for space, you could consider adding a circular or spiral staircase. Although these sometime get a bad press, if you opt for a bespoke and custom-built spiral staircase, the final product and finish will be much better than the rickety, flat-pack spiral staircases you are probably thinking of.

A better proportioned staircase, whether it is spiral or not, that release much needed floor space in a hallway is always welcome.

#3 Changing the shape of the staircase

Circular or spiral staircases add a sense of style to a hallway as well as space but changing the shape or structure of a staircase can also make it more of a modern feature in a property which, when it comes to selling, can be advantageous.

However, just one note of caution: some shaped staircases can adapt better than others. In many homes, the staircase is the only way of accessing another level and some shaped staircases can make it very difficult from getting items from one level to another.

#4 Using space under the stairs

As well as creating a piece of stunning indoor architecture, there is another reason why renovating or replacing your existing staircase will add value to your home.

The one thing that is missing from many hallways is storage space. The hallway needs to be stylish but above all, it needs to be practical.

It is the space where wet coats are shed, muddy wellies and soaking wet shoes are flung off tired, cold feet.

It is the place where dripping brollies need to find a place to dry and everything from shopping bags to school bags are kept.

Utilising space under the stairs for storage is the obvious answer but all too often the shop-bought storage solutions are ill-fitting and rather than contribute storage space, actually swallow it. Frankly, including bespoke storage solutions under the stairs will be an attractive option to any potential buyer.

#5 Shows a deeper understanding of the structure and strength of a property

The staircase in an existing property can be adding serious structural strength to an outside wall so before you start ripping out the staircase, always make sure that it is not the very thing holding up an exterior wall.

That said, when potential buyers note a new staircase – and they are not hard to spot because they look simply delightful, especially with the glass balustrade you have chosen, for example – it sends a clear message: you have really looked after this property. If you are willing to spend time and money on a staircase, the basics will be taken care of and to a high standard too.

And finally…

A renovated or new staircase built for your property, and designed in such a way to maximize space will also, by default, maximize light. And in a hallway, more light and more space are two sure fire winners for adding value and desirability to your property.

Balustrade Components create bespoke balustrades for staircases, balconies, mezzanines floors, decking, anywhere that needs or wants a balustrade of some kind. Staircases are the often unsung heroes of the home and by creating a new, bespoke set of stairs, you are adding value to your property.

Renovation Ideation – Tips to Finding Good DIY ideas

Renovation Ideation - Tips to Finding Good DIY ideas

DIY renovation isn’t for everyone. You need to have a creative side and at least a little perfectionist in you. You also need to be able to visualize a project before it begins so you don’t end up disappointed with the results.

Some people are perfectionists with the ability to visualize, and great handymen, but just struggle with ideation. Thinking up good ideas is one of the hardest parts of doing DIY renovations. Here are a few pointers to enlighten your mind with incredible renovations ideas.

Spend an hour on Pinterest

This may seem obvious to a lot of people, but plenty more have never used Pinterest. Males, in particular, have been known to avoid Pinterest, calling it a social media site for women. This may be how it started, but is definitely not where it is now.

When it comes to the creative and DIY sphere, Pinterest is king. You can type in just about any DIY project in the world that you can think of, and see how thousands of other people just like you chose to do the same project. Often they will post instructions, material costs, and other useful bits of information. It is easy to browse as well because you can just scroll through pictures until you see one that you like. Click it and you know exactly how to make it.

Look at homes for sale

It never hurts to look at new homes that are selling on the market. You can use realtor sites like realtor.com, or FSBO sites like Fizber to accomplish this. Just spend an hour going through different homes to get an idea of what kind of look you would like to go for. You can also get an idea of what people that are purchasing homes want if you are looking to sell the home anytime soon.

Use home renovation sites

A lot of companies offer to do home renovations for you. They spend a lot of money making their websites appealing so that they can bring in visitors. As part of that, they will usually have galleries and pictures online that show a lot of their past projects. This creates a perfect opportunity for DIY fanatic because they can go look at all of the ways the home renovation companies are currently renovating homes, mix it with a touch of their own personality, and come out with something that is both trendy, and appeals to their own personal style.

Get more than one head involved

A lot of people don’t enjoy group brainstorming sessions because of the concessions that must often be made. However, it has been proven that better ideas can come out of a group session. Get a few friends together and ideate together. You don’t have to do anything that you don’t want to do, but maybe one of your friends has done a similar project and has some good advice. This can also be helpful if you already have an idea and want to confirm the possibility of doing it. Maybe a friend or neighbor has tried a similar project and has run into problems in the long run with it. This can be particularly true with concrete based projects.

Plan

This last step isn’t part of ideation but it is incredibly important. Before you start the project make sure you have a plan for every part of the project. You know how much it will cost, where to get the materials, how much time it will take, etc. There is nothing worse than realizing halfway through a project that it is going to cost significantly more than you thought.


6 Most Innovative Bathroom Renovation Ideas

It is the human nature to want better which is why we keep changing things around us. One of the favored ways to do so is by remodeling or renovating the rooms in our house, especially the bathroom. This is the place where we can unwind and relax which is what prompts us to renovate it and make it convenient and smart. It is for this reason; we should look at every element of the room to make it better. Here we have the 6 most innovative bathroom renovation ideas which you can consider.

6 Most Innovative Bathroom Renovation Ideas

  1. Renovated Storage Space: The first thing that you can do to your bathroom adds storage space. In order to do so you will first need to remove the large cabinets, which will be replaced by innovative open spaced shelves where you can keep the accessories like the towels, etc. One of the best ways to renovate the storage space is by simply adding floating shelves to your bathrooms. This will not only help you make the storage area much cleaner but at the same time, it will add a tinge of fashion to the bathroom. Another clever addition to your bathroom could be wooden stacks for holding the bathroom accessories.
  2. Bathroom Theme: This is a modern day concept that you will find in the bathroom of most people, especially modern day couples. Here choosing a proper color palette is essential as based on that you will be painting your bathroom. The best renovation idea here is to have a neutral paint for the bathroom as this adds a more pleasing feel to the area as opposed to the accent colors, which takes time to settle. It is advisable here to add patterns and textures to your bathroom renovation idea to make it unique and appealing.
  3. Adding Strategic Colors: If you want your bathroom to stand out then it would be prudent to add some color here. This renovation idea can come in the form of colorful tiles, multicolored towels, robes, rugs, etc. Moreover, adding a few appropriate paintings and stylish bathroom accessories like soap dishes, etc. can work wonders for your bathroom. In addition, you can also paint your mirror frame to make your bathroom vibrant and warm. Here you will need to be as creative as you can make your bathroom look the best.

    bathroom-renovation

  4. Making it More Functional: Whether you have a small bathroom or big one you need the functionality. So here you need to keep in mind that although you are trying to make it look attractive yet it should not compromise the overall functionality of the room. For this purpose, you can use ideas like putting a hamper under the sink or putting a basket over the washer or dryer. Another clever way to increase the functionality of the renovated bathroom is by putting the counter space and floating shelves to good use and making them devoid of clutter.
  5. Innovative Shower Cabinets: One of the most important features of the modern day bathroom is the shower cabinets. Here we would recommend you to install stylish two door shower cabinets to save up on space. For showering you can put in smaller showers all over the cabinet which will be able to reach every part of the body individually. This will give the bathroom a lot tidier and modern feel.
  6. Racks inside Cupboards: Storage space can come at a premium in small bathrooms. To maximize available space, install wire racks on the doors of cabinets in the bathroom. You could install them inside or outside, depending on where they are the least intrusive. You can also install them behind doors.


How to Move Furniture Safely and Easily [Infographic]

Anyone who has ever had to move a large, heavy piece of furniture around a house or up/down a flight of stairs will tell you that it is a physically imposing task, and not one without a bit of spatial know-how either. When it comes to shifting a bookcase or sofa, it isn’t just a matter of picking it up and going on your merry way. You’ll have to think ahead about where you’re going to grab it, what’s the easiest route to take and, most important of all, whether there are any unsafe impediments to negotiate.

Chic Furniture and Gift (http://www.chicfurnitureandgift.co.uk/shabby-chic-bedroom-furniture) created this great infographic guide to moving furniture quickly, easily and safely around your home. There are guides on moving furniture upstairs and downstairs, a list of the items you’ll most likely need before attempting to lift a heavy or bulky furniture item, as well as some vital tips on moving it as safely as possible.

Without proper consideration, lifting a bookcase up a flight of stairs can be lethal. If you don’t manage to grip it properly, it could come tumbling down on top of you and cause serious injury or even death. For starters, never move heavy furniture on your own. Always have a second (or even third) pair of hands on call to help out.

For more safety tips, check out the infographic below.

how-to-safely-move-furniture-infographic


How to Transition a Bench from Summer to Fall

how-to-transition-a-bench-from-summer-to-fall

Source

Alright, so maybe it isn’t quite Fall. After all, Starbucks hasn’t even released their pumpkin spice latte! As shameful as it may be to admit, we all know the release date of that blessed drink is our gauge for pulling out plaid and scarves. But just because our cup isn’t flowing with pumpkin lattes, it doesn’t mean that we can’t start the transition into a happy and beautiful fall season.

One of the best ways to do this is with your home décor. Light up the pumpkin candles, break out the zucchini bread, and get started on some DIY projects that will give your home the ultimate feeling of comfy and cozy fall.

Look no further than your living room or entry way for a DIY project that will prep you for cooler weather. See that bench in the corner? When’s the last time you really took a good look at it? Well, a piece as functional and versatile as a bench is deserving of a little more life, don’t you think?

Benches are like the little black dress of furniture; you can dress them up or dress them down based on how you make them over and they pretty much fit every occasion. And with an upholstered bench – well – fasten your seatbelts, because this ride may get a little crazy in the cool department. But don’t sweat it if you don’t have a bench covered in fabric. You can use throw pillows to get a little cushion for those tushes – and what’s more versatile than a throw pillow?

A bench is the perfect setting for putting on shoes on your way out the door or adding additional seating when you need room for more. If you have a bench that gets overlooked, it’s time to take notice and get it ready to turn some heads.

Here’s what you’ll need to get started:

  • Bench
  • Fine-grain sandpaper
  • Small brushes
  • Clean cheesecloth
  • Paint brush
  • Chalk paint
  • Wax sealer or polyurethane
  • Staple gun (if reupholstering)
  • Scissors (if reupholstering)
  • Trendy new fabric and/or throw pillows

Step One: Sanding

sanding

Source

Before you can do much in the way of making over or painting your bench, there is some prep work to be done. That beautiful piece of furniture is going to need a thorough sanding to get rid of any rough edges. Using either a sanding block or a sheet of sandpaper held just in your hands, gently rub your way through every crevice of the bench. Smooth the surface until you can rub your hand over it without anything catching (gloves may be helpful to prevent blisters).

Step Two: Wipe Down, Dust Off

dusting

Source

Using clean cheesecloth, start to wipe down the bench to remove any dust particles left behind from sanding. For hard to reach crevices and decorative detailing, small brushes may be helpful. If you don’t have either, cut up an old tee shirt and use a toothbrush for the odd angles.

Step Three: Paint

paint

Source

Now comes the fun part. Hopefully, you didn’t rush through the other two steps. It can be incredibly tempting to skip the prep work, but if you want a piece to last, the prep work has to be done and done well. Once that’s all over, though, it’s time to break out the paint. The type of paint you use is totally up to you, but chalk paint is making its sweep in the world and for good reason.

Chalk paint is easy to use and can even be made at home with a few simple ingredients. For Fall, stick to warm hues or those with a golden tone. Apply a thin, even coat as a base. Wait for the first coat to dry and repeat until you’ve reached the desired finish.

Step Four: Apply Wax

That beautiful bench is now glistening with a fresh coat of paint. To keep it looking brand new for years to come, put a finishing coat of wax or polyurethane over the dried paint. If you think you’ll be painting your bench again soon (maybe Spring?), this step may be unnecessary. It’s most useful to apply the wax with a brush and wipe off the excess with a clean piece of cheesecloth. Allow the wax to dry before moving on to the next step.

Step Five: Reupholster the Cushion

If your bench has a cushion on it, you can easily swap out the fabric for something a little more reminiscent of the fall months. Golden hues go well with pumpkins, right? Take off the cushion and remove any layers of fabric from previous recovering’s. Leave the original. Use any layer scrap as a template for your new cushion.

Once the fabric has been cut, center the cushion over the new fabric rectangle. Cover the edges of the cushion by pulling the fabric tight on the underside of the cushion and stapling. Repeat until the fabric is no longer puckering and loose and is tightly adhered to the cushion. Turn upright and assemble your bench!

Step Six: Add Throw Pillows

The final touch is upon us: add throw pillows. Throw pillows are not only great for cushioning bums, but, by golly, they’re cute! Be inspired with seasonal throws to finish the look.

The great part about furniture is how versatile it is. Seasons change, trends change, and alongside it, furniture does, as well. Give your bench a new look for fall with a few, small modifications. A new coat of paint and a few new throw pillows can give your furniture that cozy feeling everyone loves in the fall months.

Author Bio:

Kacey MyaKacey is a lifestyle blogger for “The Drifter Collective.”  Throughout her life, she has found excitement in the world around her.  Kacey graduated with a degree in Communications while working for a lifestyle magazine. She has been able to fully embrace herself with the knowledge of nature, the power of exploring other locations, cultures, and styles, while communicating these endeavors through her passion for writing and expression. Her love for the world around her is portrayed through her visually pleasing, culturally embracing and inspiring posts.

The Drifter Collective: An eclectic lifestyle blog that expresses various forms of style through the influence of culture and the world around us.

https://twitter.com/kacey_mya

https://www.instagram.com/thedriftercollective/


Designer Secrets: Choose a Perfect Rug for Your Space

Designer Secrets: Choose a Perfect Rug for Your Space

At the first glance, interior designer’s job seems easy: put an armchair here, a sofa there, a coffee table in front, and voila! But the big stuff are maybe much easier to fit in than the details. What about the curtains, tablecloths and of course, the rug? The right rug can make the space look amazing, warm and welcoming, while the wrong rug can make the room appear unfinished and awkward. There are so many things to consider in such a small item: the size, the texture, the color and the design. All of them together can make or break the look of the entire room. We’ll let you in on a few designers’ secrets about choosing a perfect rug for every space.

Start with the Color

Start with the Color

Choosing the right color is the best starting point when purchasing a rug. Since rugs are usually the last thing you are buying for the room, you will already have a pre-established color palette to guide you. This doesn’t mean that your rug can’t be a show-stopper, but only that it has to be in coherence with the remaining colors. However, if you have many shades and patterns in a single room, consider getting a neutral rug or a single color rug that complements your furniture or walls.

Move onto the Patterns

Move onto the Patterns

There’s nothing more appealing in a room than a patterned rug, but be cautious when choosing the patterns for each space, because you don’t want it to be overwhelmed with too many accents. You can use a rug with an all-over repeat pattern in a simple space with almost every piece of furniture, but if you are going to use a rug with an asymmetrical pattern, it’s better to combine it with furniture that has a more open and delicate frame. Don’t be afraid to mix patterns of different proportions. That is a much better choice than combining a chair, sofa, curtain and rug with the same pattern, where there would be no clear distinctions between these pieces.

Mind the Size

The second big (or small) thing you have to keep in mind when choosing a rug is its size. Size of the rug will depend on the size and the function of a room. Take living room for example. There are two widely accepted approaches: all the furniture sitting within the outer perimeter of the area rug and the front legs of the seating furniture on the top of the rug. In the second case, the rug being beneath the furniture gives the illusion of spaciousness, while in the first, it defines the sitting area. In the bedroom, the area rug should allow you to land on a soft spot when getting up, so it is best to occupy two thirds of the bed, say the professionals from DecoRug. The kitchen and the bathroom usually have small area rugs, simply for aesthetic reasons.

Texture Makes a Huge Difference

Texture Makes a Huge Difference

It’s the last thing we remember when buying a rug, and one of the first things we notice when spotting it. Every interior designer knows that a room rich with different textures will feel layered and warm, so paying attention to the texture of the rug is essential. Here, you can aim for contrast between the furniture and the rug. A sleek leather sofa, for instance, should be contrasted with a fluffy shaggy area rug, while a soft velvet couch will go perfectly with a smooth and hard material like sisal. The function of the room will also dictate the texture. That is the reason why you should never put a shaggy rug in your dining room – the frequent traffic, spills and stains would make cleaning and walking much more difficult. A rug like that, however, would be perfect for the bedroom, because you want your feet to land on soft and fluffy spot upon waking up.

Rugs define the space and enhance the décor, so making this choice shouldn’t be taken lightly. Following some basic rules and designers’ tips is the safe way to go, but if you have an idea of your own, sometimes you should simply go with your gut.

Guest Post By:

Chloe TaylorChloe is an art historian, recreational ballet dancer and a contributor at smoothdecorator.com. She is passionate about photography, dance and music. Her biggest dream is to travel the whole world with her husband and take stunning photographs of beautiful places. She also enjoys learning and writing about home design, since she is crazy about aesthetics. You can find Chloe on FB, Twitter, and G+.

6 Features that Most Home Buyers Really Want to See

When trying to sell your house, there are hundreds of things you should be concerned about. But most of these things are easily solved, and you’re left with important questions that interest all potential home buyers. In order to get the top dollar for your house, you have to take care of some of the most important features of your home. Listed below are 5 of the most important features every new homeowner checks before purchasing the house.

Cleanliness

Nothing will turn the buyers away from your house like dirt. If you are already selling the house, make sure it is clean and shining for the next couple of days or weeks, until you find the right buyer. This goes for the kitchen, the entrance area, the living room and the bathroom. Assuming that the bedrooms are clean and tidy, we advise that you focus on removing stains and grime from your kitchen and bathroom. The condition of the house has to be flawless, and that includes having a clean sink and a shiny bathroom at all times.

dirty-kitchen

Bad Odors

If your home has a strange odor from food, your pets or your cigarettes, it is about time you do something about it. No one will buy a stinky house. Buyers don’t want to detect the smell of your recent food or your pet, so make sure you clean everything thoroughly. Use products and chemicals to help you completely remove the smell from the house, leaving it with a neutral smell. Add a pleasant aroma at the doorway in order to make your potential buyers feel like home.

A separate Laundry room

Most of the people shopping for a house look for a laundry room. Having a spacious room in which you can do your laundry every day is crucial. If you still don’t have one within your home, consider adding it. If your home is out of space, take it to the basement or create an external room outside the house. Laundry room matters, so don’t neglect it.

Take care of the cooling system

One thing every potential house buyer wants to see is a stable way of heating or cooling your home. Most of the time, this is achieved through air conditioning system, but there are some cases where buyers actually looked for antique or modern ceiling fans. These are rare nowadays, but increase the value of your home in case you have them installed. Also, modern versions are very effective and fit perfectly into every home décor. So before you show your home to your new potential buyers, make sure you have the cooling section covered in detail.

kitchen-appliances

Get modern and energy-saving appliances

No one is attracted to all those kitchen appliances which spend more energy than they actually need. Throwing or selling those and replacing them with the new and modern ones will do the trick. Your new potential buyers will be thrilled by the fact that they won’t have to replace the entire kitchen set, and you will get a higher price on your house.

Repaint everything and remove all personal belongings

The house has to be in absolute perfect order. Before you open it for potential buyers, make sure you are finished repainting the house, as well as removing all of your personal belongings. You don’t want your buyers to imagine you still living there; you want them to imagine themselves living there. You can achieve this by removing all of your personal belongings from the house.

These 6 features are important for every house buyer, so ensuring that you fulfill them will bring you top dollar. Also, you might end up selling the house faster than you thought possible.

About author:

Tracey Clayton is a full time mom of three girls. She feels she knows a thing or two about raising happy, healthy and confident kids, and offers helpful advice in hers parenting articles. She’s also passionate about traveling, fashion and healthy living. Her motto is: “Live the life you love, love the life you live.”

Moving on up: What to Consider with a Second Story Addition

Wouldn’t it be cool to just easily add another story to your house like you can do with Legos? Well, removing and re-attaching the roof isn’t that easy, but it isn’t much of a drag either. Adding an entire story addition to your home provides your family with a lot of spare space and amazing views, but there are some requirements you need to meet first.

expand-your-house

Structural Requirements

Unlike your old roof system, an entire second story with overcrowded rooms will weigh much more. You cannot just start building it; otherwise your home will collapse. You will need professional engineers to calculate how much weight the foundation and walls can carry and how to strengthen them. A second story will require structural support, which consists of adding steel connections and plywood in main walls and foundation. You cannot neglect this, especially if your home is older and if you live in the area of high seismic risks.

Whole-House Look

Your home probably has one design that prevails throughout the exterior and interior. Adding a second story can disturb the completeness of the design if not done right. There are a lot of décor details to be considered, but the Hudson Homes experts suggest planning a design of a second story as it was always intended or present in your home. Don’t deviate from the house’s design. Rather, mimic the colours, finishes, mechanical and structural work and your home will look complete. A good design of the second

construction

story will only enhance your curb appeal and the home’s functionality.

Mechanical Work

This aspect of adding a story could seem tedious. The furnace, water heater and electrical panels are adjusted to the initial square footage, but now you have to expand all the systems. HVAC systems can easily be replaced or new zones can be added, depending on their type. Electrical panels are upgradable, and can be upgraded to 200 amps, and hot water can be delivered in many ways. You can install tankless heaters that have circulating pumps, opt for regular tank systems or separate on-demand systems for your new master bathroom. Another option is to upgrade your home to energy-efficient systems and install ductless or geothermal heat pumps and solar-assisted hot water.

Stairs

Second story addition has one more tedious, but solvable problem – the stairs. New staircase means reducing the space in one of the rooms, which can greatly affect their use and functionality. However, there are the lucky situations such as extending the existing staircase from the basement. If you are of no such luck, you will need some creative thinking. Consider the use and function of all the rooms and consult with an experienced architect. There is no doubt that you can find the perfect solution without disturbing the traffic flow in your home.

spiral stairs

Insulation

This remodeling will probably require removal of the old siding and sheathing from the exterior. Do not despair; use this opportunity to renew your home’s insulation. Some older houses usually don’t have any insulation in their walls, so installing some on both the main story and the new one is a good investment. If your home does have insulation, you can use this occasion to upgrade it to more sustainable one. Keep in mind that the energy consumption will increase along with the increased size of your home, so put in some more effort and money into natural insulation or cladding systems.

Roofing

Without exception, this upgrade of your home requires the removal of the entire roof. Even though you cannot just attach it like it’s a Lego block, a good contractor will make things almost as easy. Many experts recommend adding a second story during the winter when the rains are scarce, but in case of any weather inconveniences, they will make sure your home is protected. You might not even have to vacate your home during the project.

This project is a big investment and it takes time, so make sure not to bite off more than you can chew. Precise plans and trustworthy contractors are a must for a quality base, while the design will be a piece of cake.

Copyright © 2024 | Bruzzese Home Improvements | All Right Reserved | Web Design & Development by QualityMust